Welcome To RevSites
Build A RevSite From Scratch
Using RevSites Templates
Adding A Popup
Documentation
Get to know about the RevSites Manager here.
Thank you so much for choosing our platform.
If you have any questions that are beyond the scope of this help file, Please feel free to email via support@revsites.com
Build a Revsite
Once logged in, you will be directed to the dashboard. Look for the main menu on the dashboard.
Locate the first menu option, which is labeled "Build a RevSite."
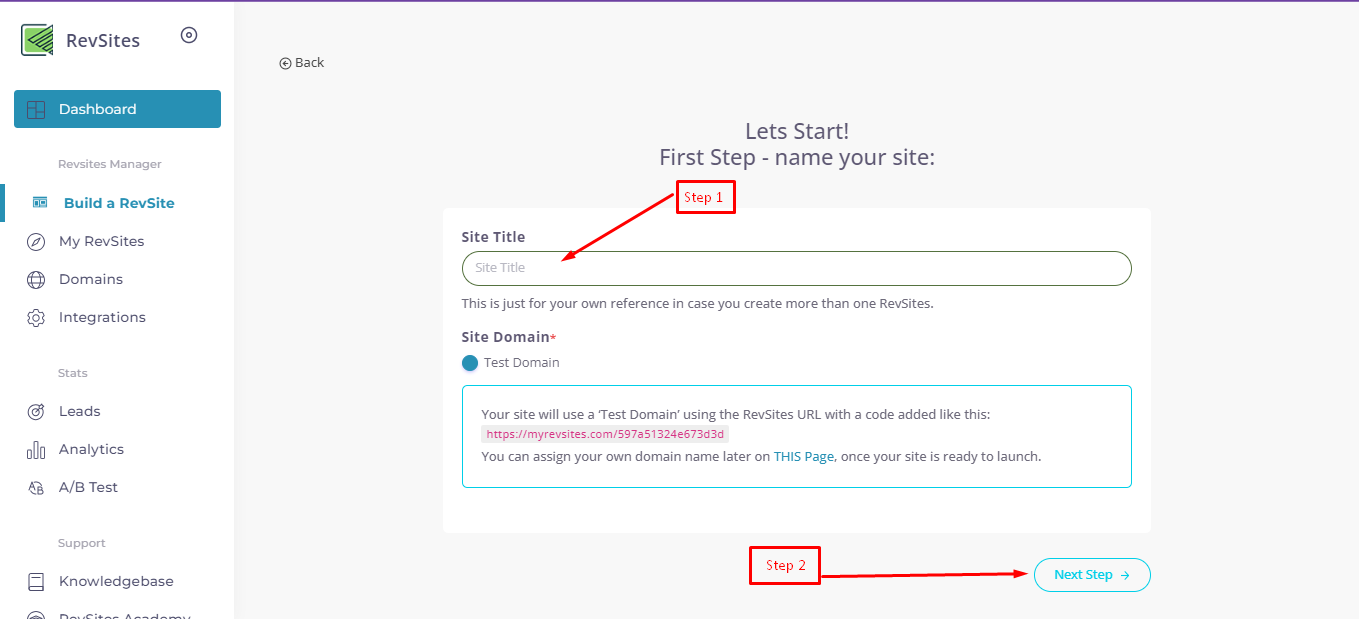
By following Step 1 and Step 2, you will have completed the first crucial steps towards building your website.
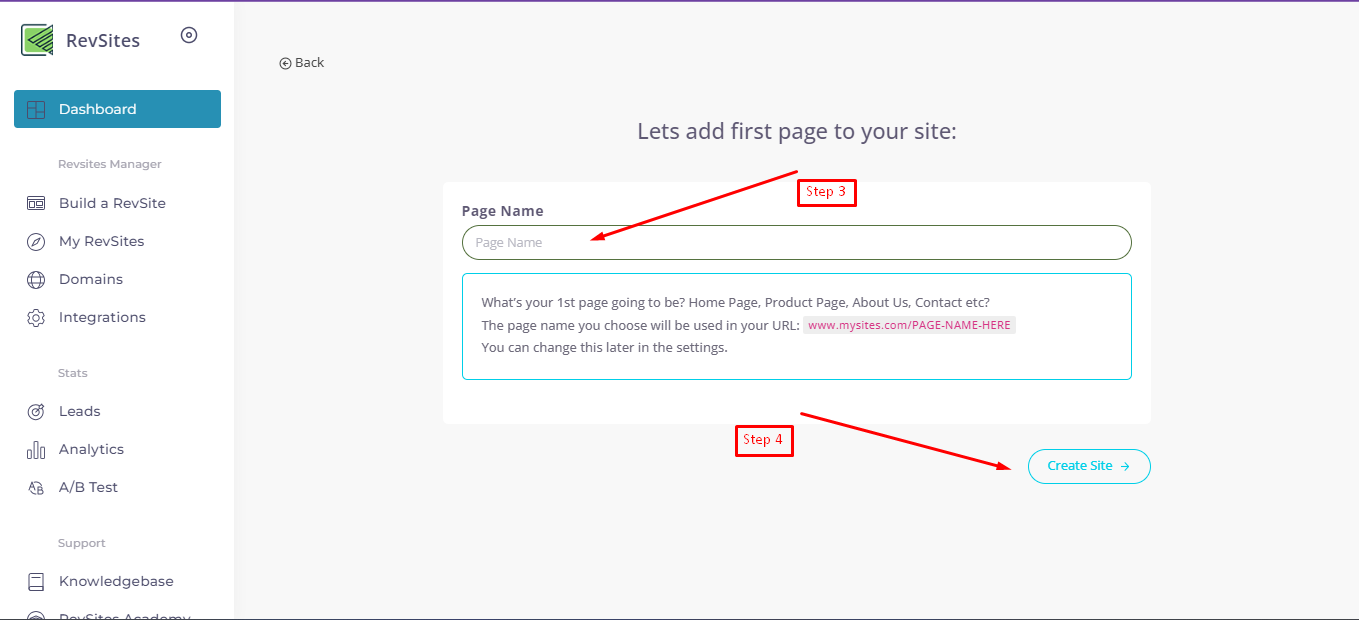
After that, you will have to add the Page Name for your first page.
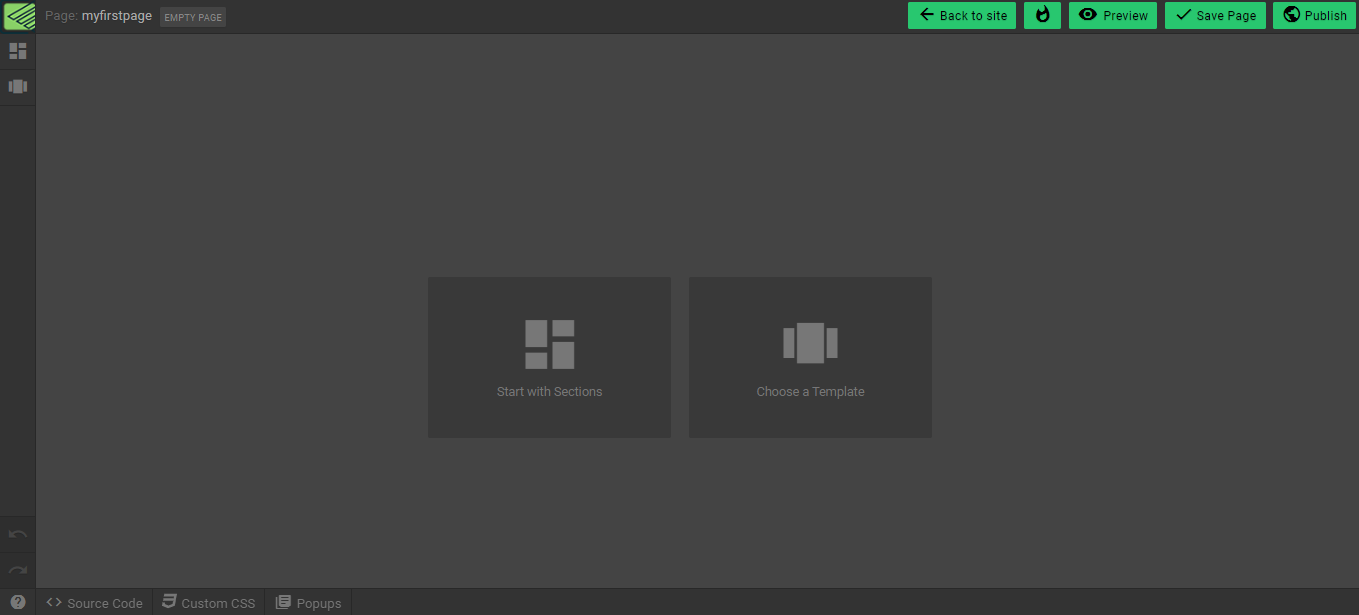
After completing the initial steps, you will be redirected to the Web Builder, a powerful tool that allows you to create webpages using a drag and drop interface.
To access help documentation for the Web Builder, click here.
My RevSites (Edit)
Congratulations, your website has been successfully added to the platform! Once you have completed the process, you will be able to see your website listed on the platform, along with two options: "Edit Site" and "Settings".
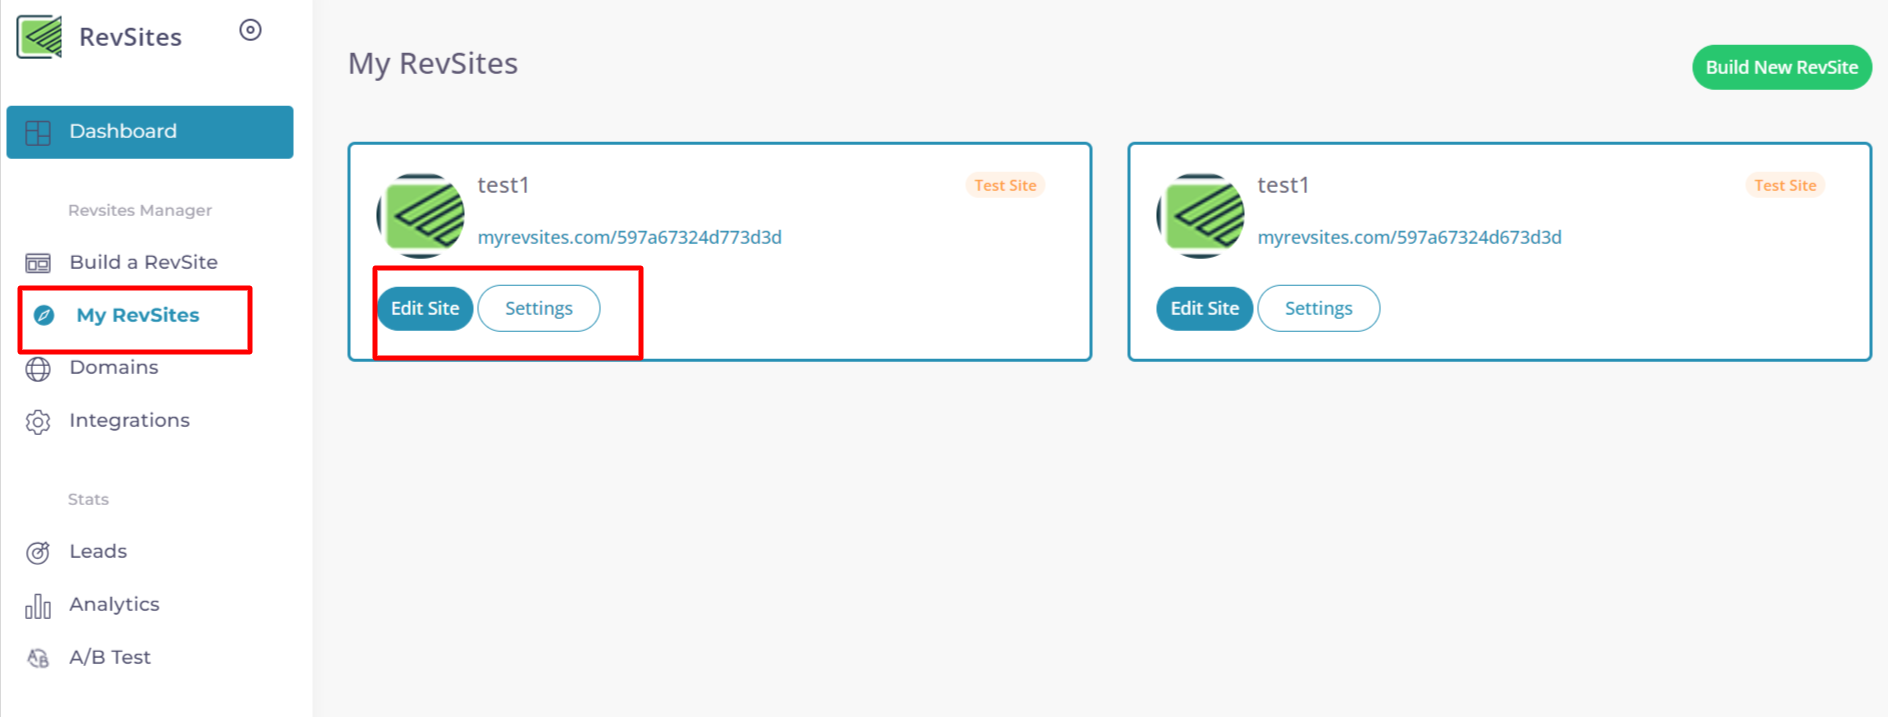
When you select the "Edit Site" option, you will be presented with a screen displaying a list of all your pages. Each page on the list will have several options available:
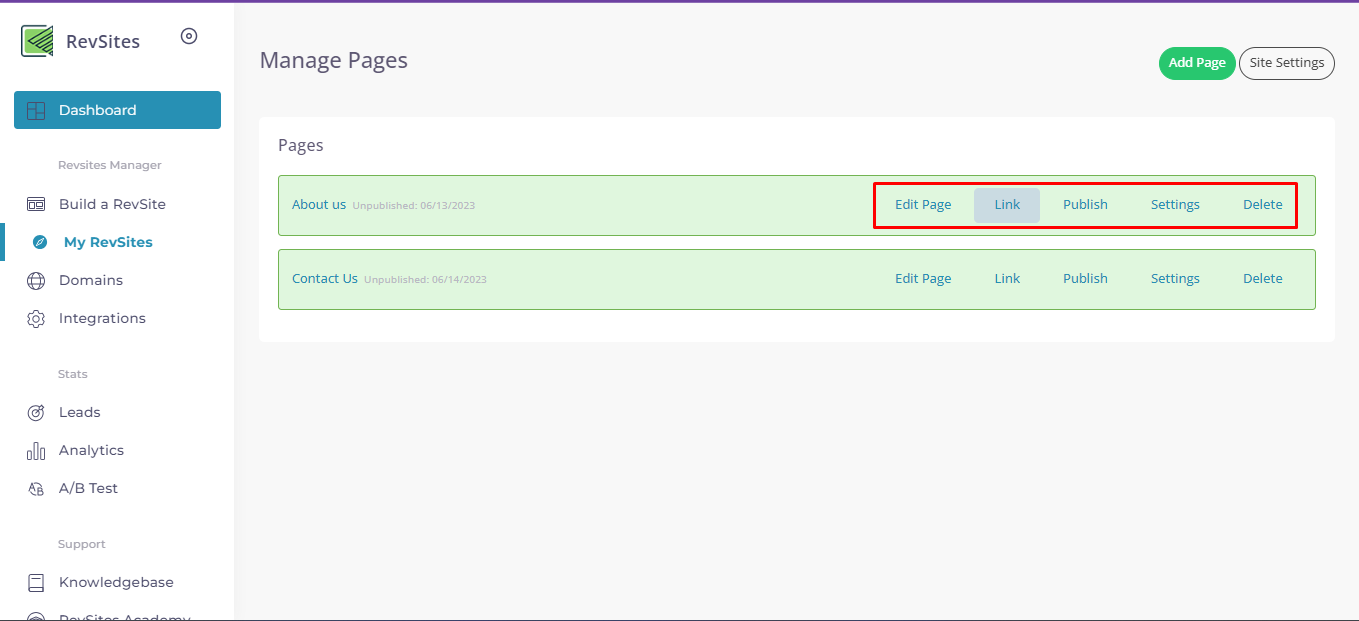
- Edit Page: This option allows you to make changes and modifications to the selected page's content, layout, and design from the web builder. To access help documentation for the Web Builder, click here.
- Link: By choosing this option, you can preview your current page.
- Publish: Selecting this option will publish the changes you have made to the page, making them live and accessible to your website's visitors.
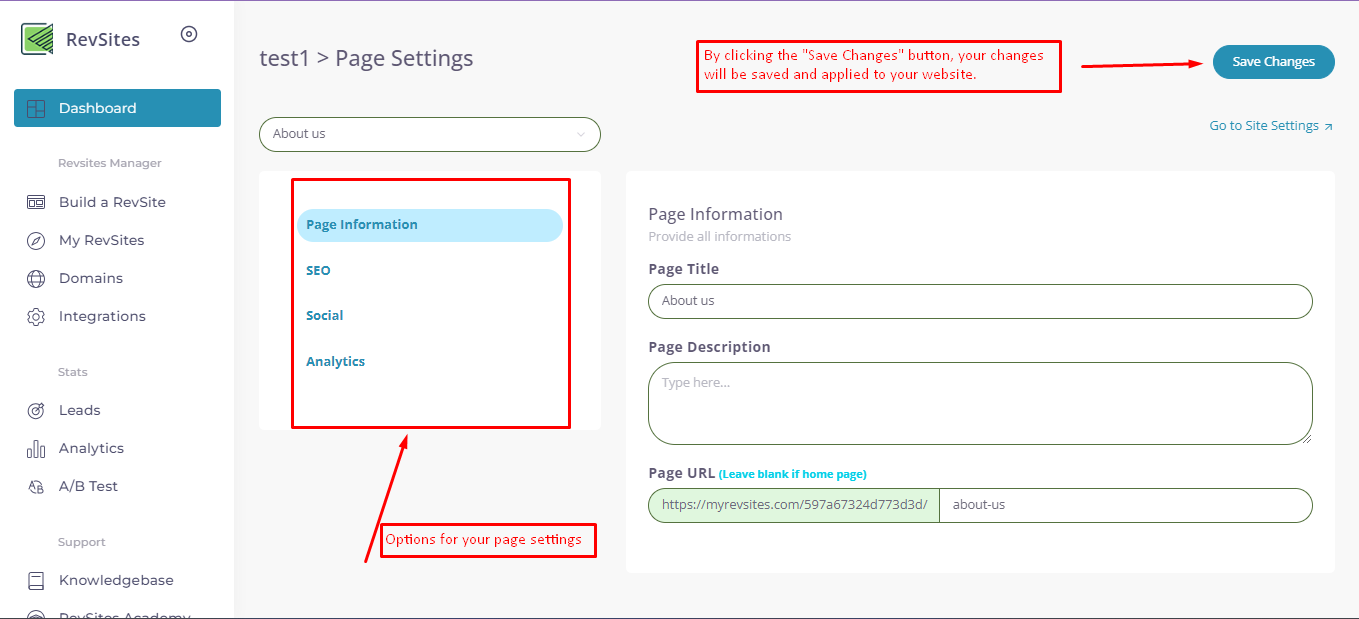
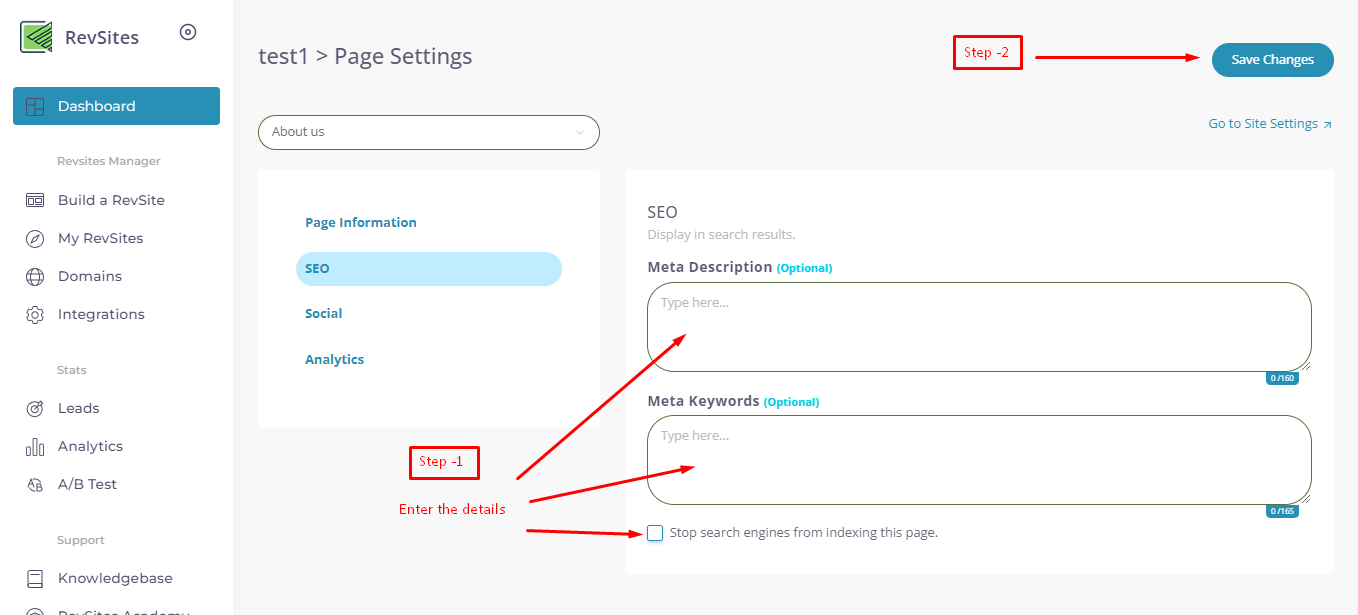
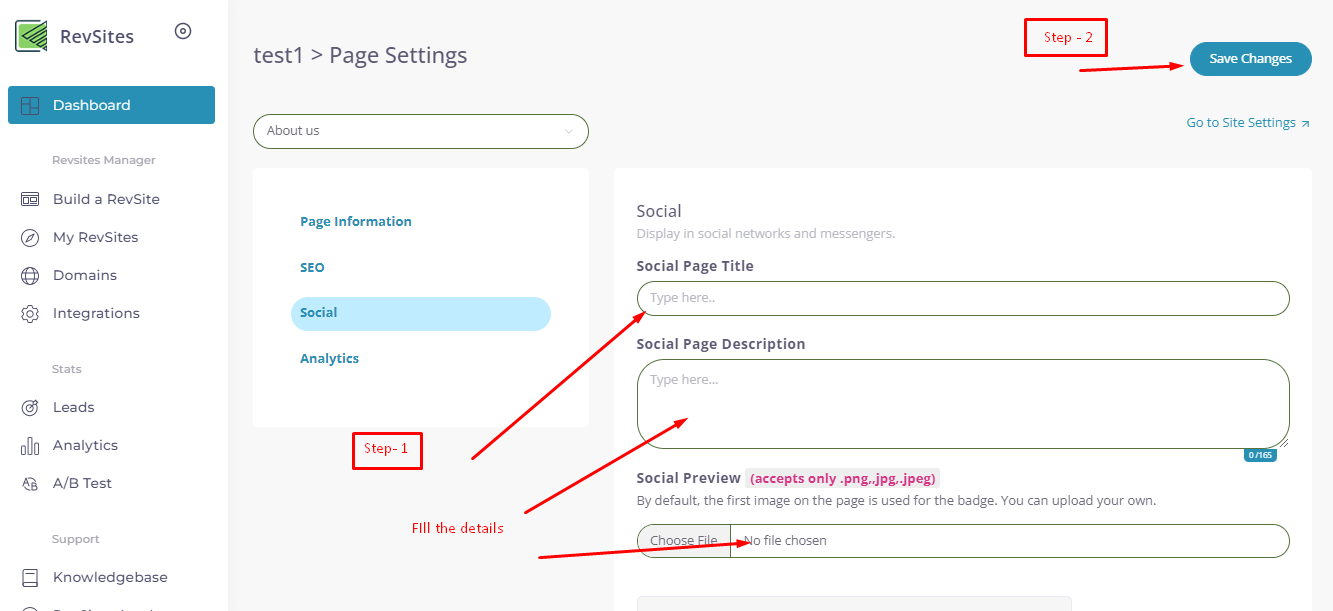
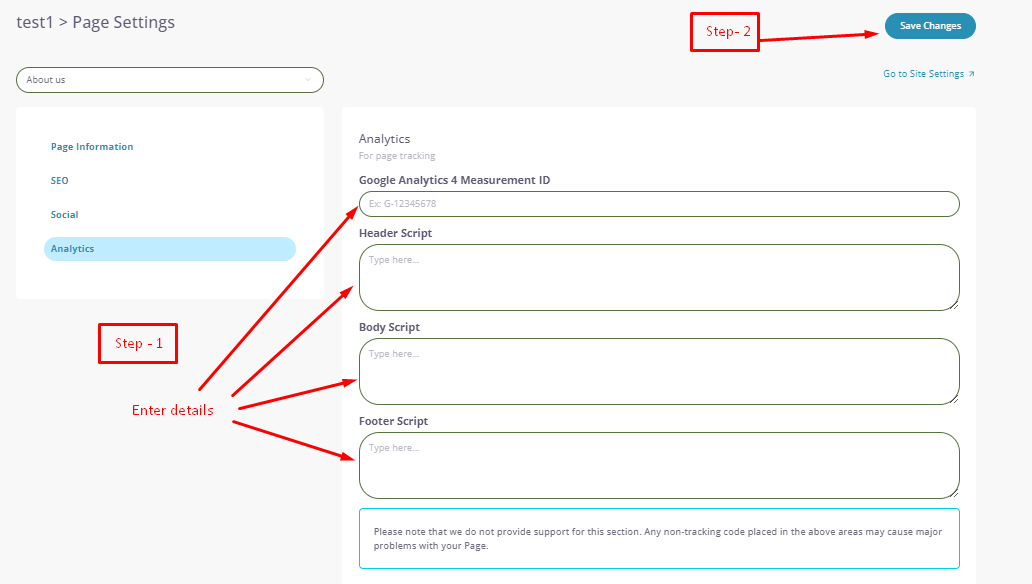
- Settings: This option enables you to configure specific settings for the selected page, such as Page Information, SEO settings, Social identity settings, Tracking Analytics settings.
- Delete: If you wish to remove the selected page from your website, this option allows you to delete it permanently.
Utilize these options within the "Edit Site" section to manage, customize, and fine-tune your webpages according to your preferences.
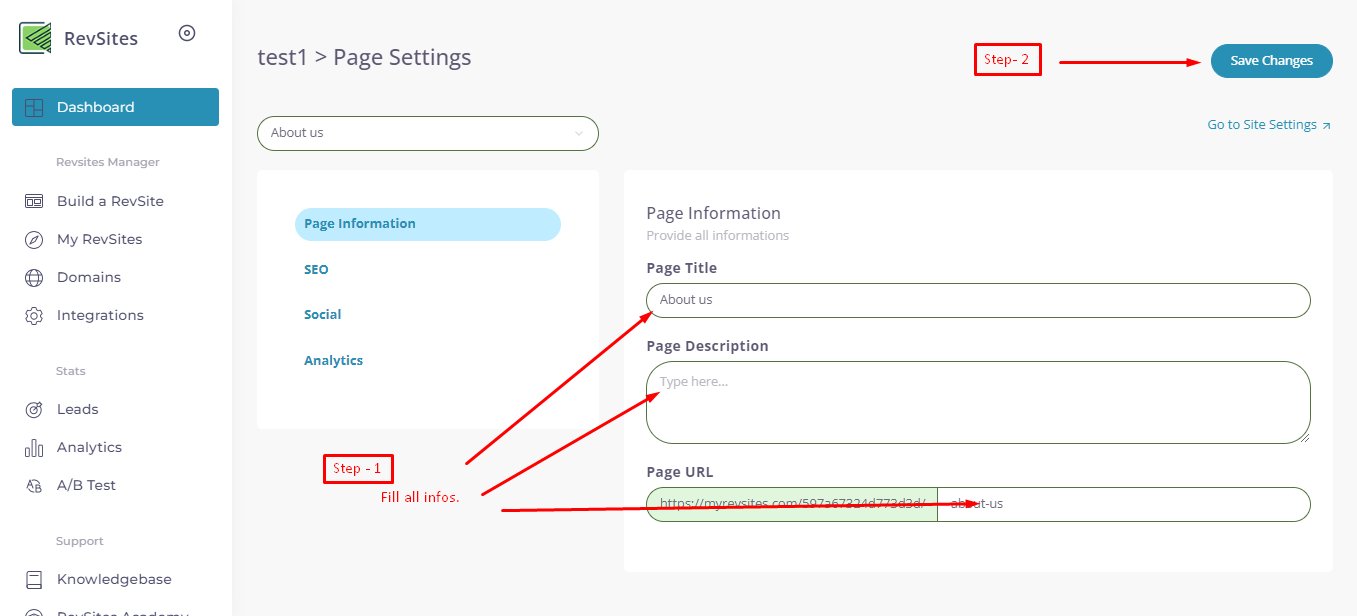
Page Settings
My RevSites (Settings)
Within the "Site Settings" option, you will find several essential options to manage your website. These options include:
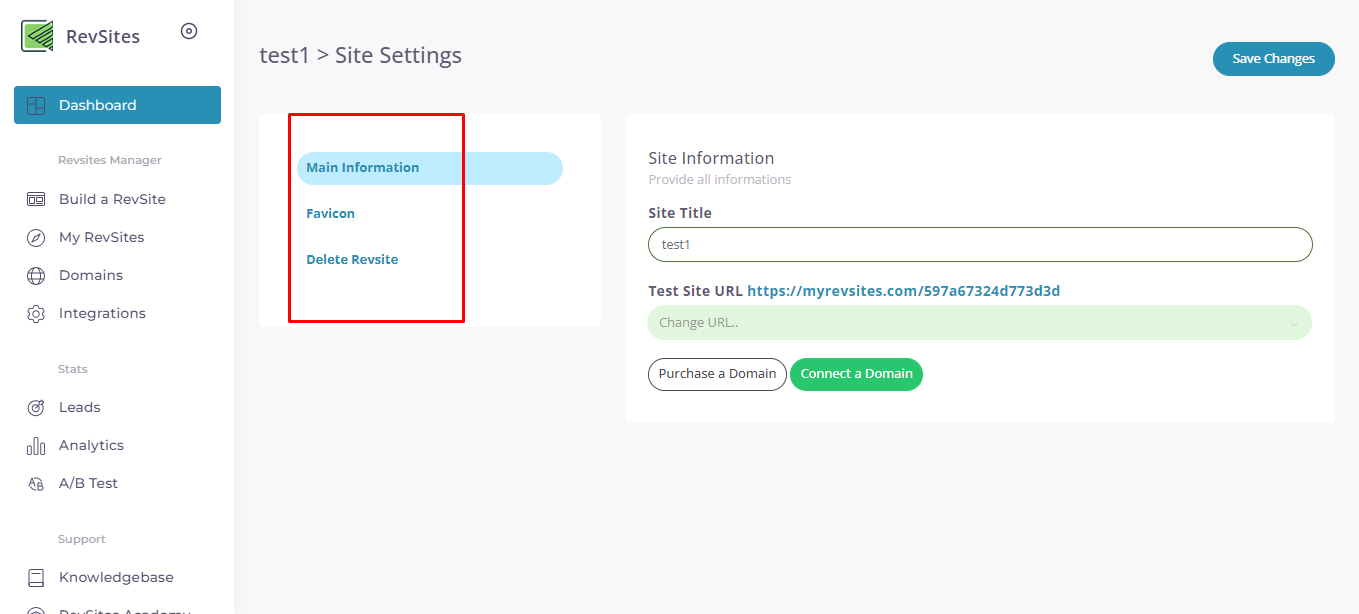
- Main Information: This section allows you to edit and update the main details of your website, such as the site title, description, and other relevant information.
- Favicon: The "Favicon" option allows you to upload and set a custom favicon for your website.
- Delete Revsite: If you decide to delete your entire RevSite pages, you can find the "Delete Revsite" option here.
Accessing the "Site Settings" section provides you with control over critical aspects of your website, enabling you to manage its information, customize the favicon, and make decisions regarding the deletion of your Revsite account if necessary.
Domains
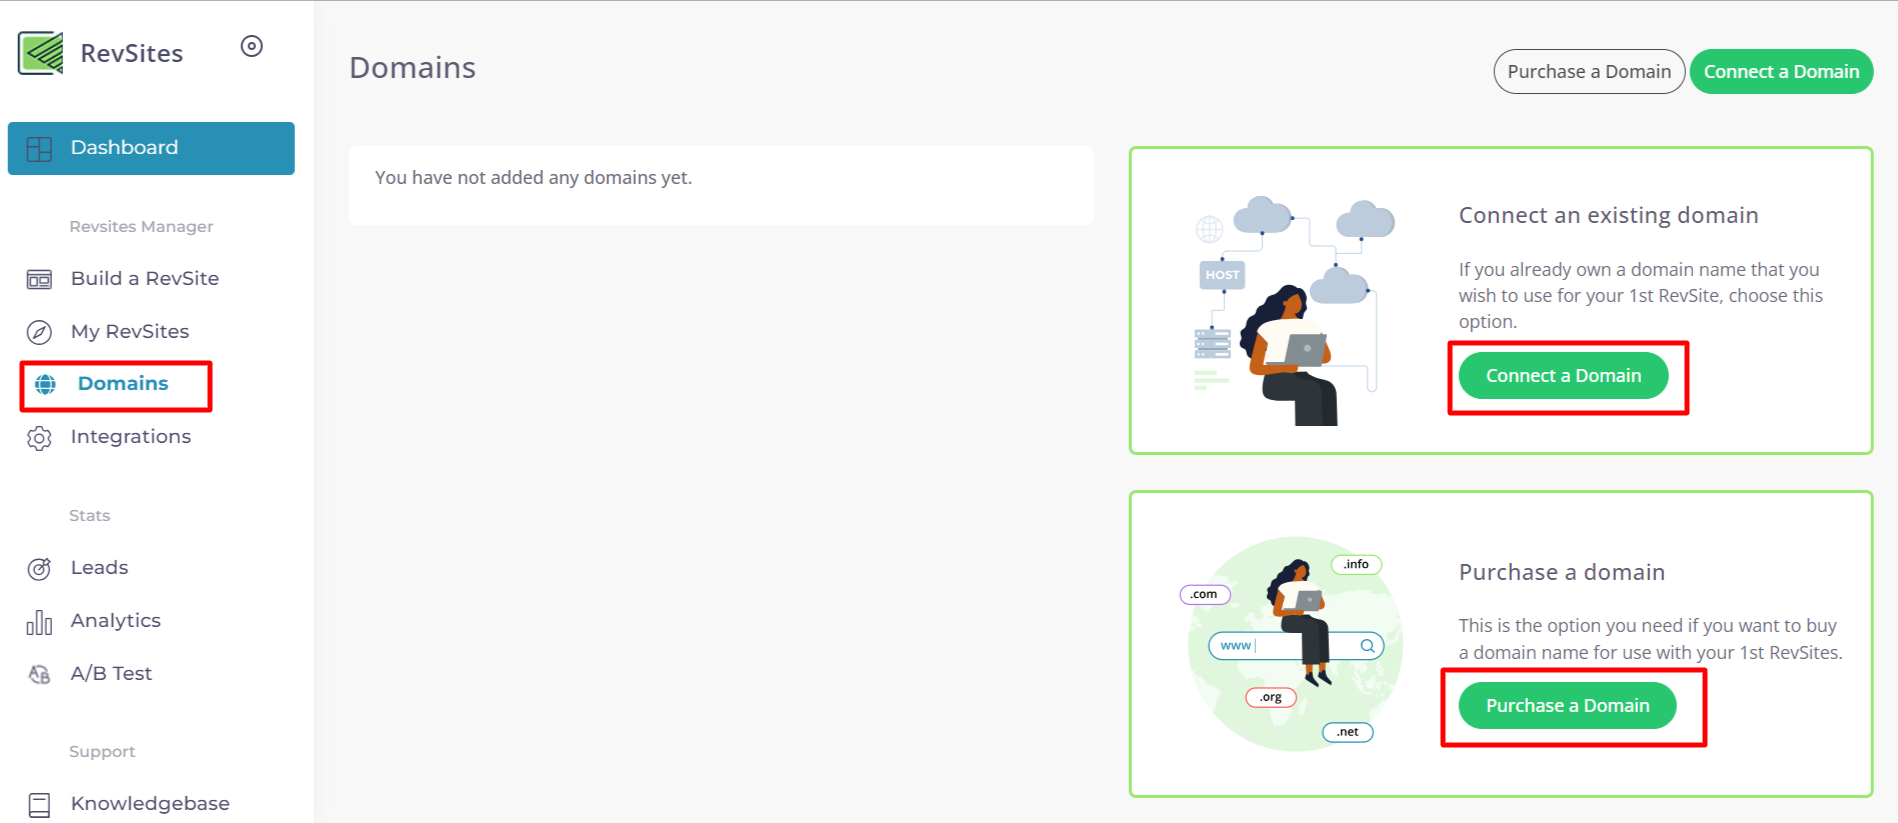
You have not added any domains yet.
Now you need to add your domain. To add a domain on this platform, you need to go to the "Domain" under the dasboard and then click on the "Connect an existing domain" button there. You can also choose the "Purchase a domain" button here. Screenshots are as below:
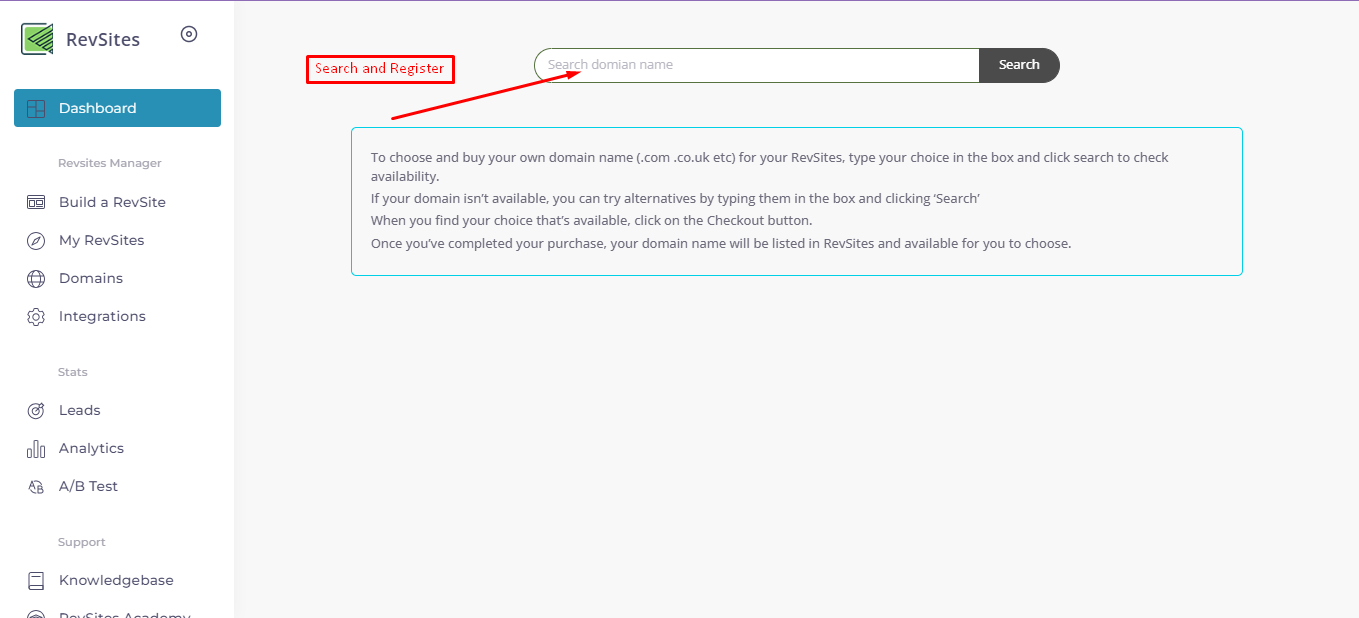
By clicking "Purchase a Domain" you can register your domian here.
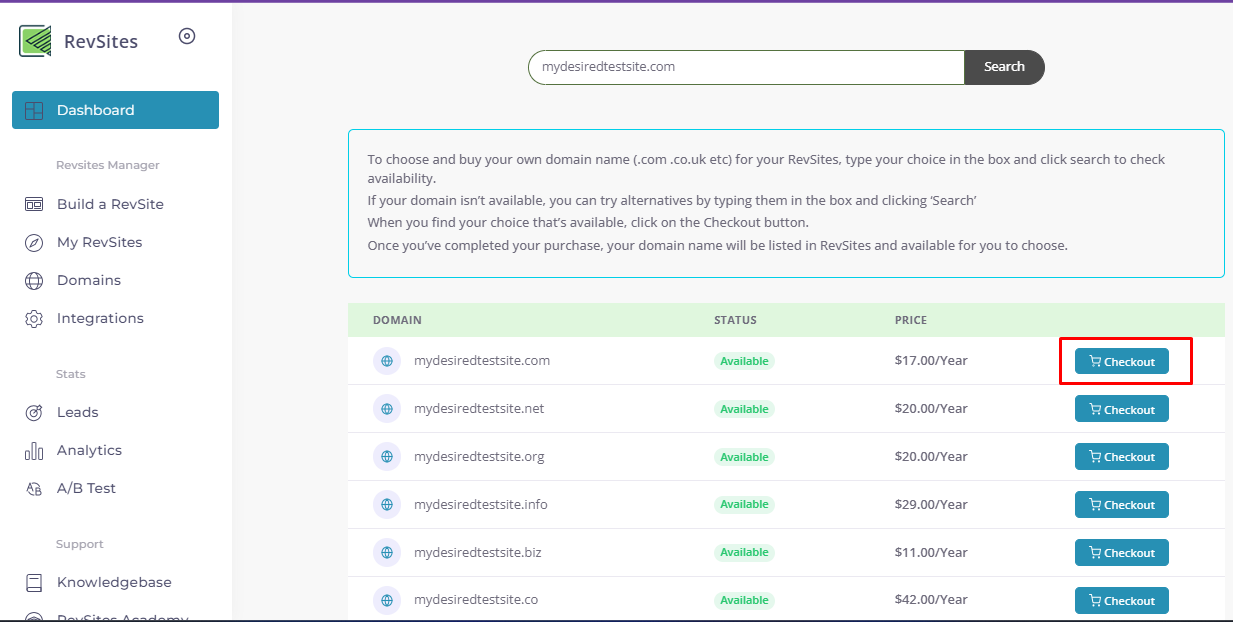
If your desired domain is available then you can proceed with the same domain by clicking the corresponding checkout button, which will redirect to you to a payment page.
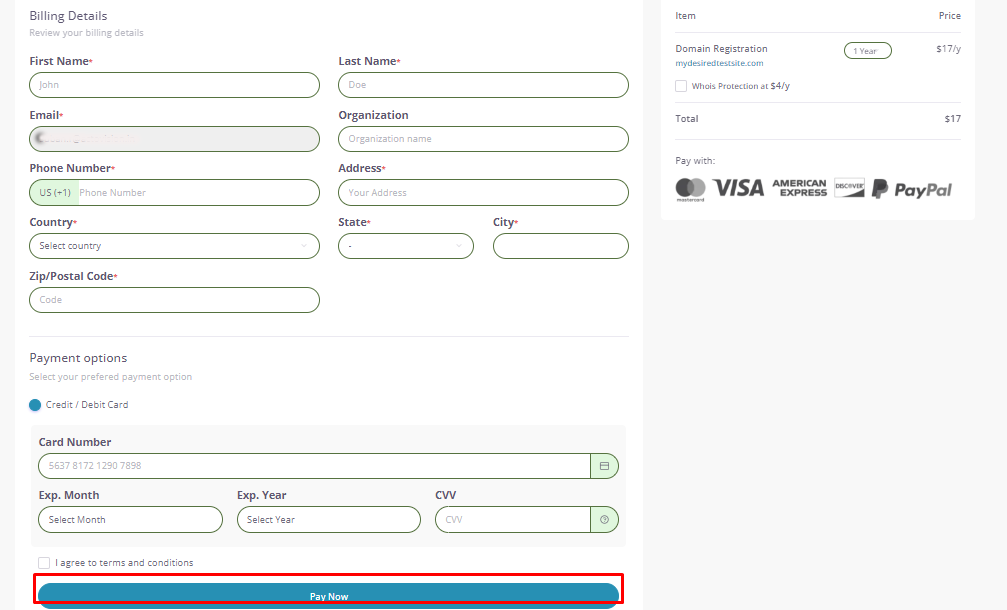
After filling out all the required informations, click on the Pay Now button and your domain will be registered with you once the payment is successfully done.
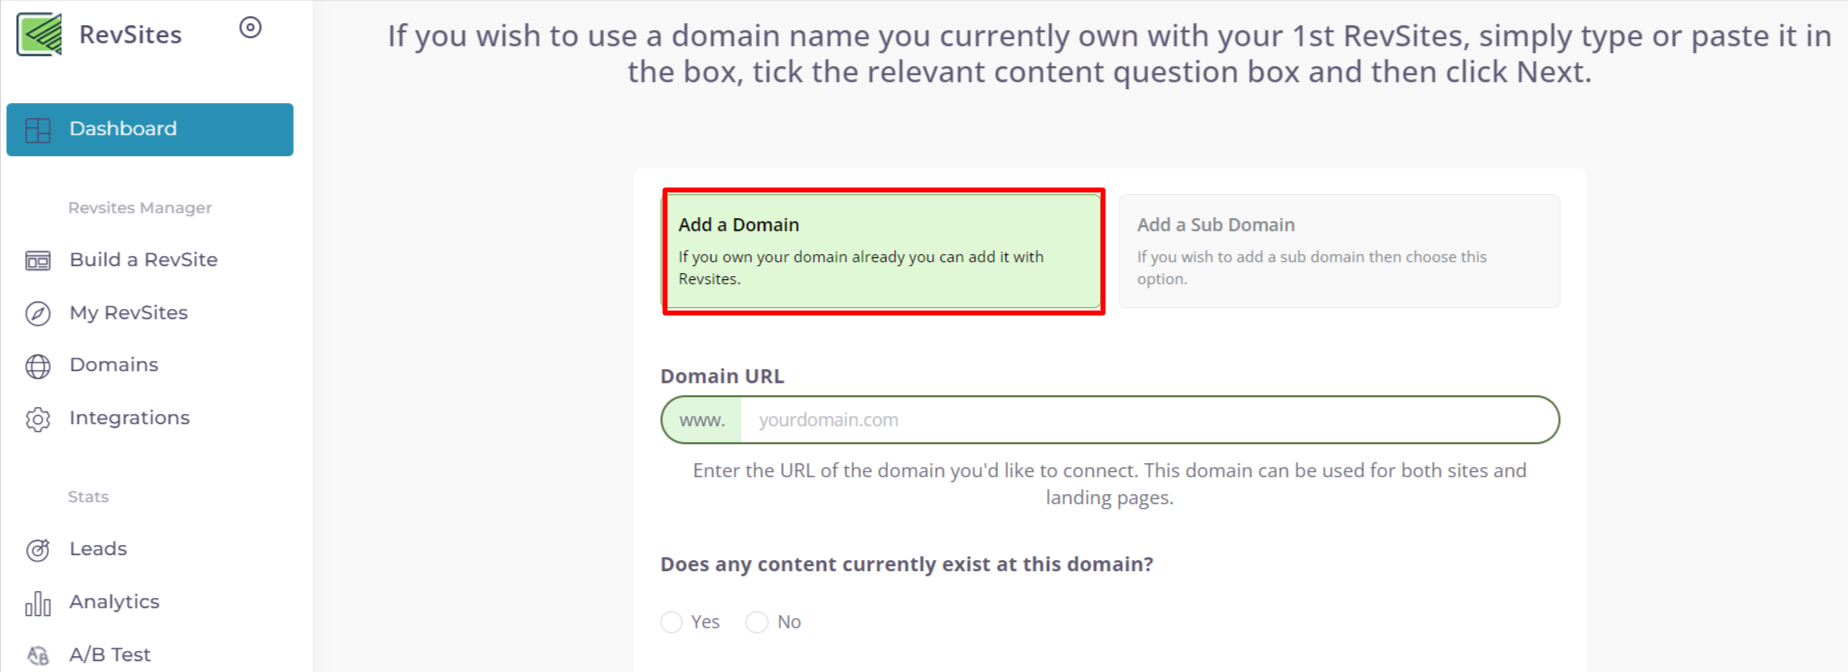
Also, by clicking "Connect a Domain" you can add a domain or sub-domain.
For addind a Domain
For addind a Sub Domain
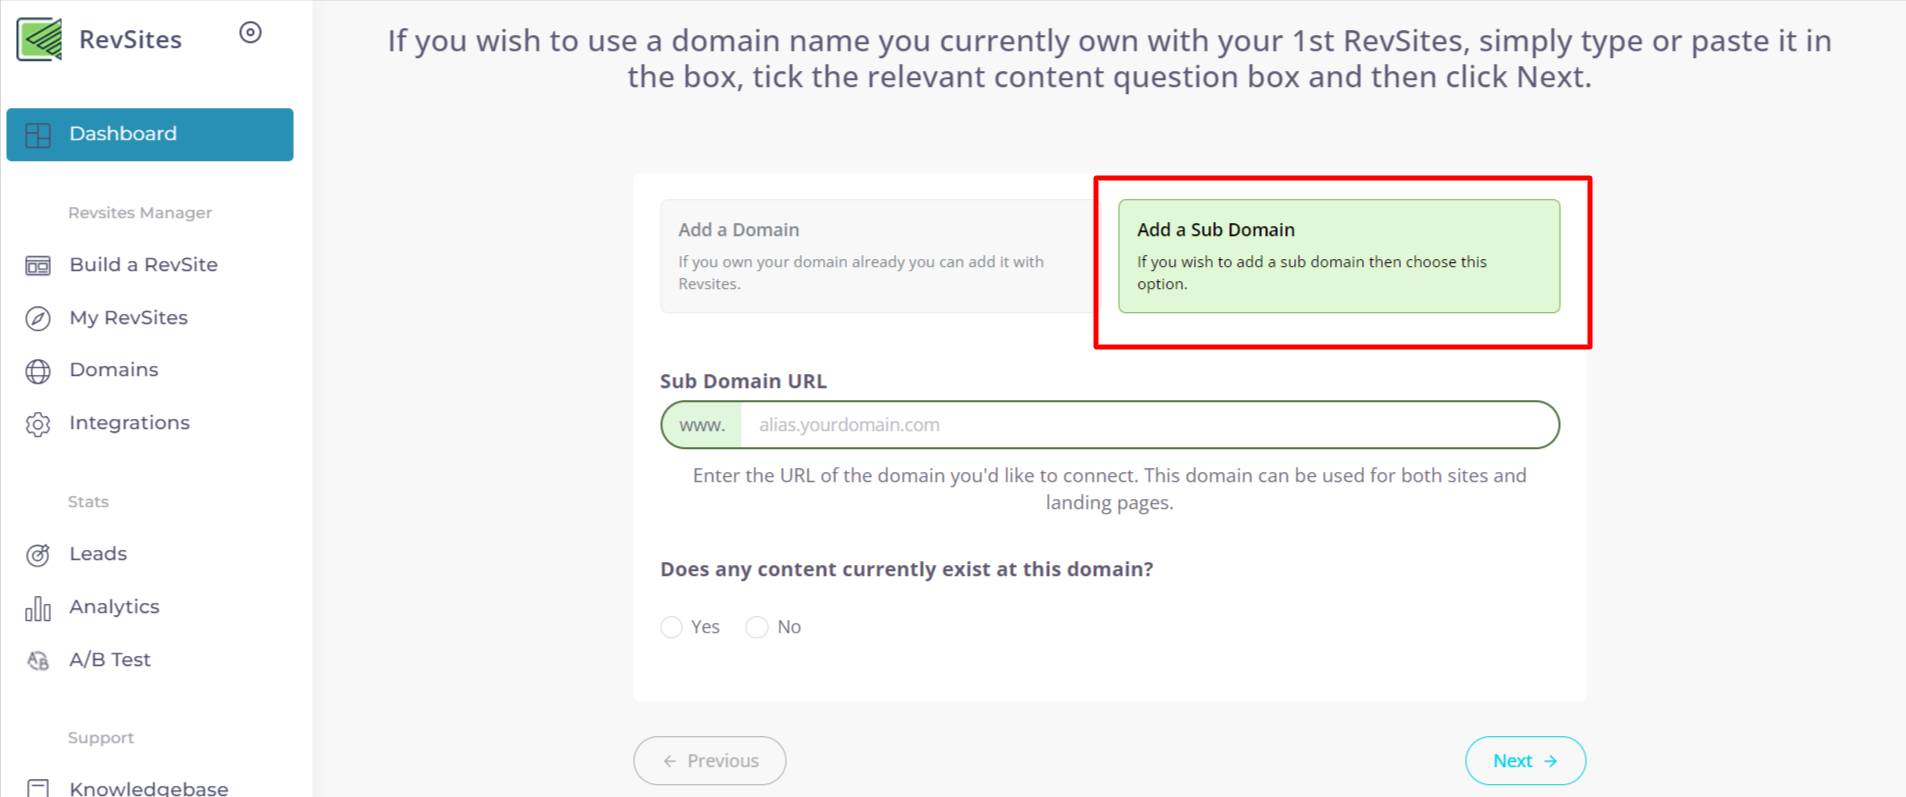
Once you click on the "Next" button, you will be asked to choose your Domain Provider and then it will directed to a screen displaying DNS record information. To update these records, you will need to go to the domain registrant panel and follow the DNS Update Tutorials provided on that page. Once you have successfully updated the DNS records, you can proceed to click on the "Finish" button to complete the process.
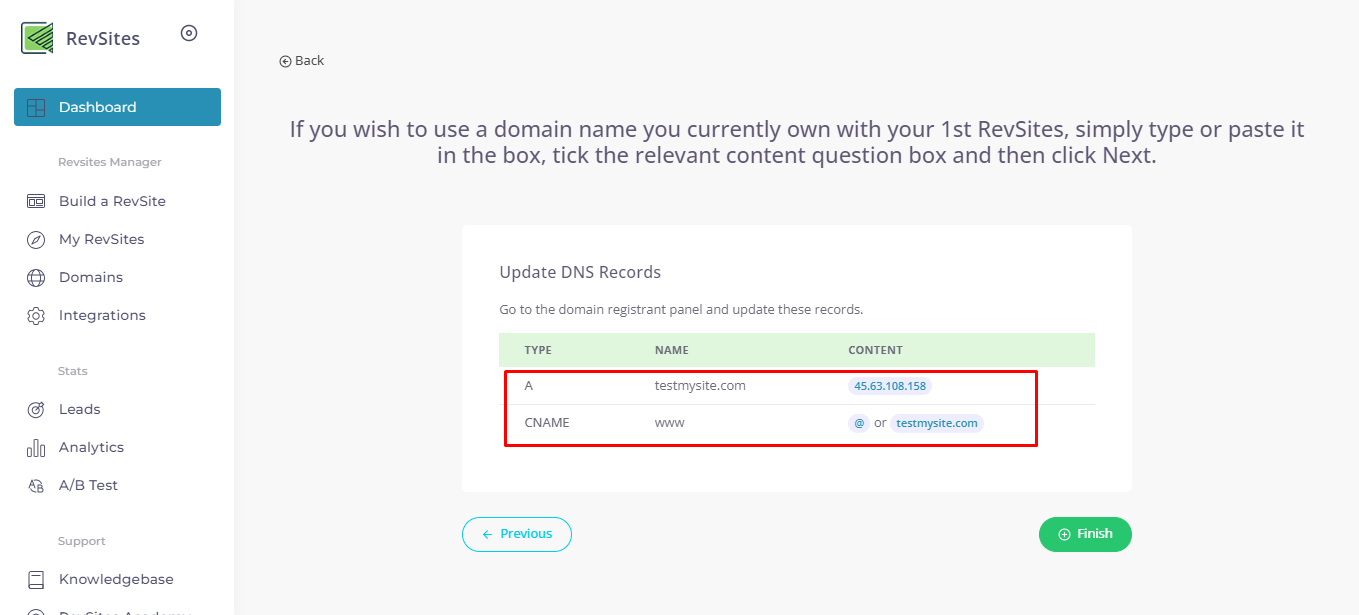
Note: To know how to update the DNS records on the registrant panel, you can follow the detailed documentation for your provider here.
| Provider Name | add A record | add CNAME |
|---|---|---|
| Namecheap | >>Click Here<< | >>Click Here<< |
| GoDaddy | >>Click Here<< | >>Click Here<< |
| Hostgator | >>Click Here<< | >>Click Here<< |
| Cloudflare | >>Click Here<< | >>Click Here<< |
| AWS | >>Click Here<< | >>Click Here<< |
| 1&1 | >>Click Here<< | >>Click Here<< |
| Hostinger | >>Click Here<< | >>Click Here<< |
| iPage | >>Click Here<< | >>Click Here<< |
| BigRock | >>Click Here<< | >>Click Here<< |
| Cosmotown | >>Click Here<< | >>Click Here<< |
| Ovhcloud | >>Click Here<< | >>Click Here<< |
| Ionos | >>Click Here<< | >>Click Here<< |
| Bluehost | >>Click Here<< | >>Click Here<< |
| Shopify | >>Click Here<< | >>Click Here<< |
| Domain.com | >>Click Here<< | >>Click Here<< |
| Google Domains | >>Click Here<< | >>Click Here<< |
| Dreamhost | >>Click Here<< | >>Click Here<< |
| Hover | >>Click Here<< | >>Click Here<< |
| Network Solutions | >>Click Here<< | >>Click Here<< |
| BuyDomains | >>Click Here<< | >>Click Here<< |
| Porkbun | >>Click Here<< | >>Click Here<< |
| Dynadot | >>Click Here<< | >>Click Here<< |
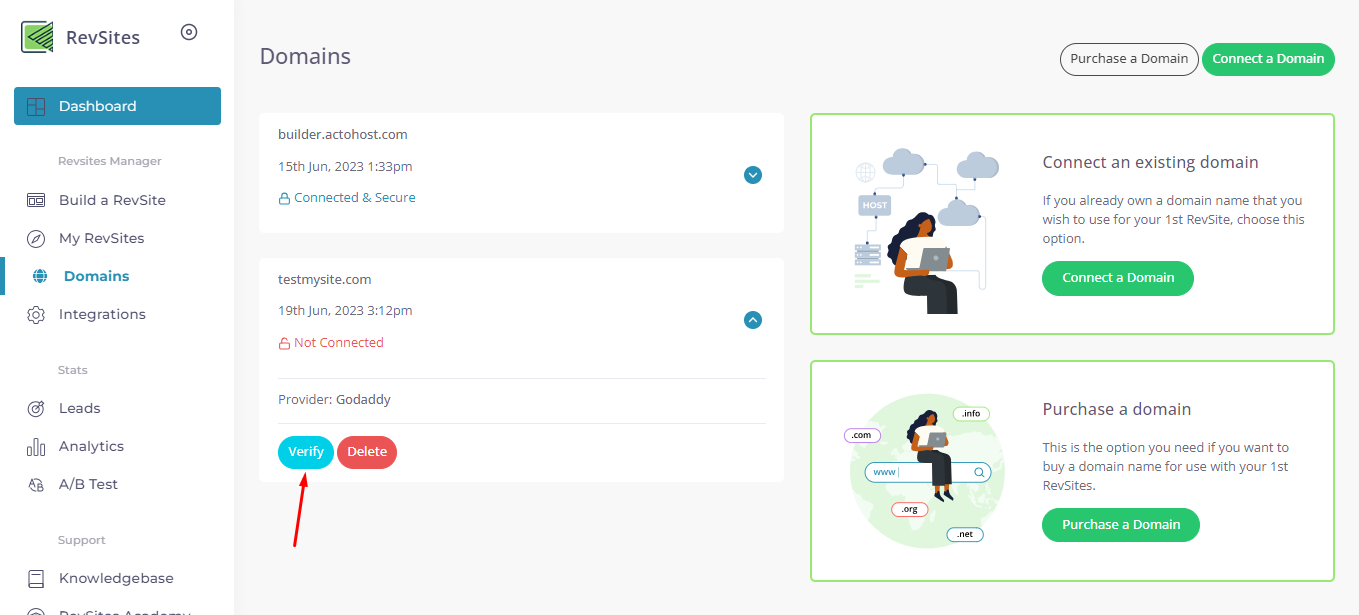
Once you have completed the previous step, you should be directed to a new screen where you will find a "Verify" button. By selecting this button, you will be able to verify your domain.
The domain verification process will only be completed once the DNS records have propagated and synchronized on both ends. This propagation and syncing can take up to 48 hours. Therefore, if the verification is not immediate, please revisit and try again later.
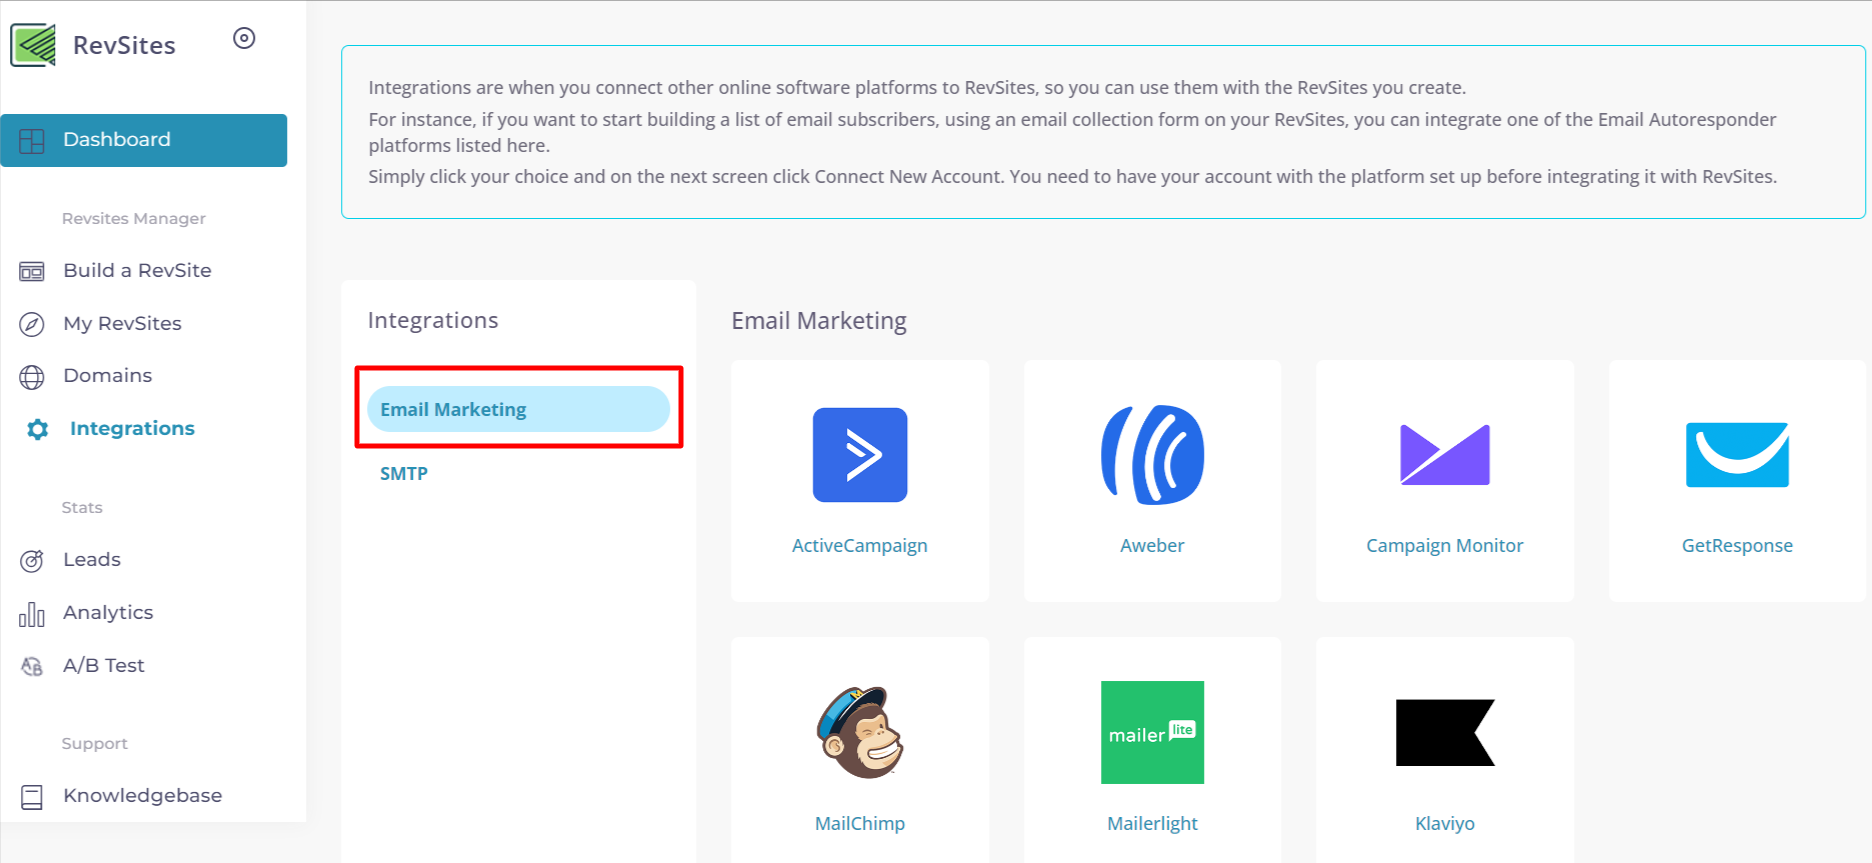
Integrations
"Integrations" are a way to connect other online software platforms to RevSites, enabling you to use them in conjunction with the RevSites you create. For example, if you wish to create a list of email subscribers by using an email collection form on your RevSites, you can integrate one of the Email Autoresponder platforms listed here. To integrate a platform, simply click on your preferred choice and, on the next screen, click Connect New Account. Please ensure that you have already set up an account with the platform before integrating it with RevSites.
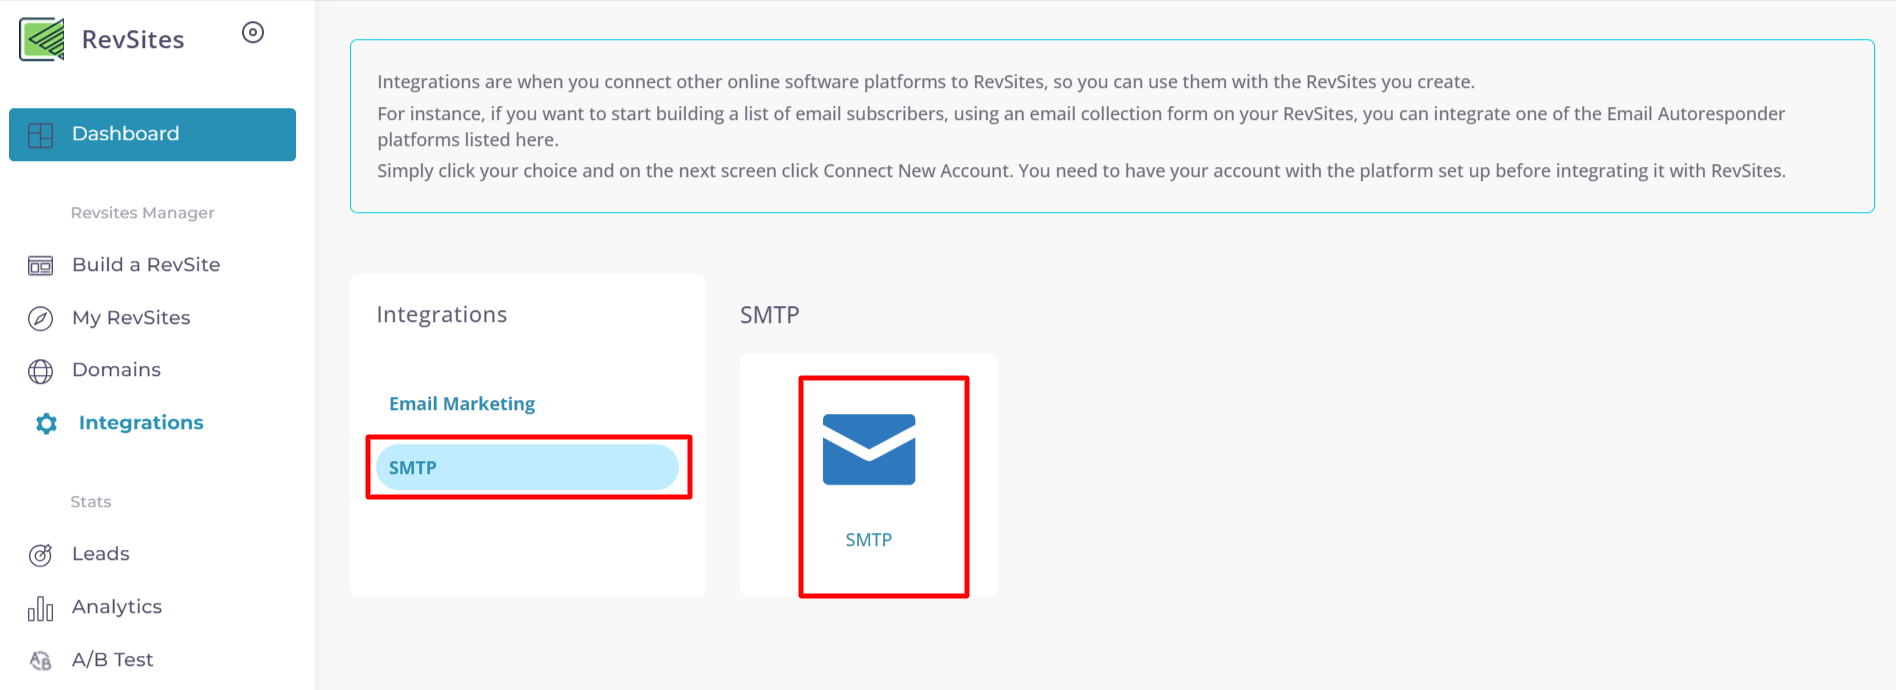
"SMTP" is a standard protocol used for sending emails over the internet. It is widely used for sending outgoing emails from an email client or server to the recipient's mail server. You can Manage your SMTP account here.
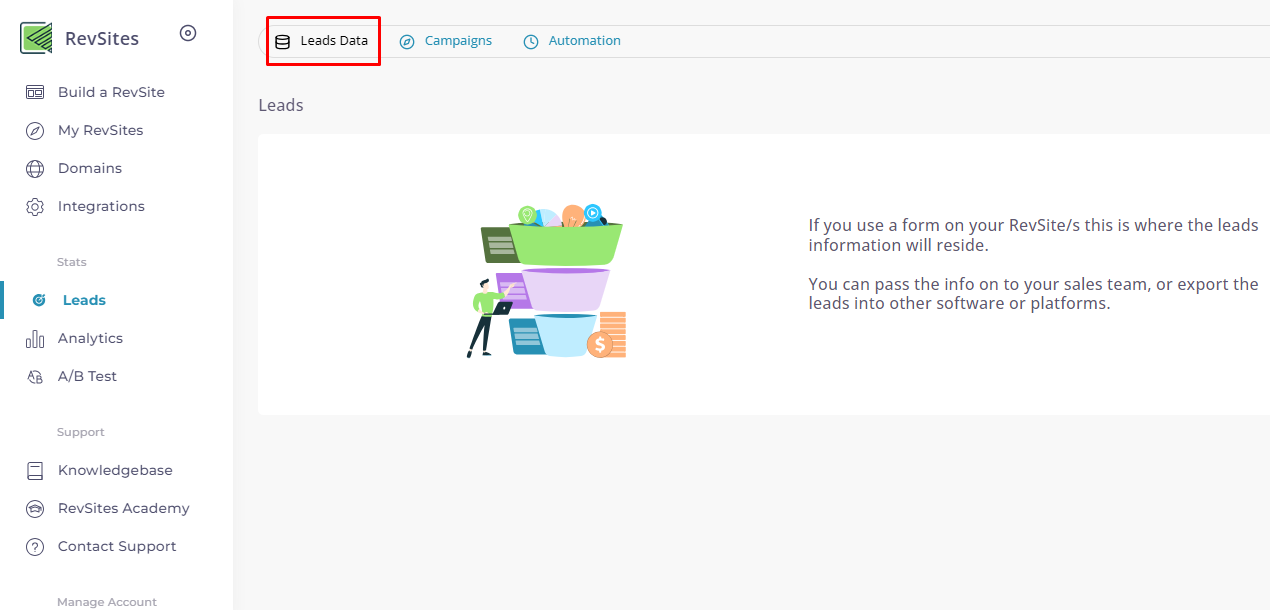
Leads
This stage consists of three important steps.
- Leads Data
- Campaigns
- Automation
Our Lead Data option allows you to effectively manage all the leads you receive from your pages. With our intuitive interface, you can easily track your leads and update reports, all while keeping detailed notes in a timeline format of all your activities with the lead data.
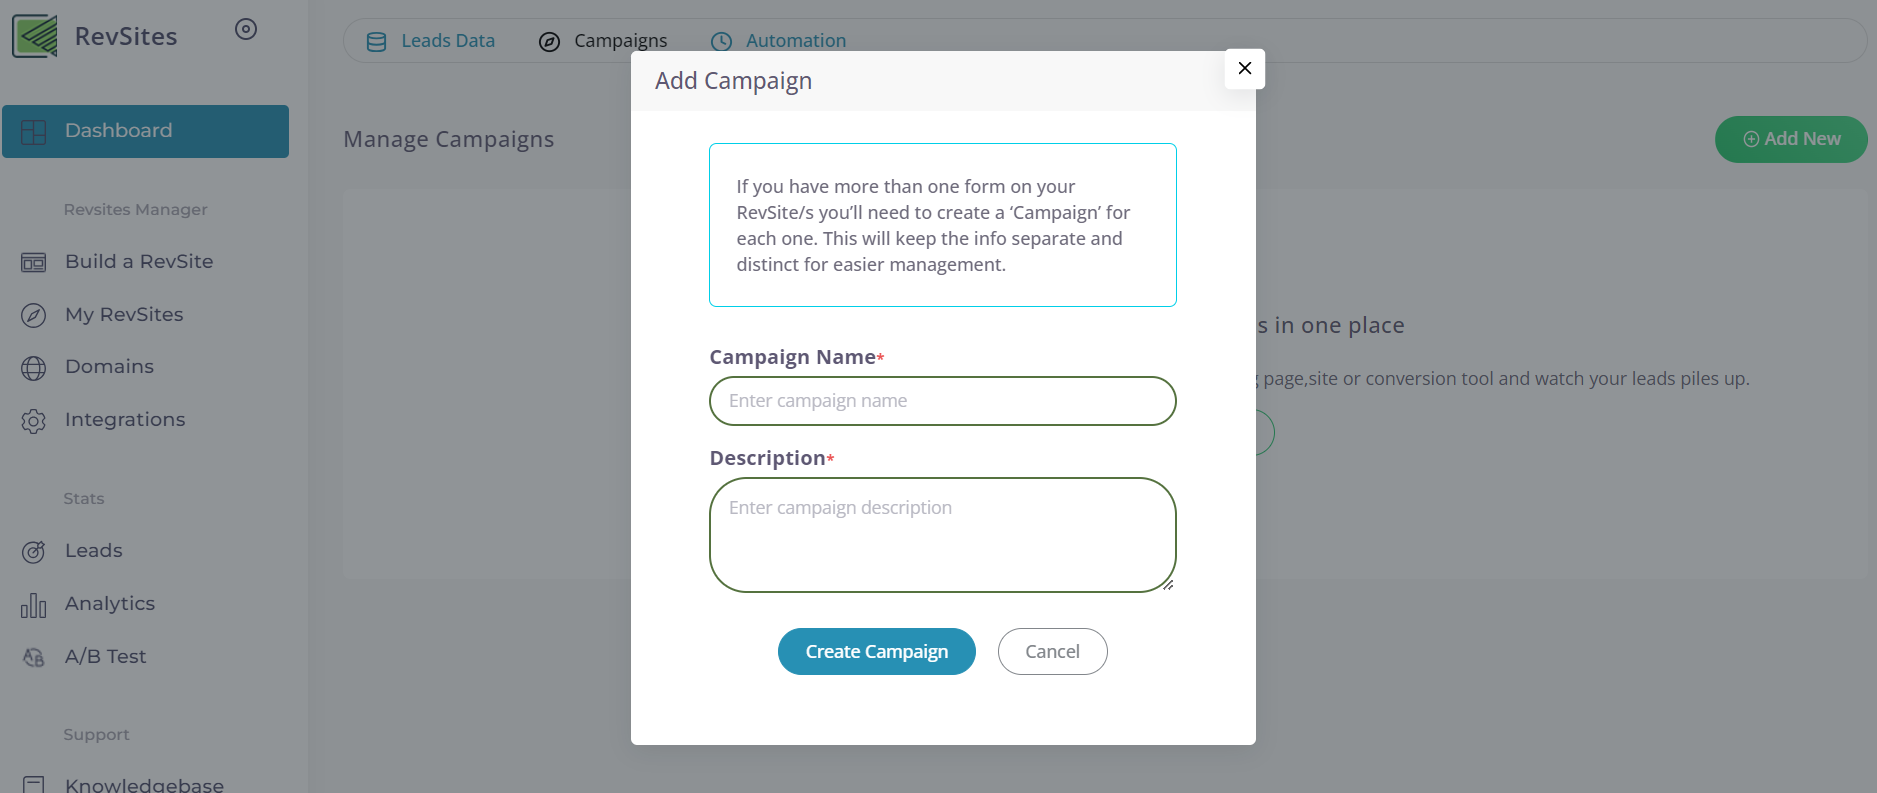
During the campaign phase, you can create and modify your campaigns. To start a new campaign, click on the "Add New" button.
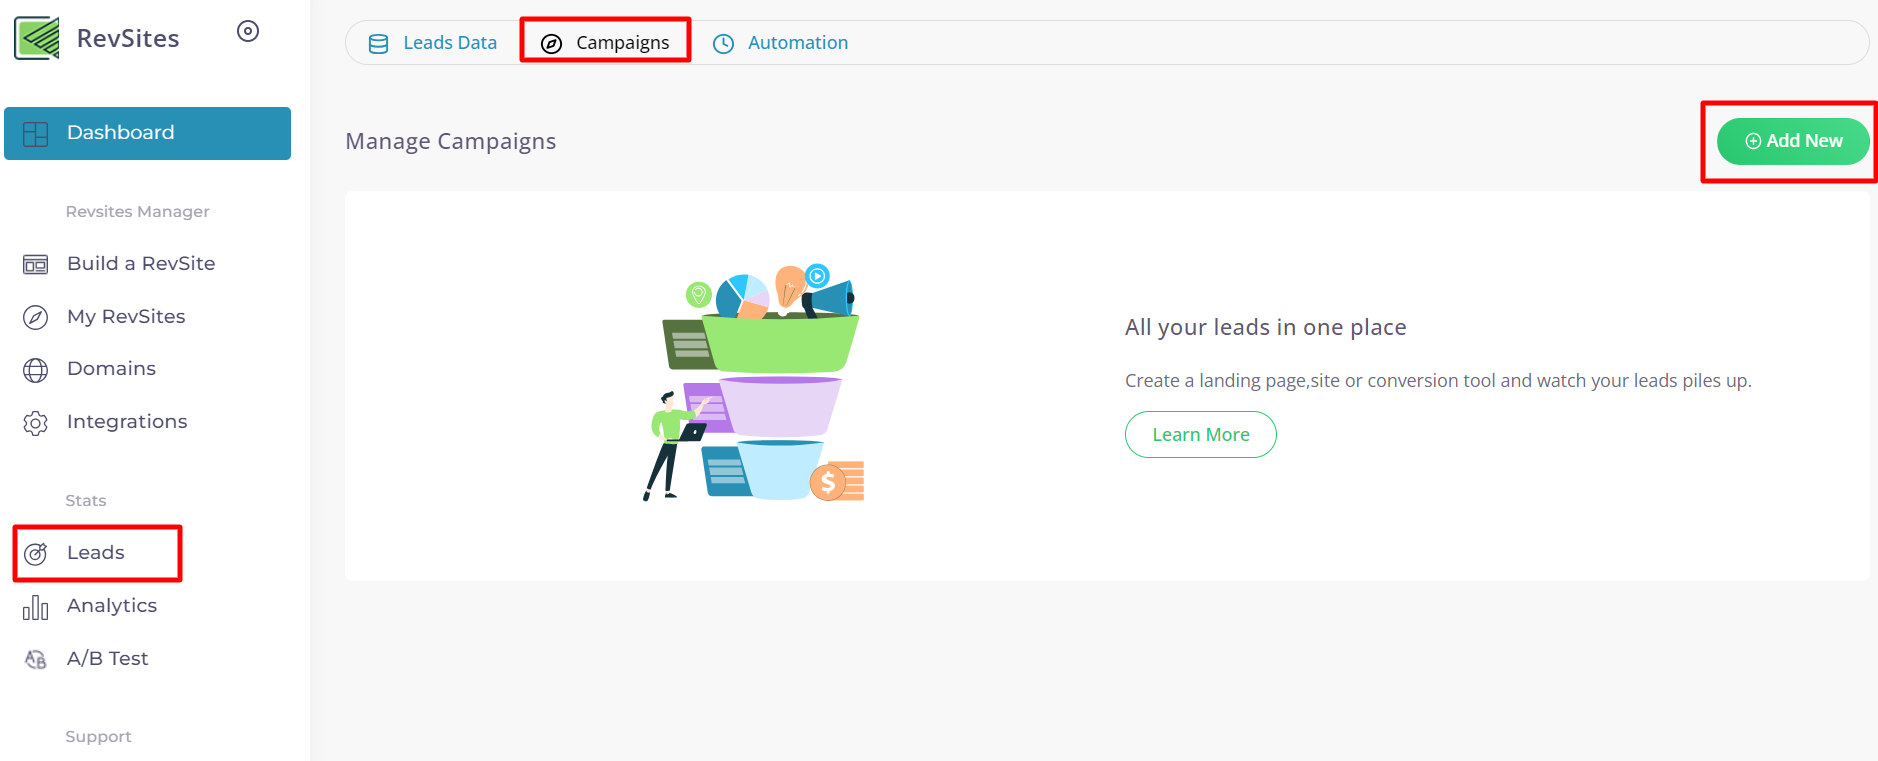
A new screen will appear where you can enter the campaign title and description. Once you have filled out the necessary information, click on the "Create Campaign" button to finalize the creation process.
You can utilize any email marketing campaign you create here in the web builder when working with the form element. For more information, click here to access detailed instructions.
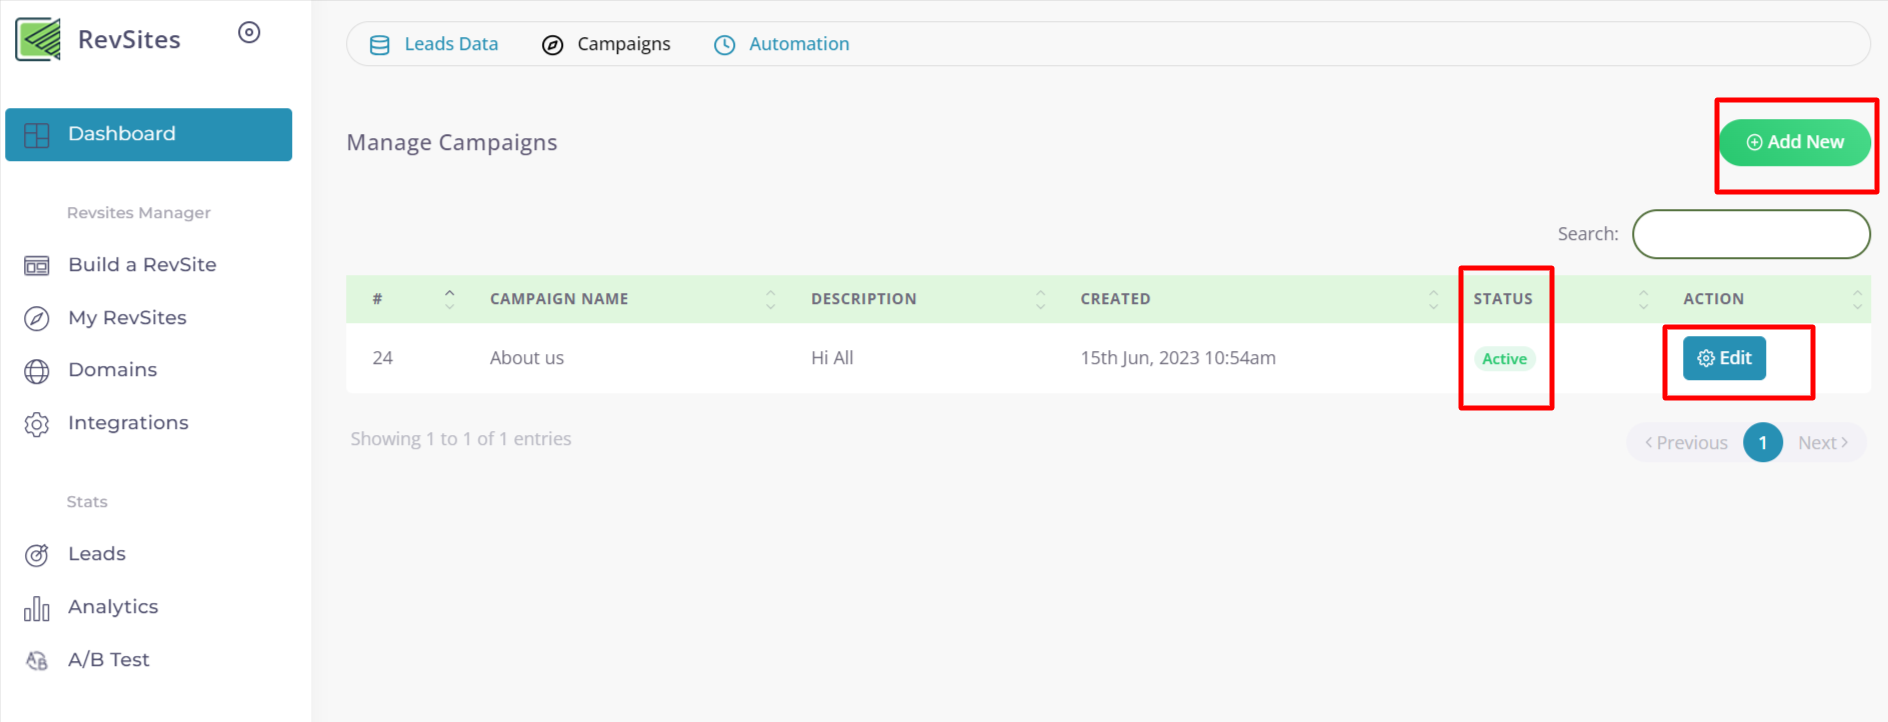
Your new campaign will now be listed and can be edited at any time from the Edit menu under your campaigns and the status of your campaign can also be changed to Active or Inactive.
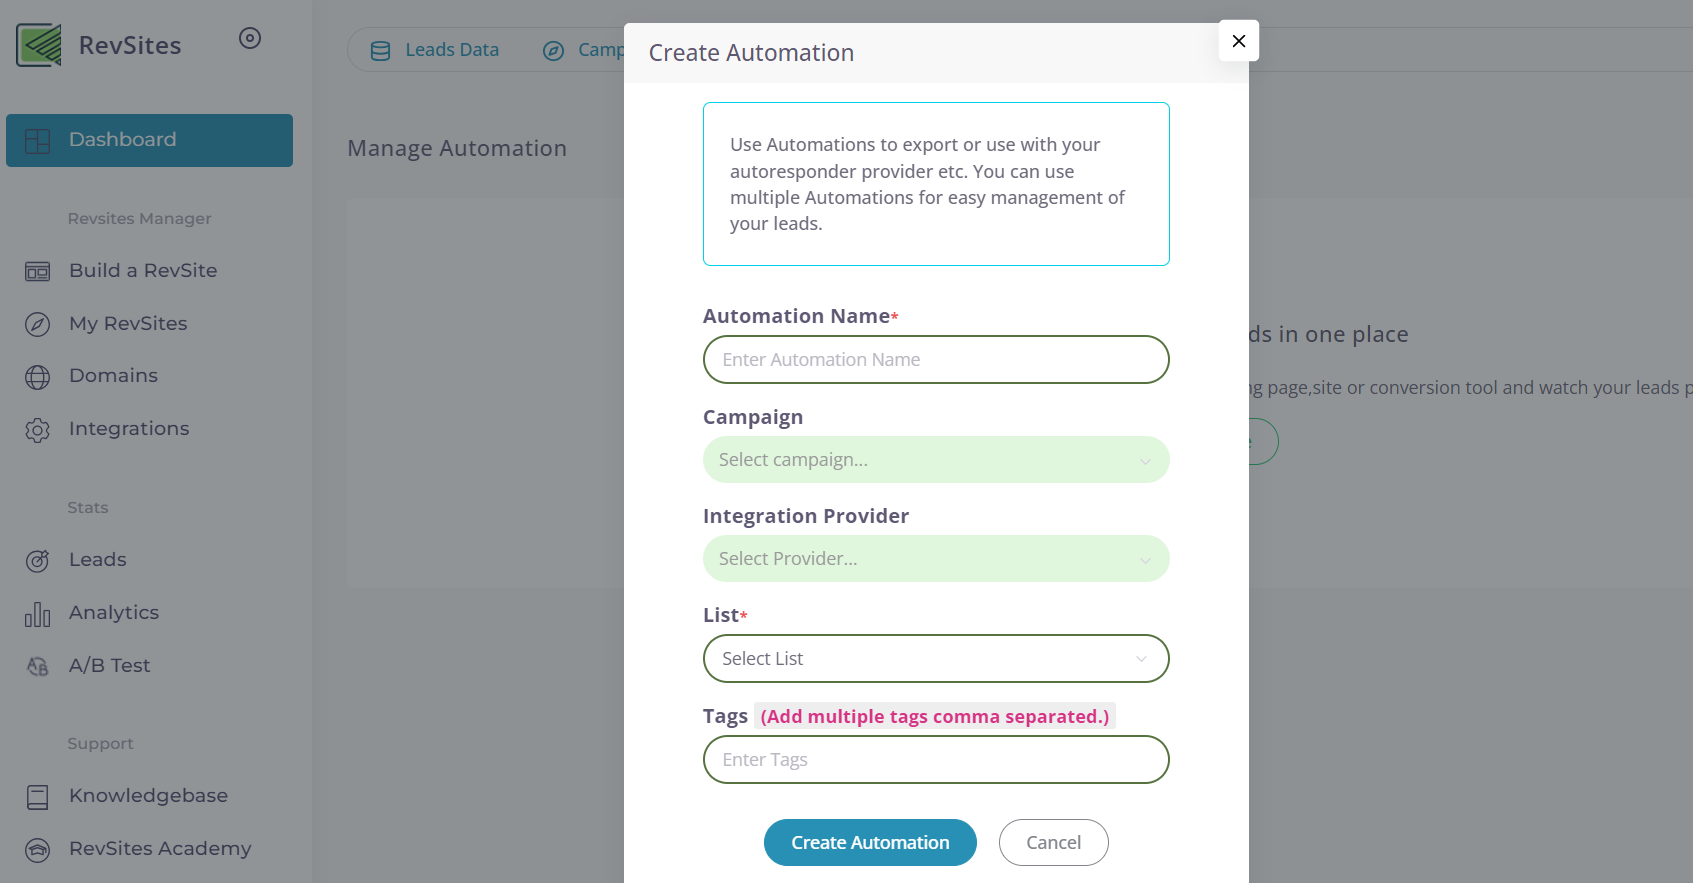
Our automation feature simplifies the process of creating new campaigns. With just a few clicks of the Add New button, you can enter the Automation Name, Select Campaign, select Integration Provider, Enter the List Id and tag/s. Once you've completed these steps, simply hit the Create Automation button to complete the process. Your newly created automations will then be listed under the automation tab, where you can easily edit and update their status as needed.
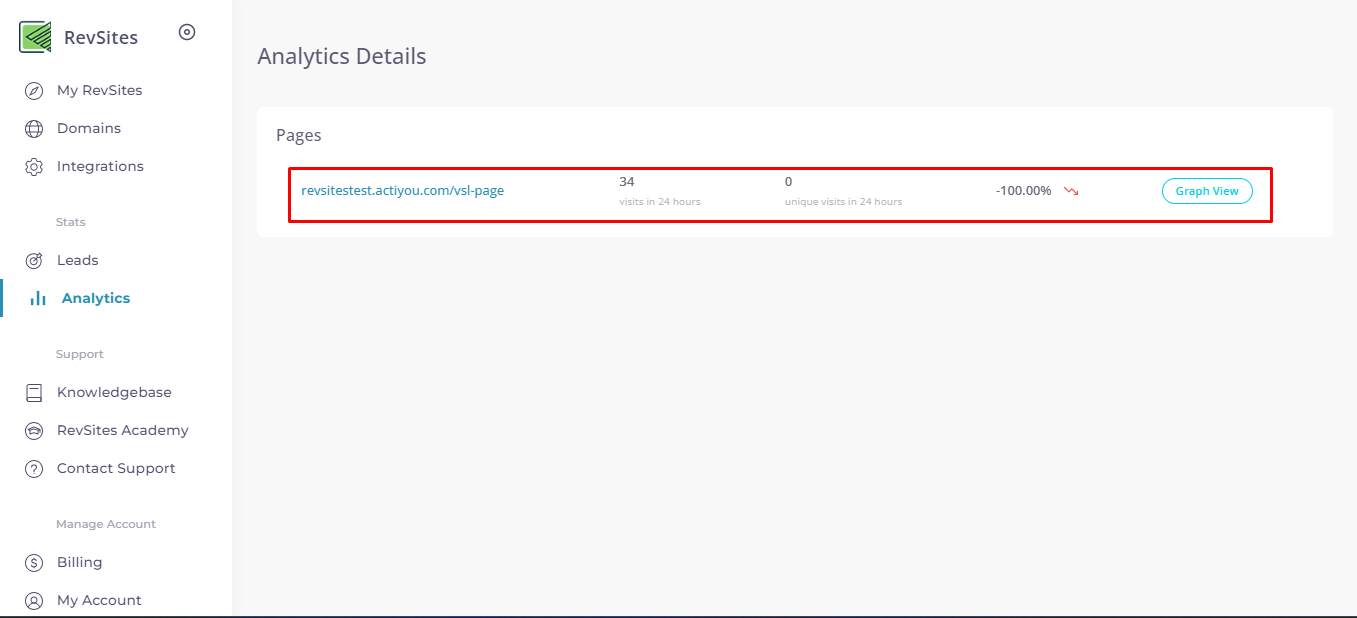
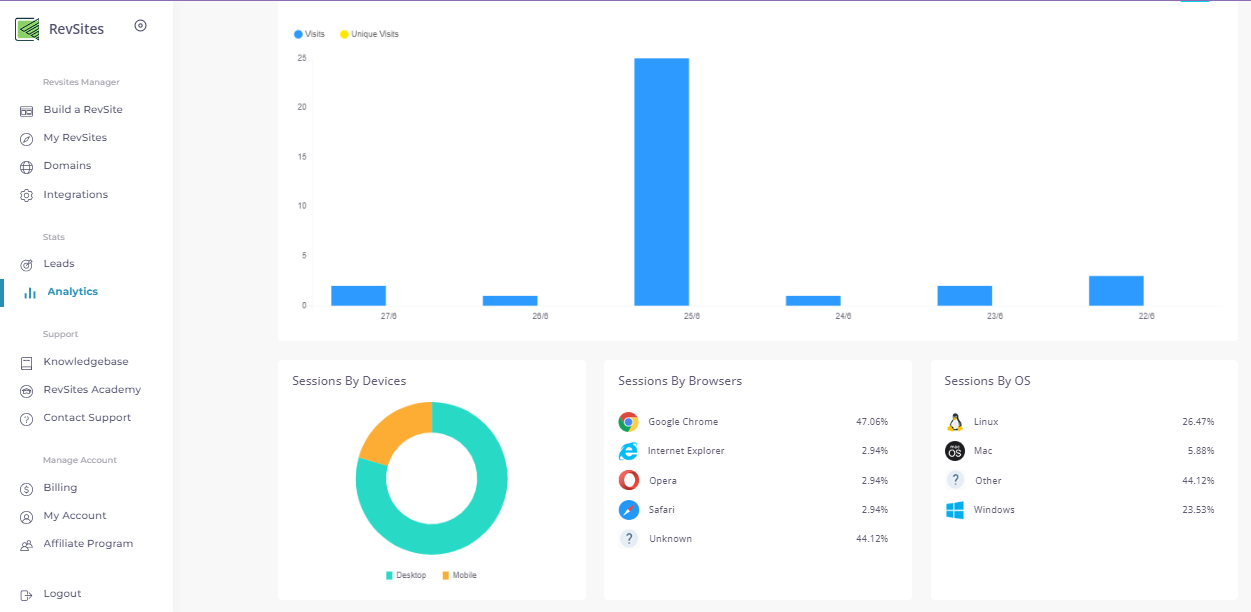
Analytic
You can see the analytic data for your site here:
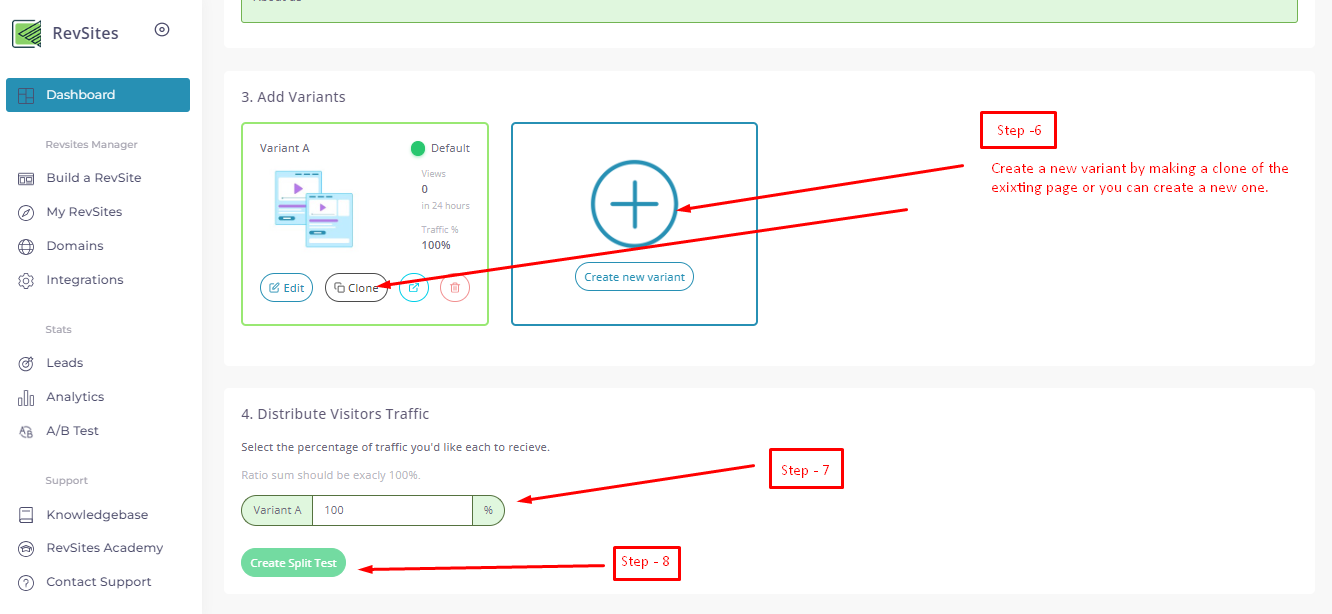
A/B Testing
The A/B testing menu enables you to conduct experiments with two different versions of your website.
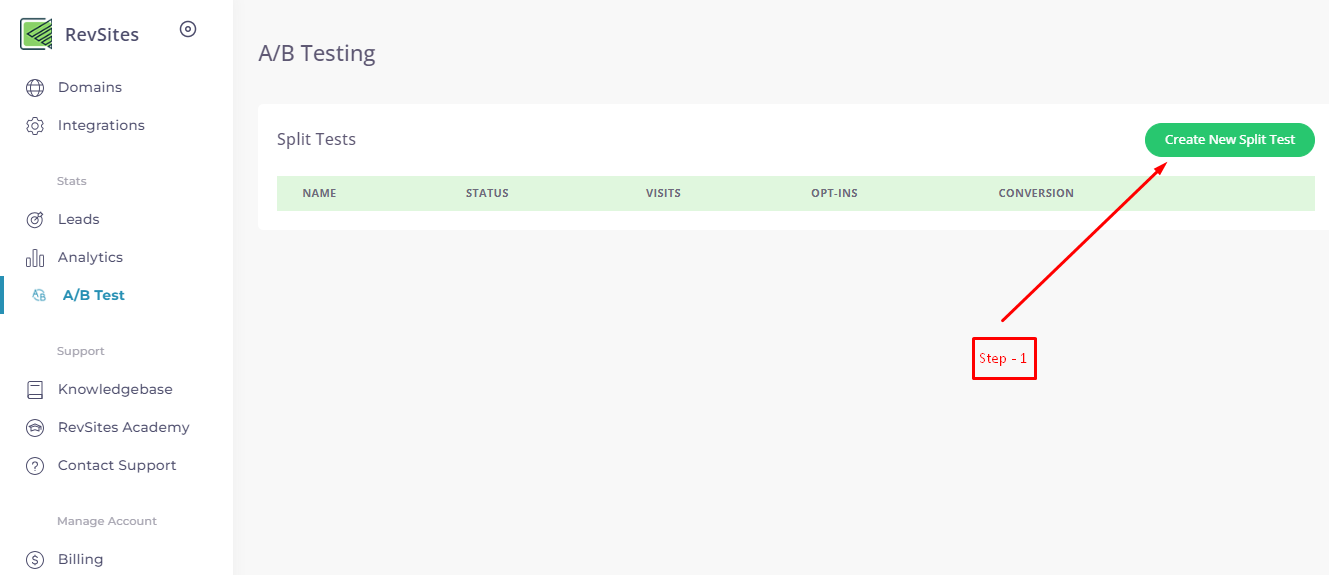
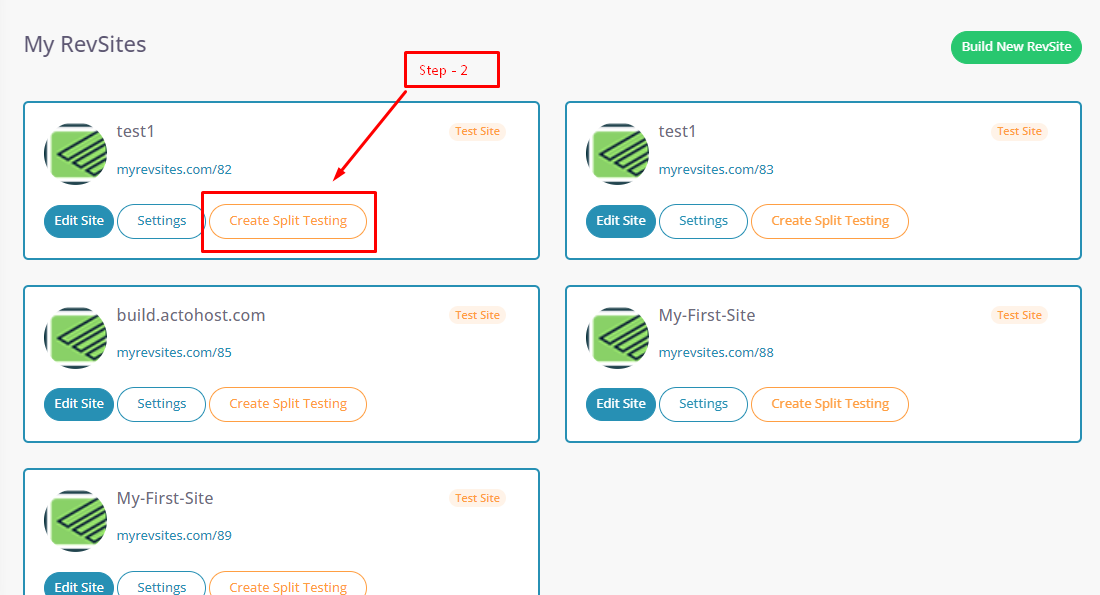
By clicking the Create New Split Test button you will get to a screen where you can create split tests for any of your sites.
On the next page you will get to setup your split test.
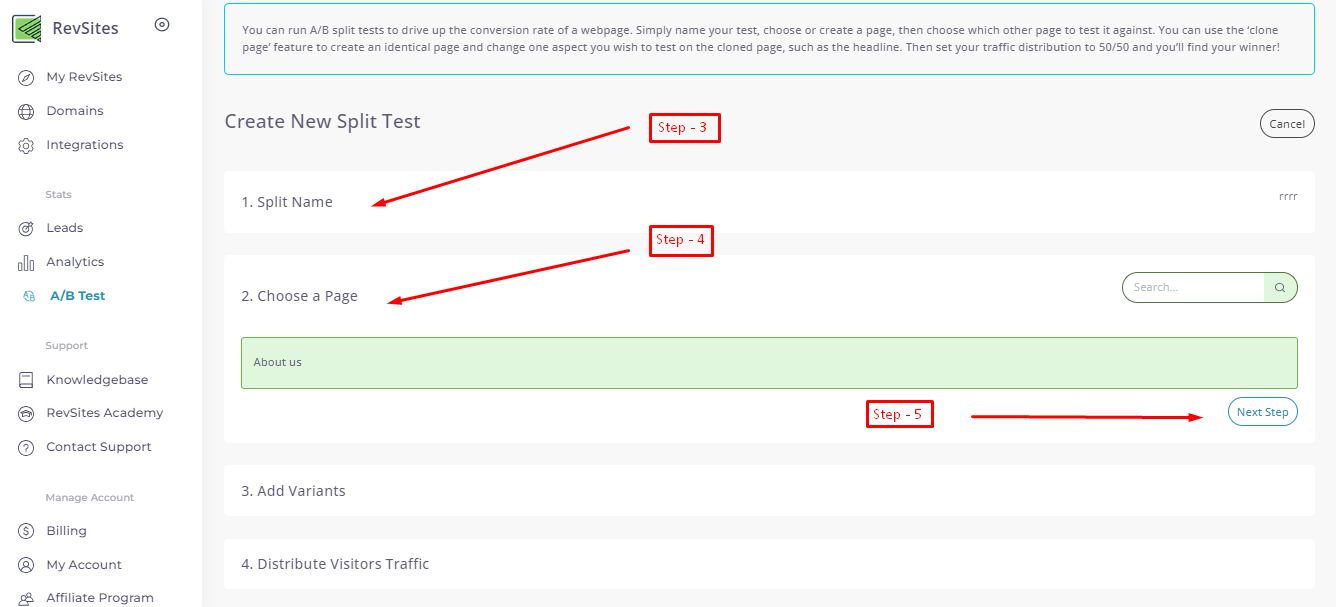
After, completeing the above steps you will need to complete the below steps to complete creating the split test.
Web Builder
Get to know about the RevSite Web Builder here.
Thank you so much for choosing our platform.
Introduction to Web Builder
To start building your page, you can choose between 2 ways:
- Start with templates.
- Start with sections.
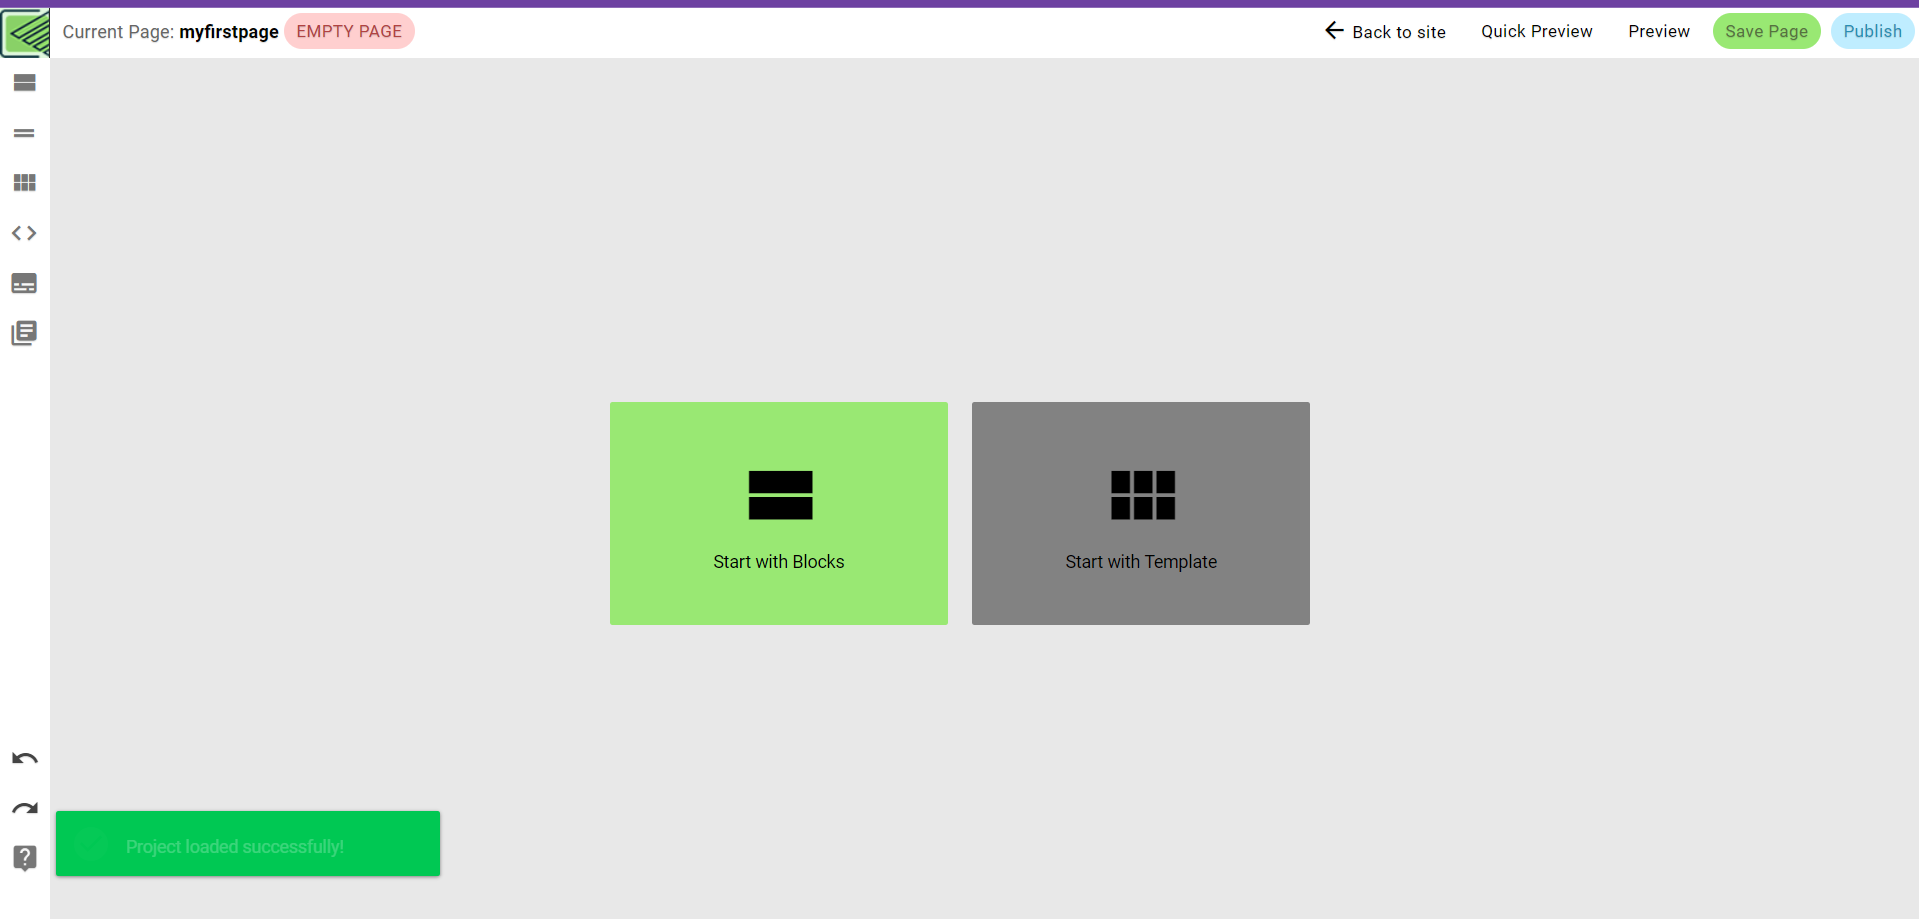
Template: You can choose any of our category based pre-designed template. Also, you can edit or customize the design as per your need using our web builder. No coding knowledge required.
Sections: By selecting "Start with Sections", you can design your page from the scratch level using Sections.
First it is good to know that:
Each Page contains Sections.
Each Section contains Elements.
An Element contains components.
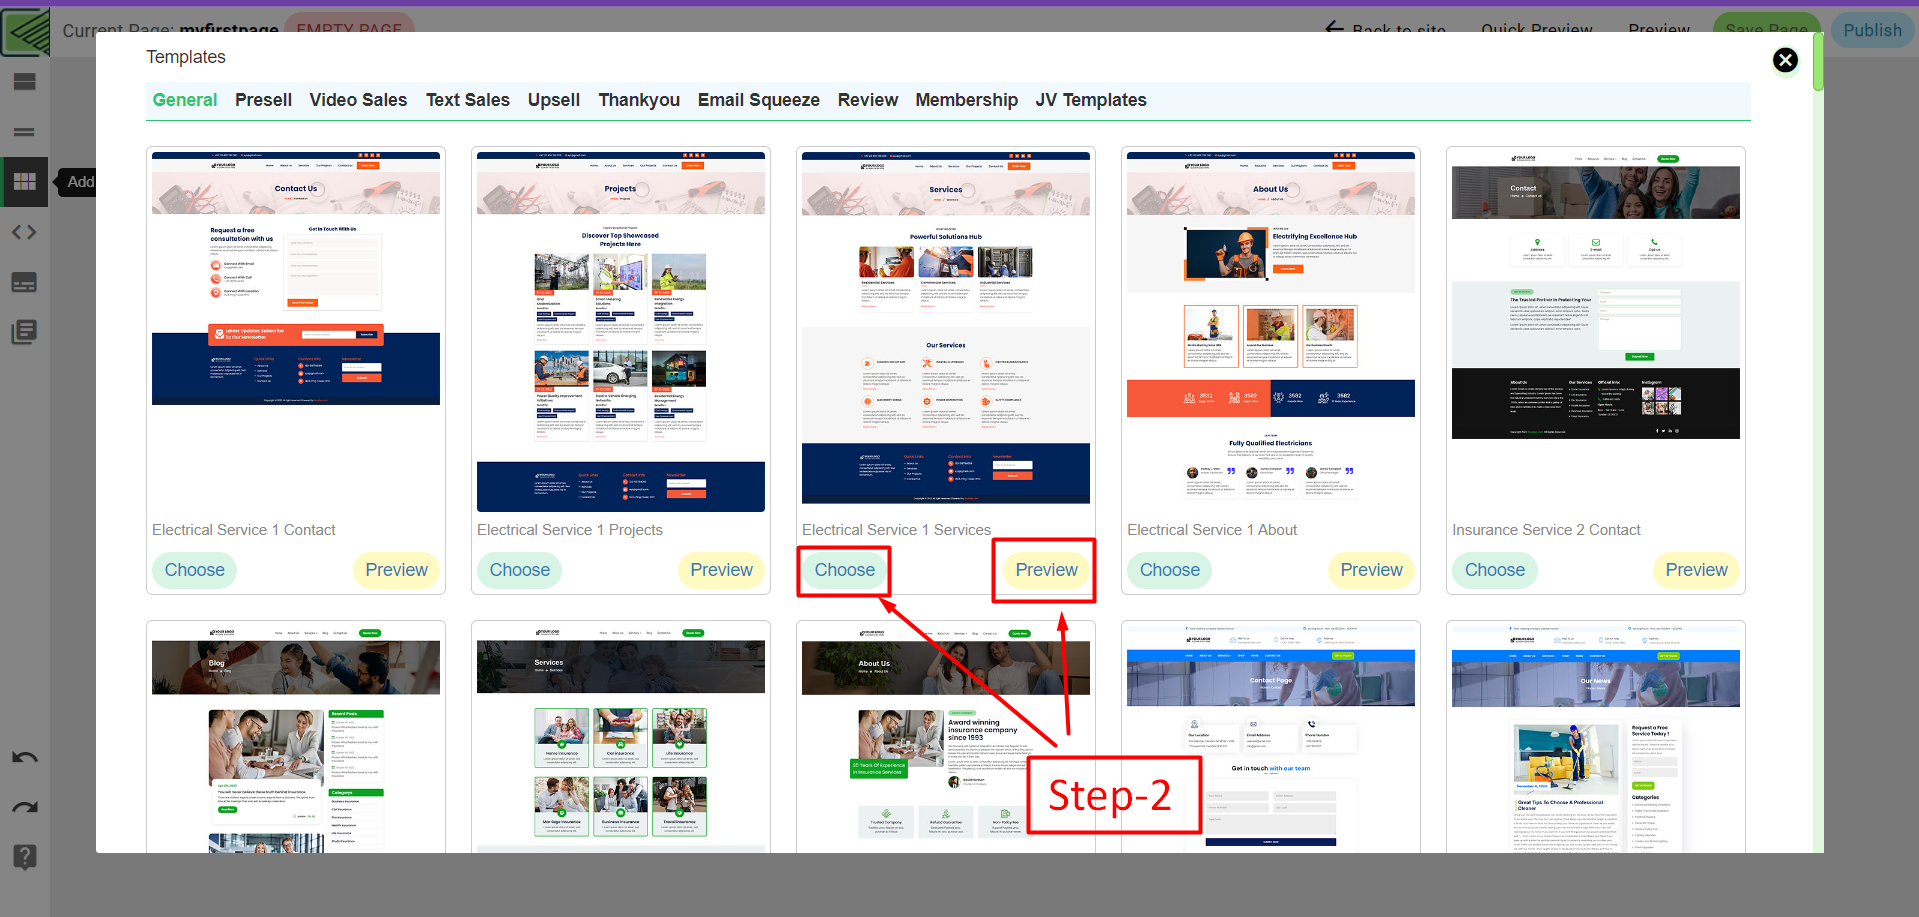
Get Started
You can choose template here. You have to click on "Choose a Template".
There are various type of template here. Such as: General, Presell, Video Sales, Text Sales, Upsell, Thankyou, Email Squeeze, Review, Membership, JV Templates.

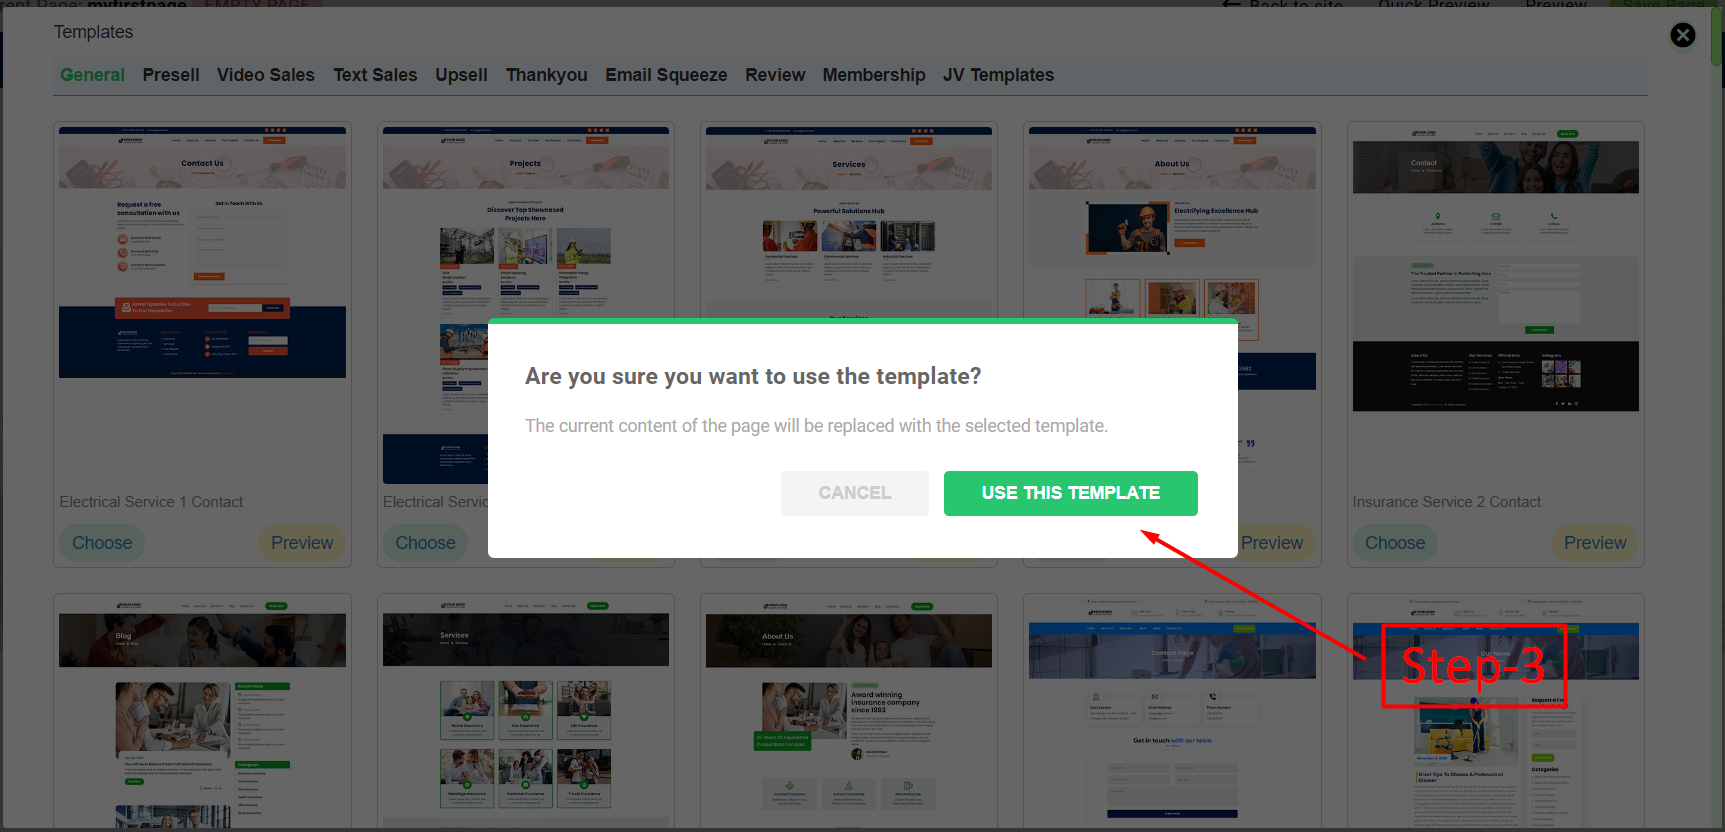
You can preview and choose any of them.
Once you have selected your preferred template, you can now incorporate additional blocks according to your requirements.
You will get to see different types of blocks under the block menu.
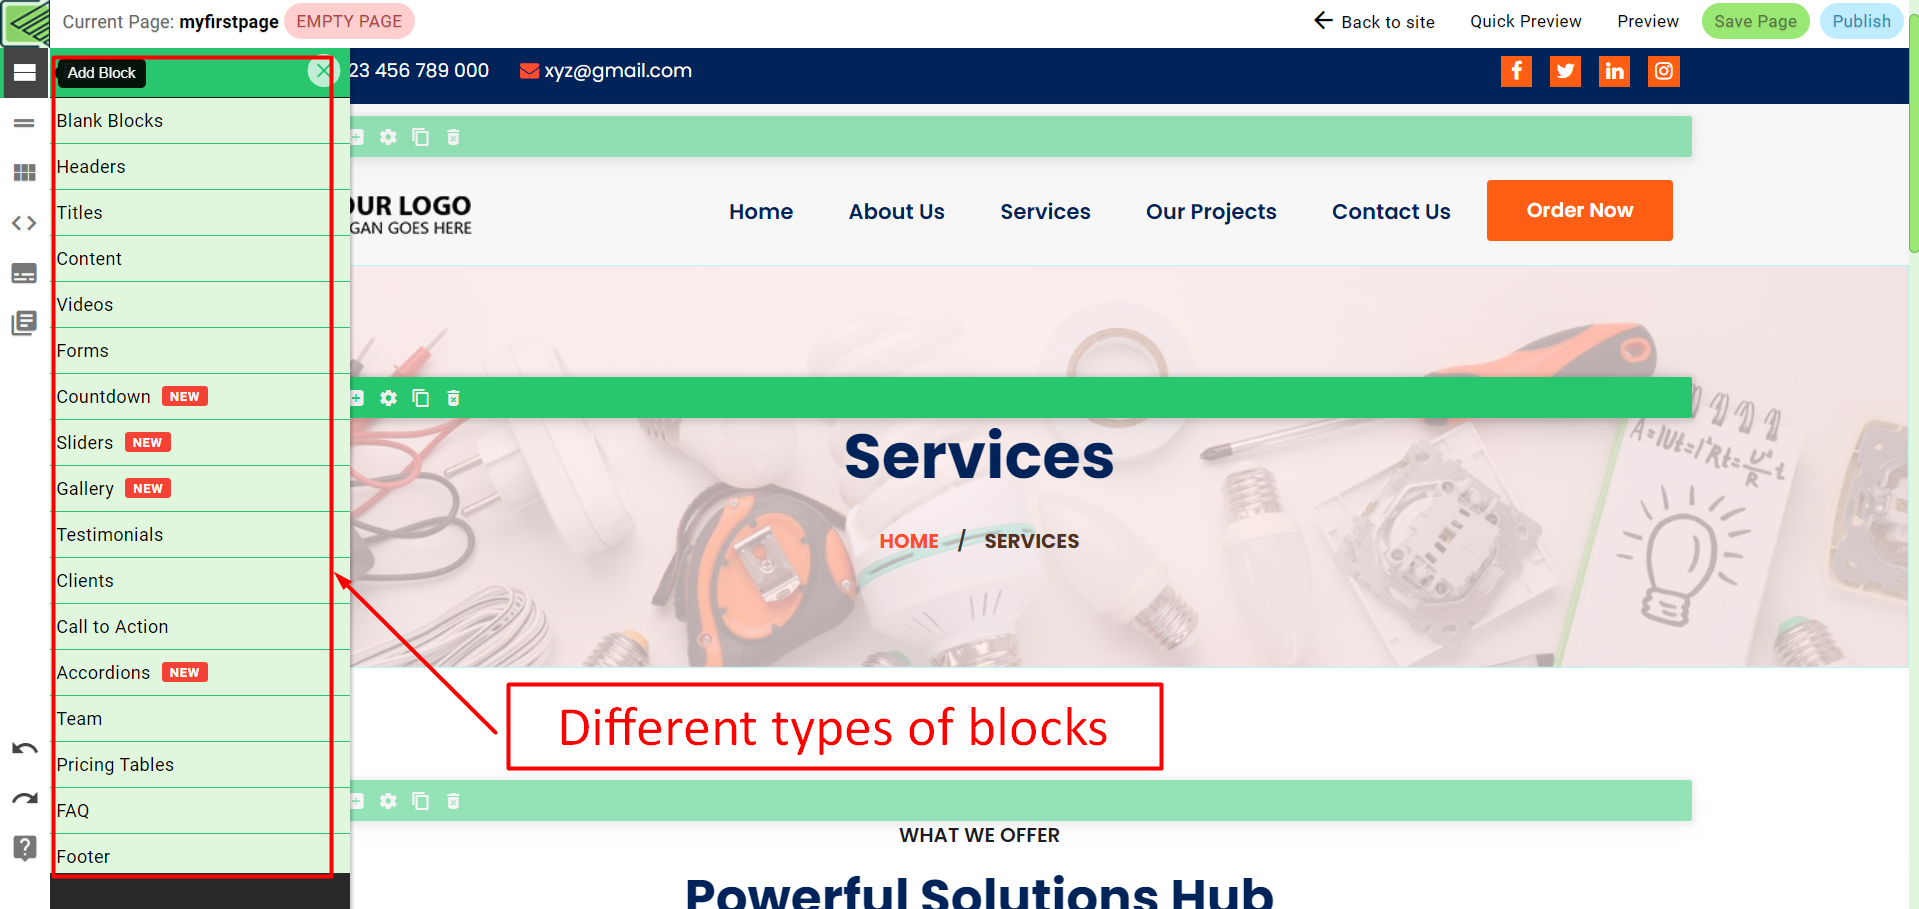
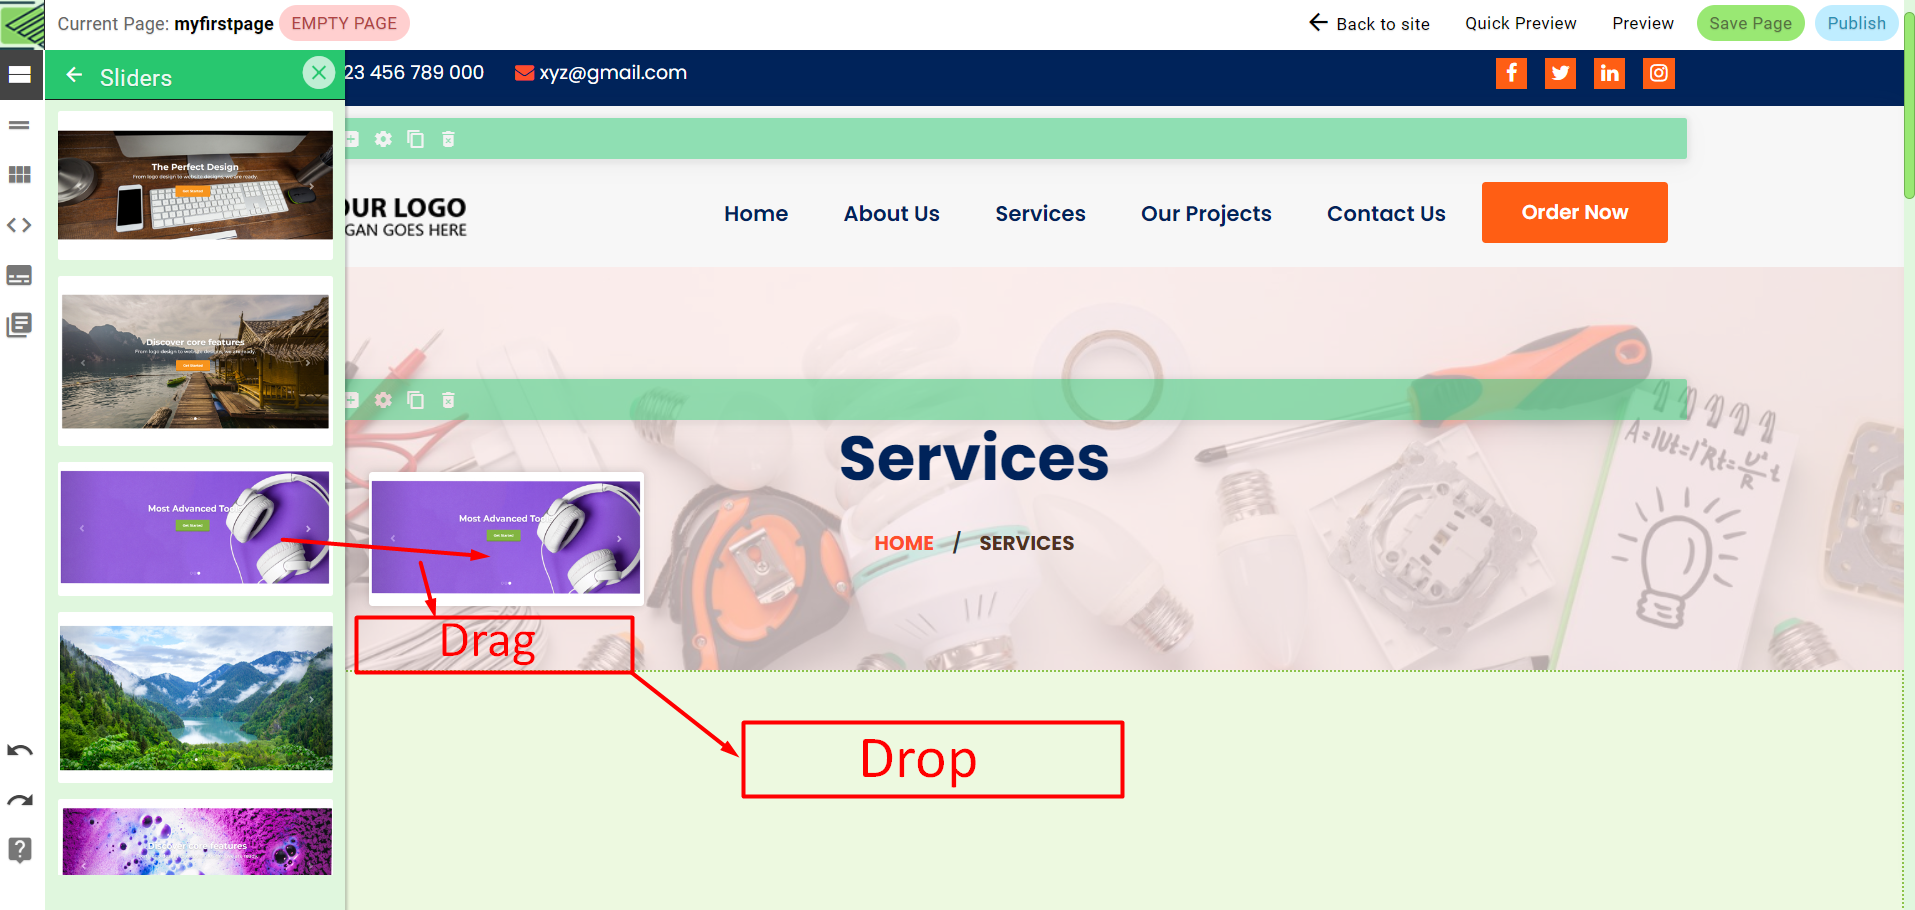
You just need to click on the block types you need to add then choose the template of your block and then just drag and drop it on to your page.
Also, you can "Start With Section" and then add the necessary blocks on them.
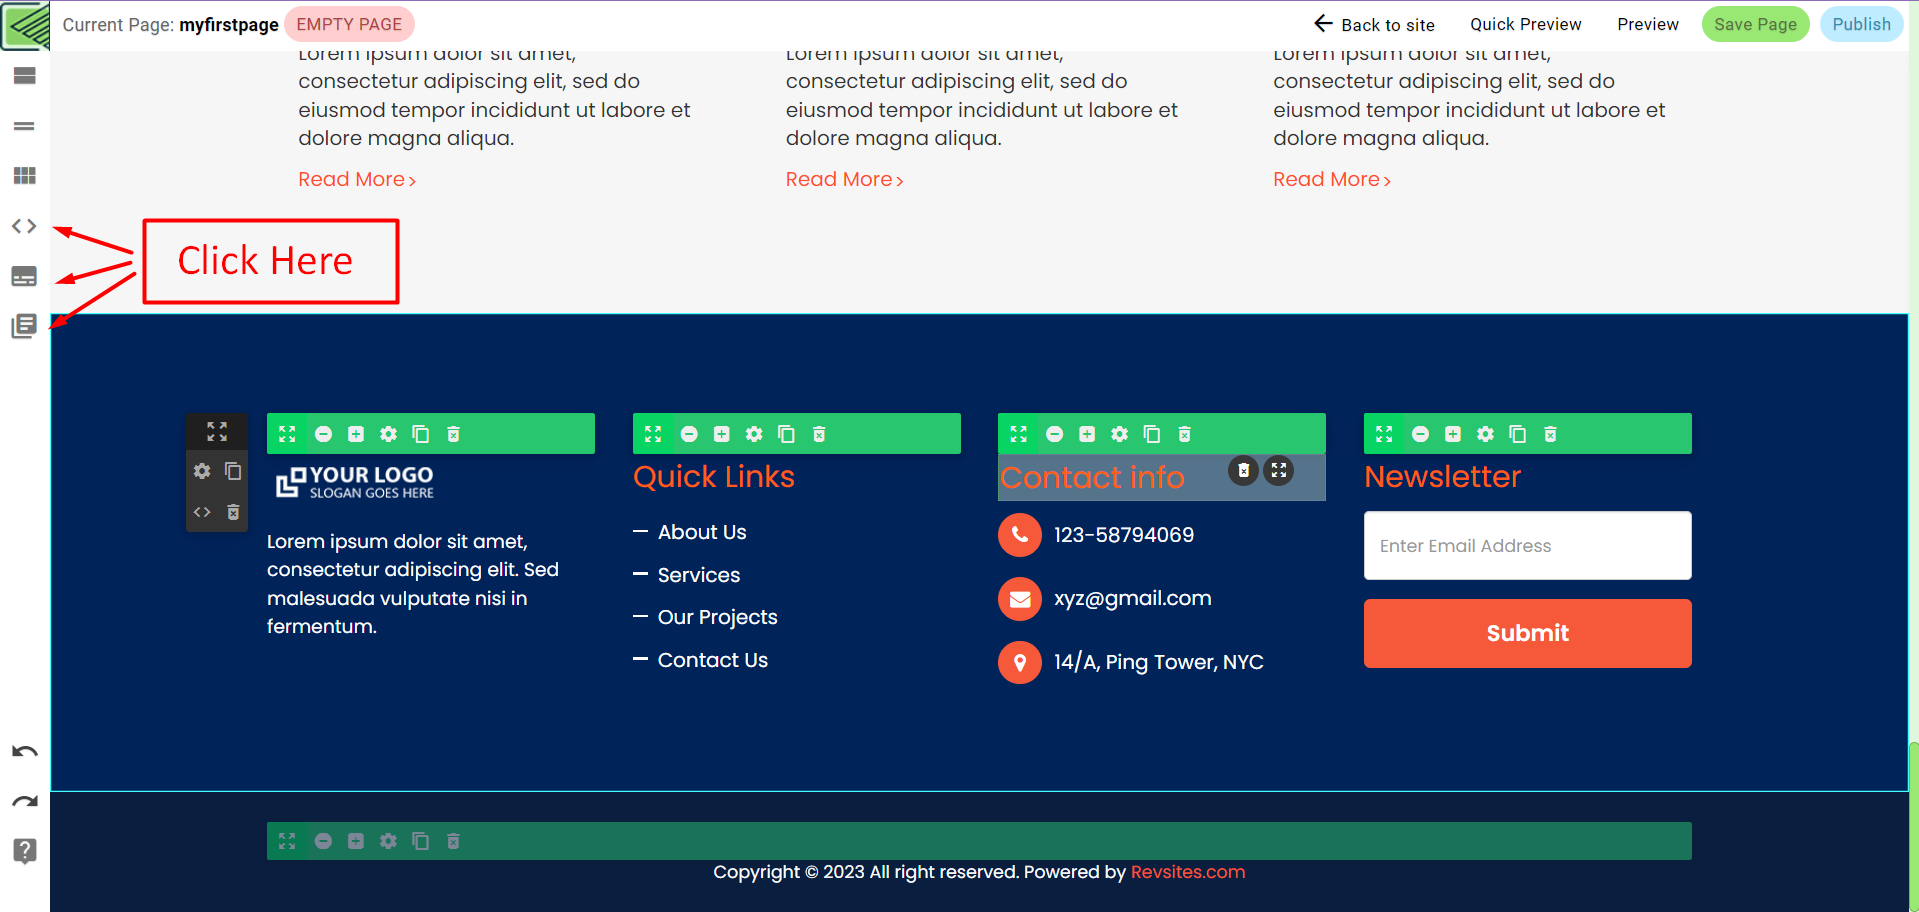
Here you can add the below things as well:
- Source Code
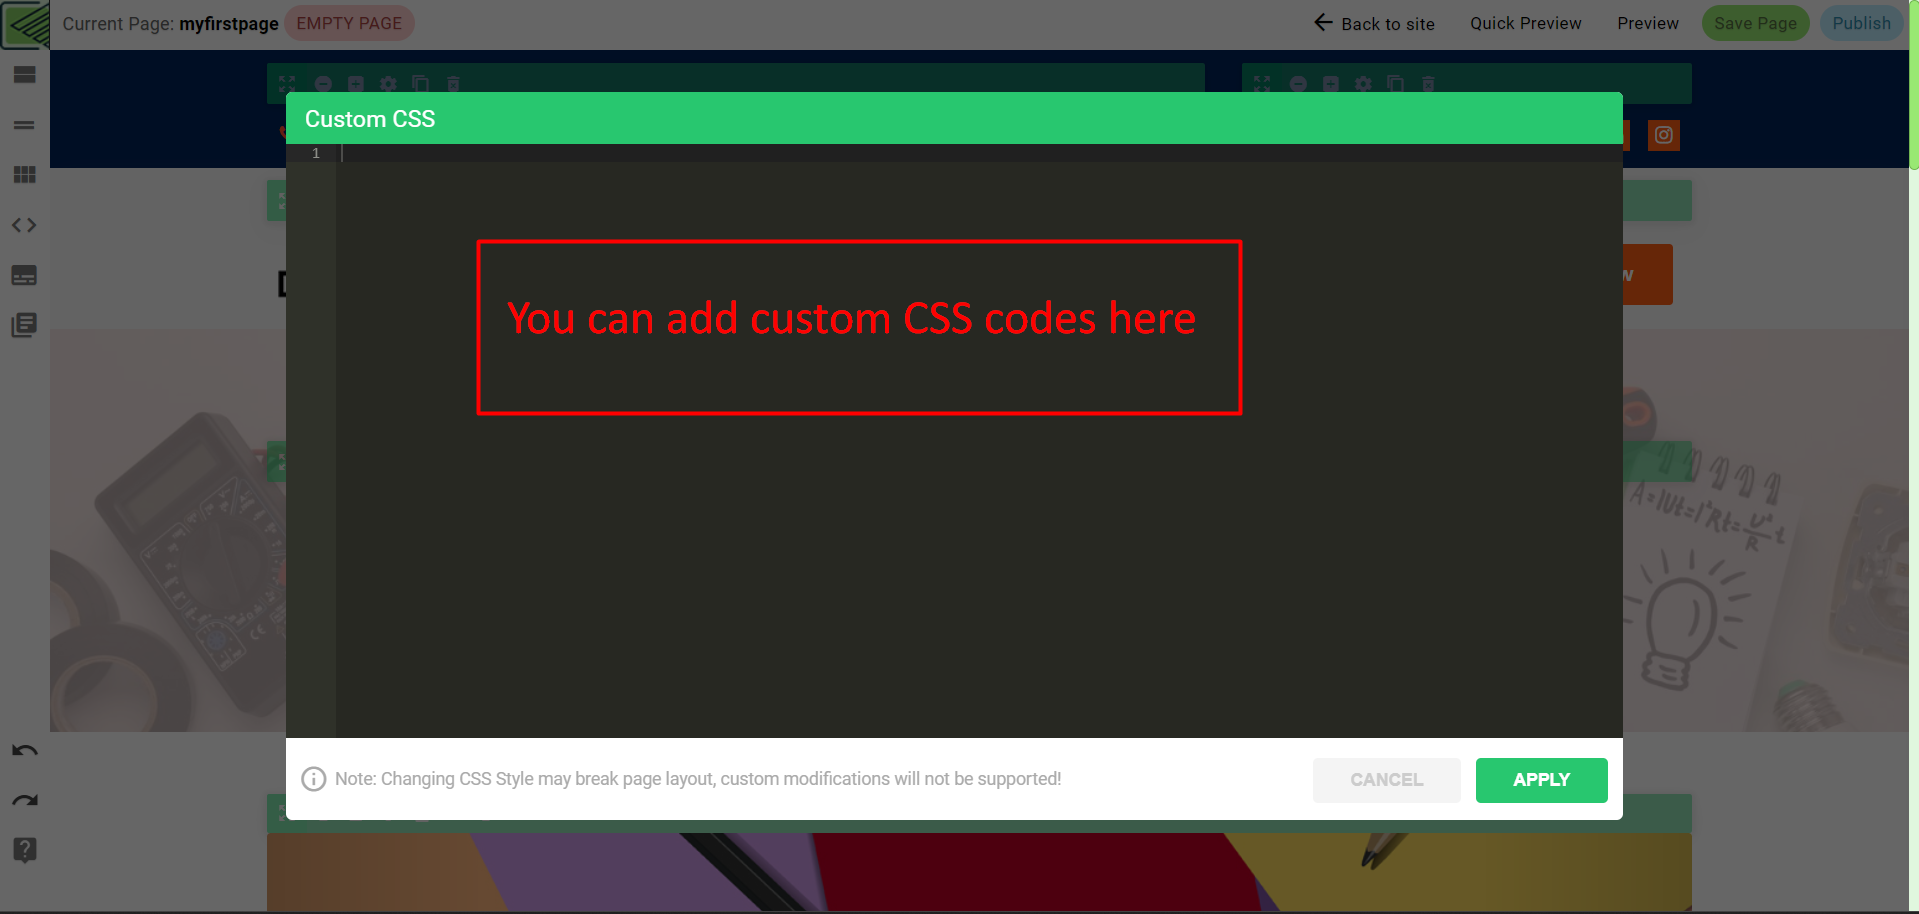
- Custom CSS
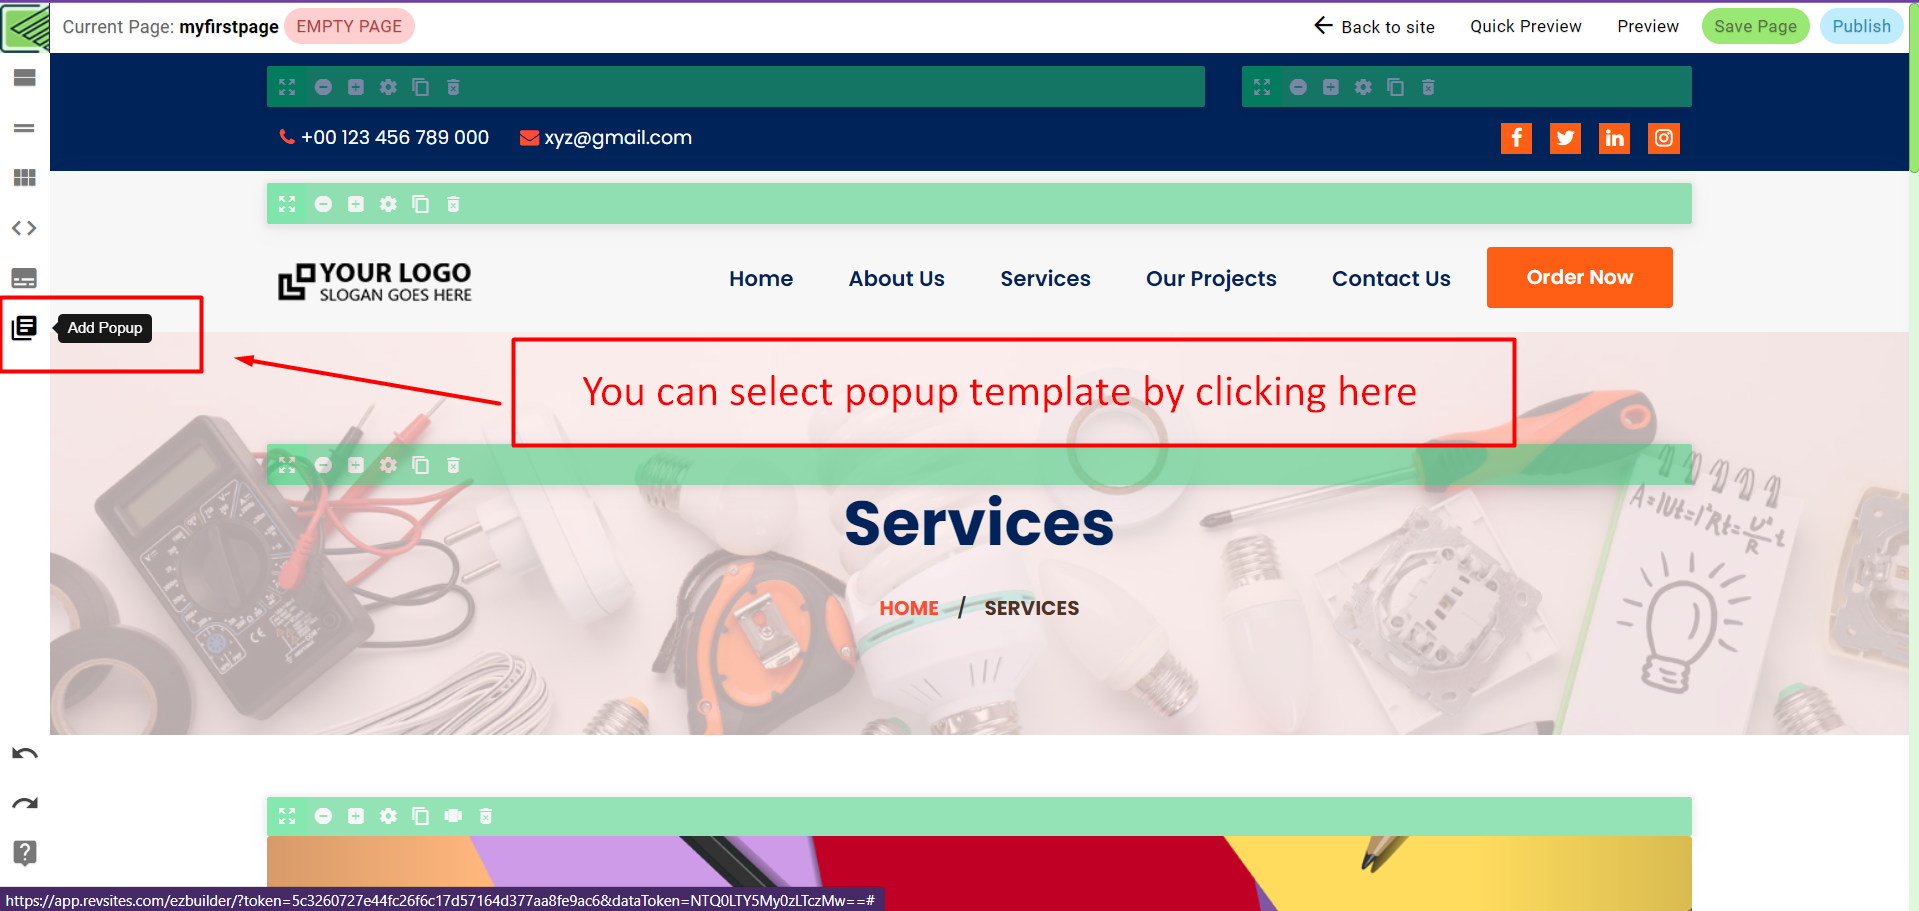
- Popups
Manage Page
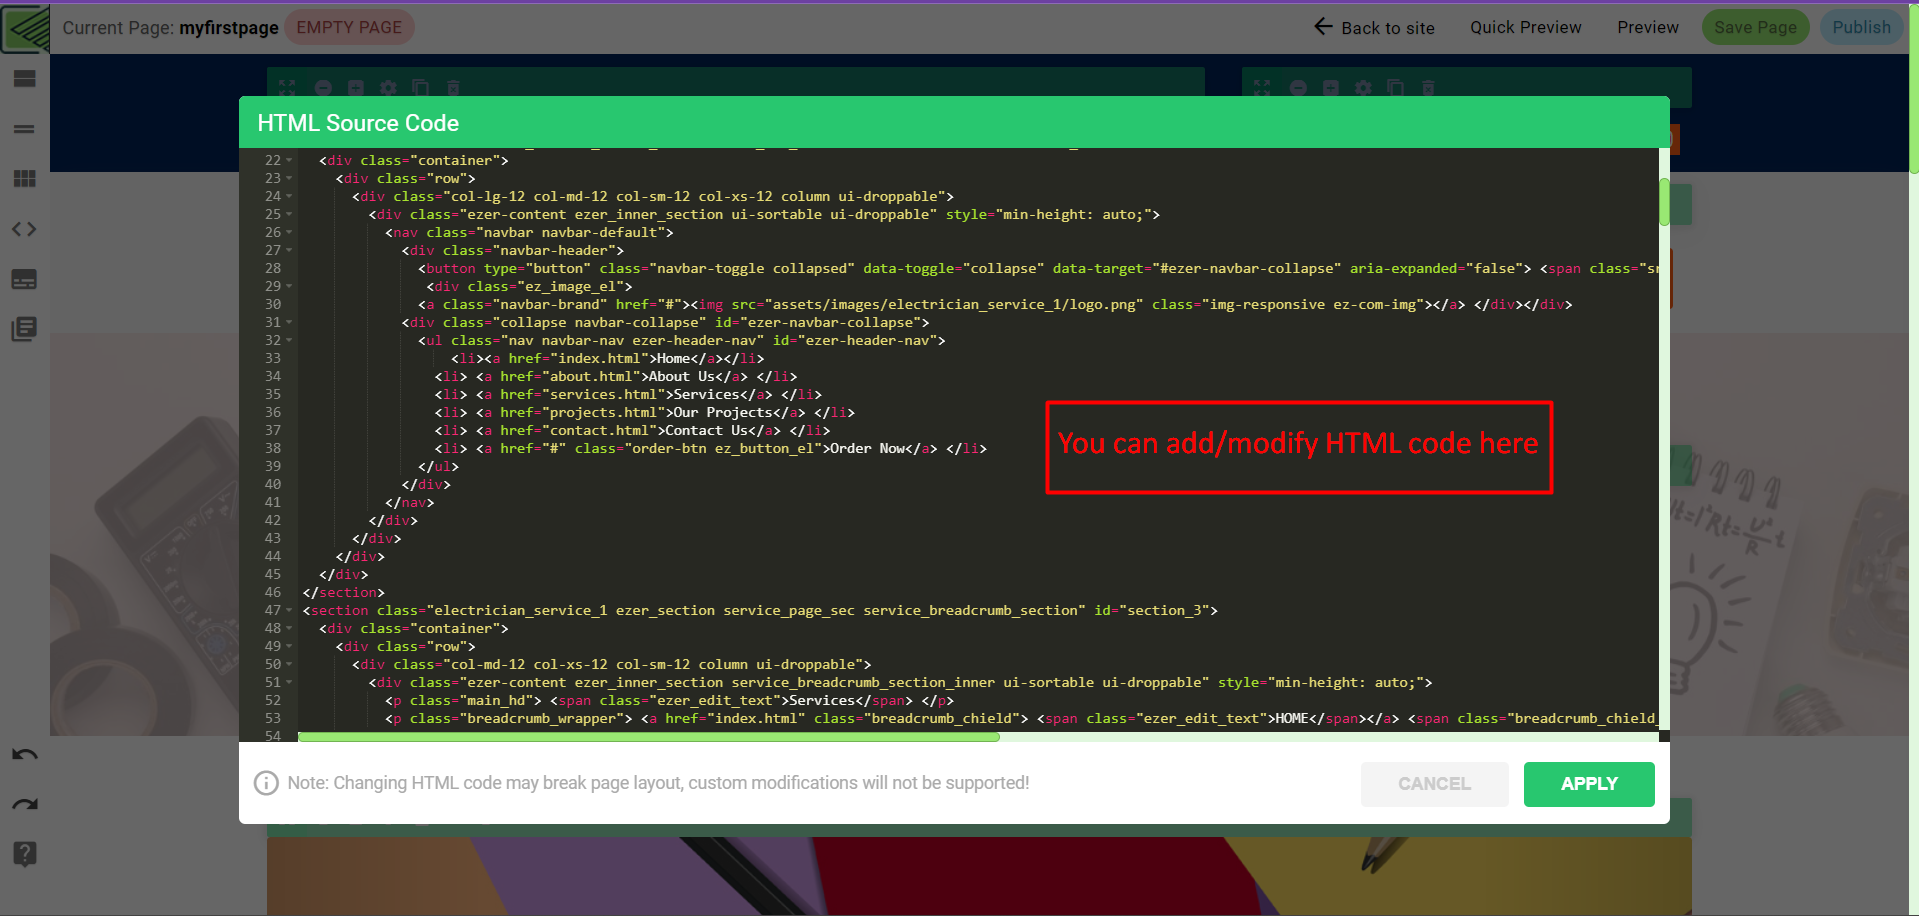
You can add custom Source Code here.
To change page width you can insert this snippet code in the CSS editor inside the builder.
Popups:
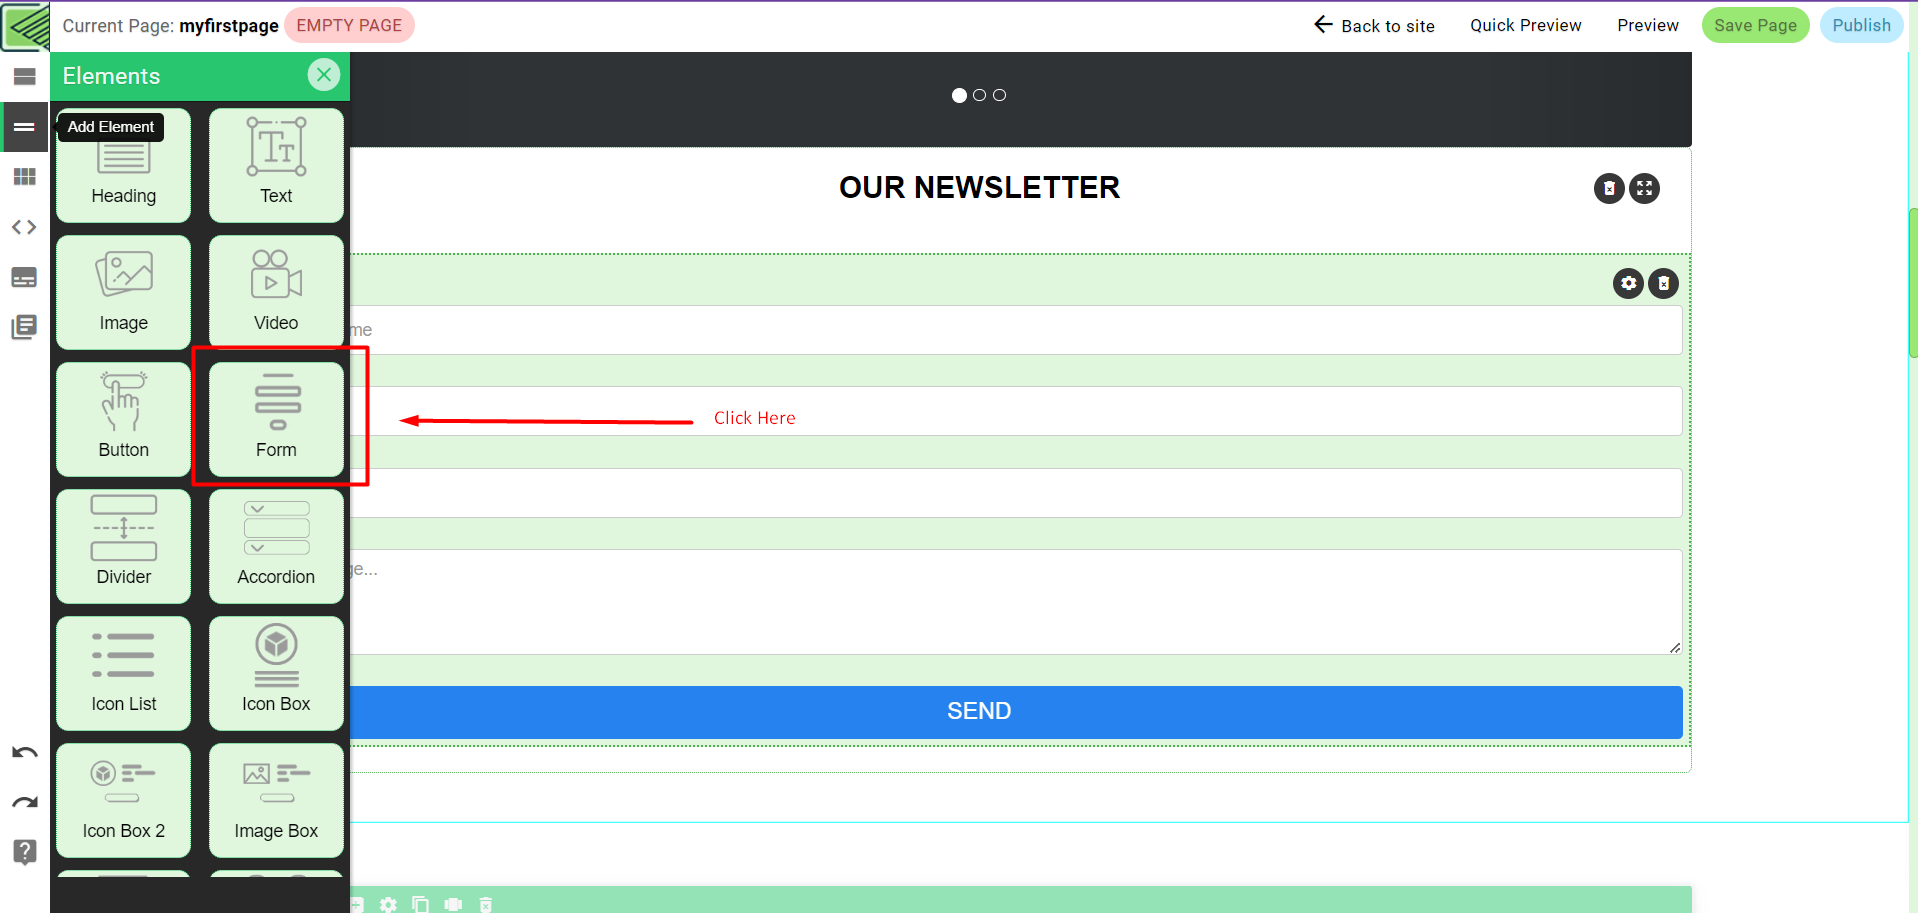
Create Form
Edit forms and add new fields:
Editing forms via Form Builder is very simple and easy, to edit a form on your page just click on the Message icon in the element’s blue bar which contains the form.
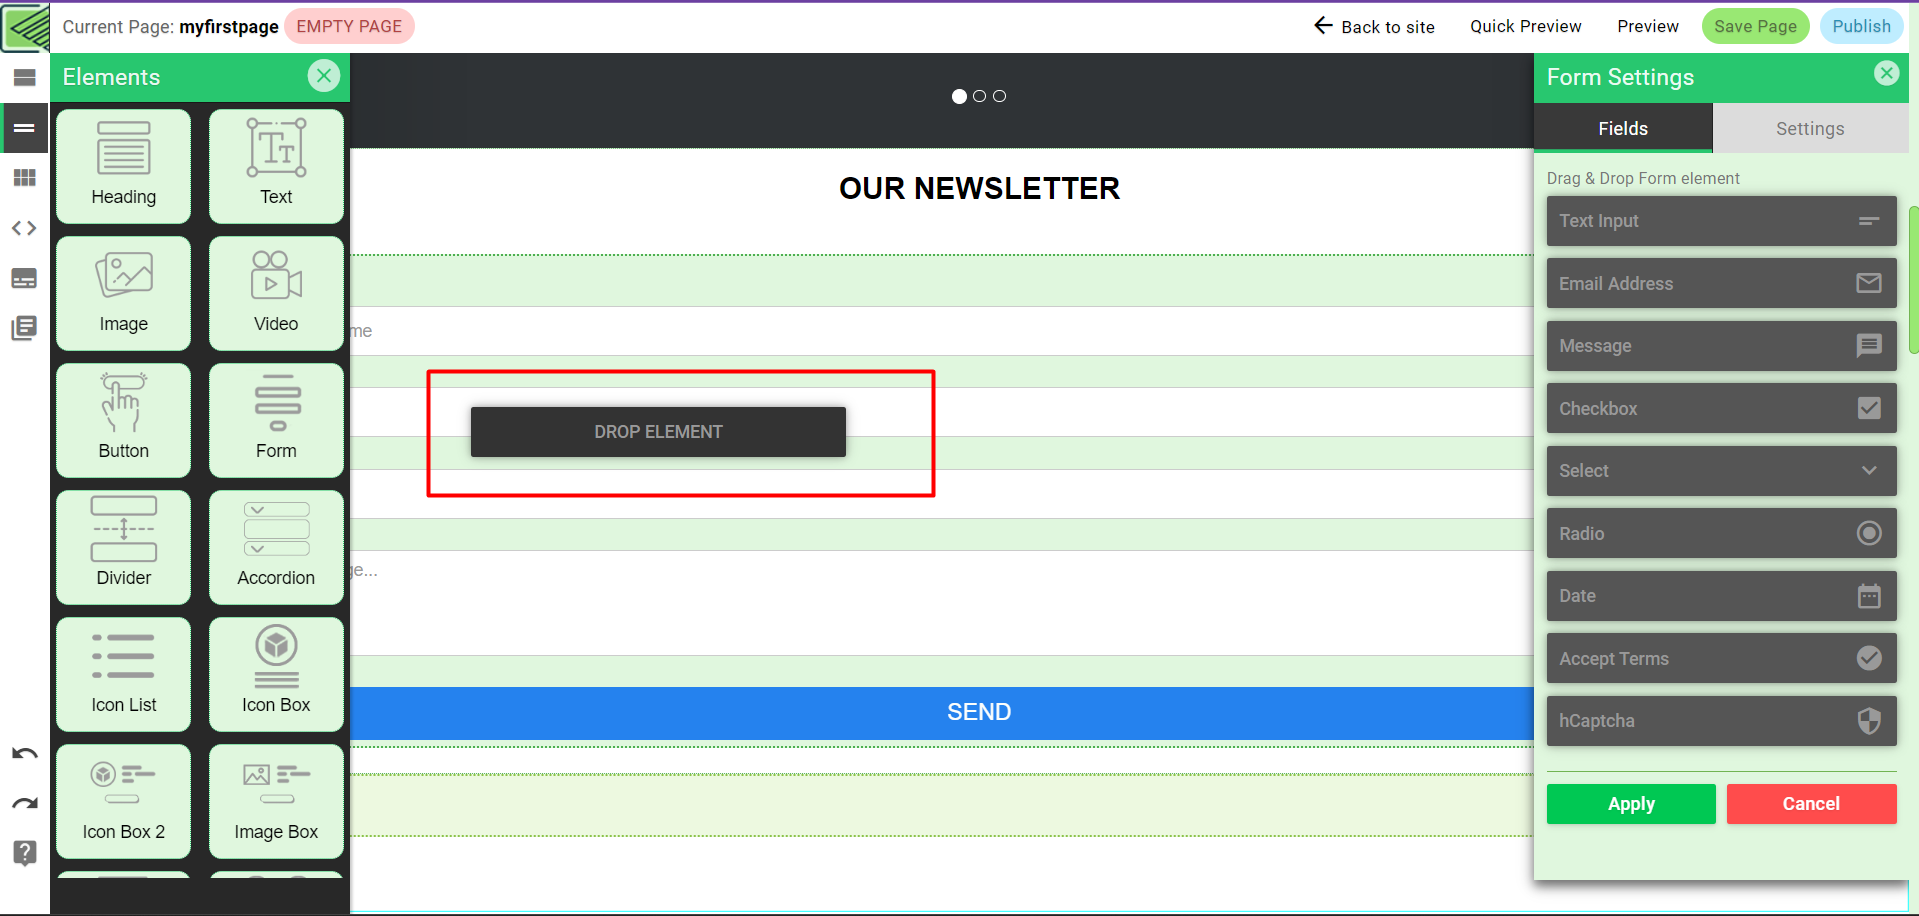
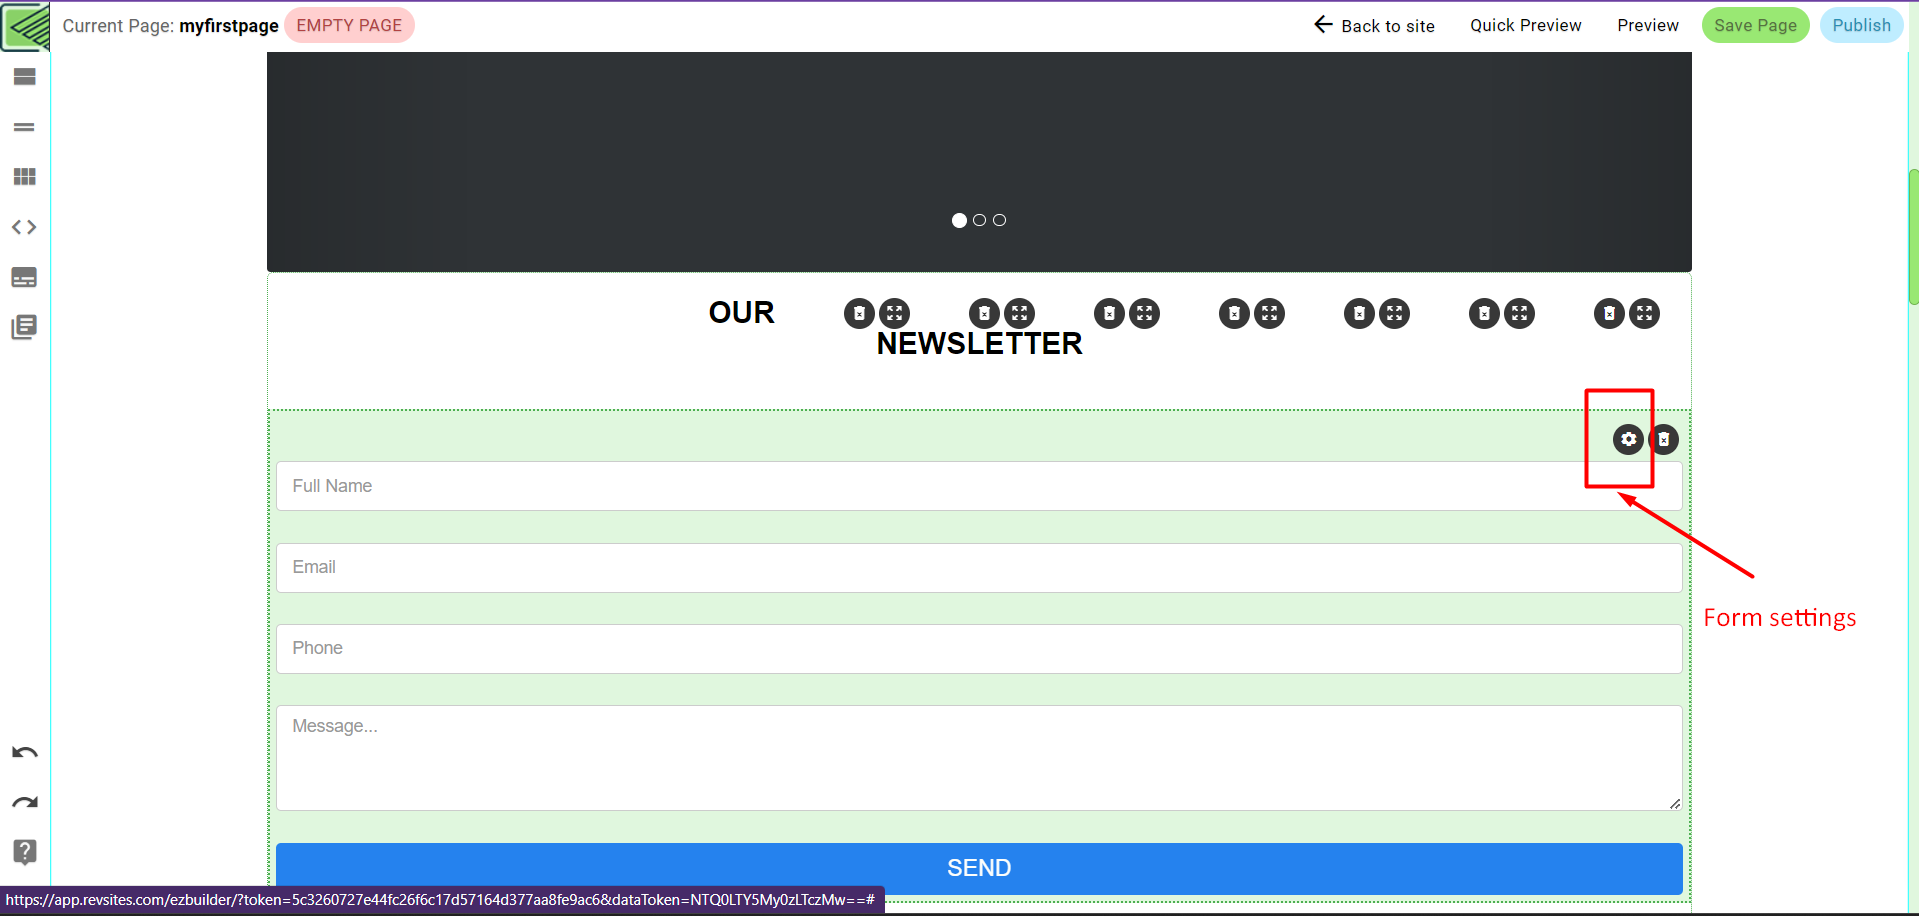
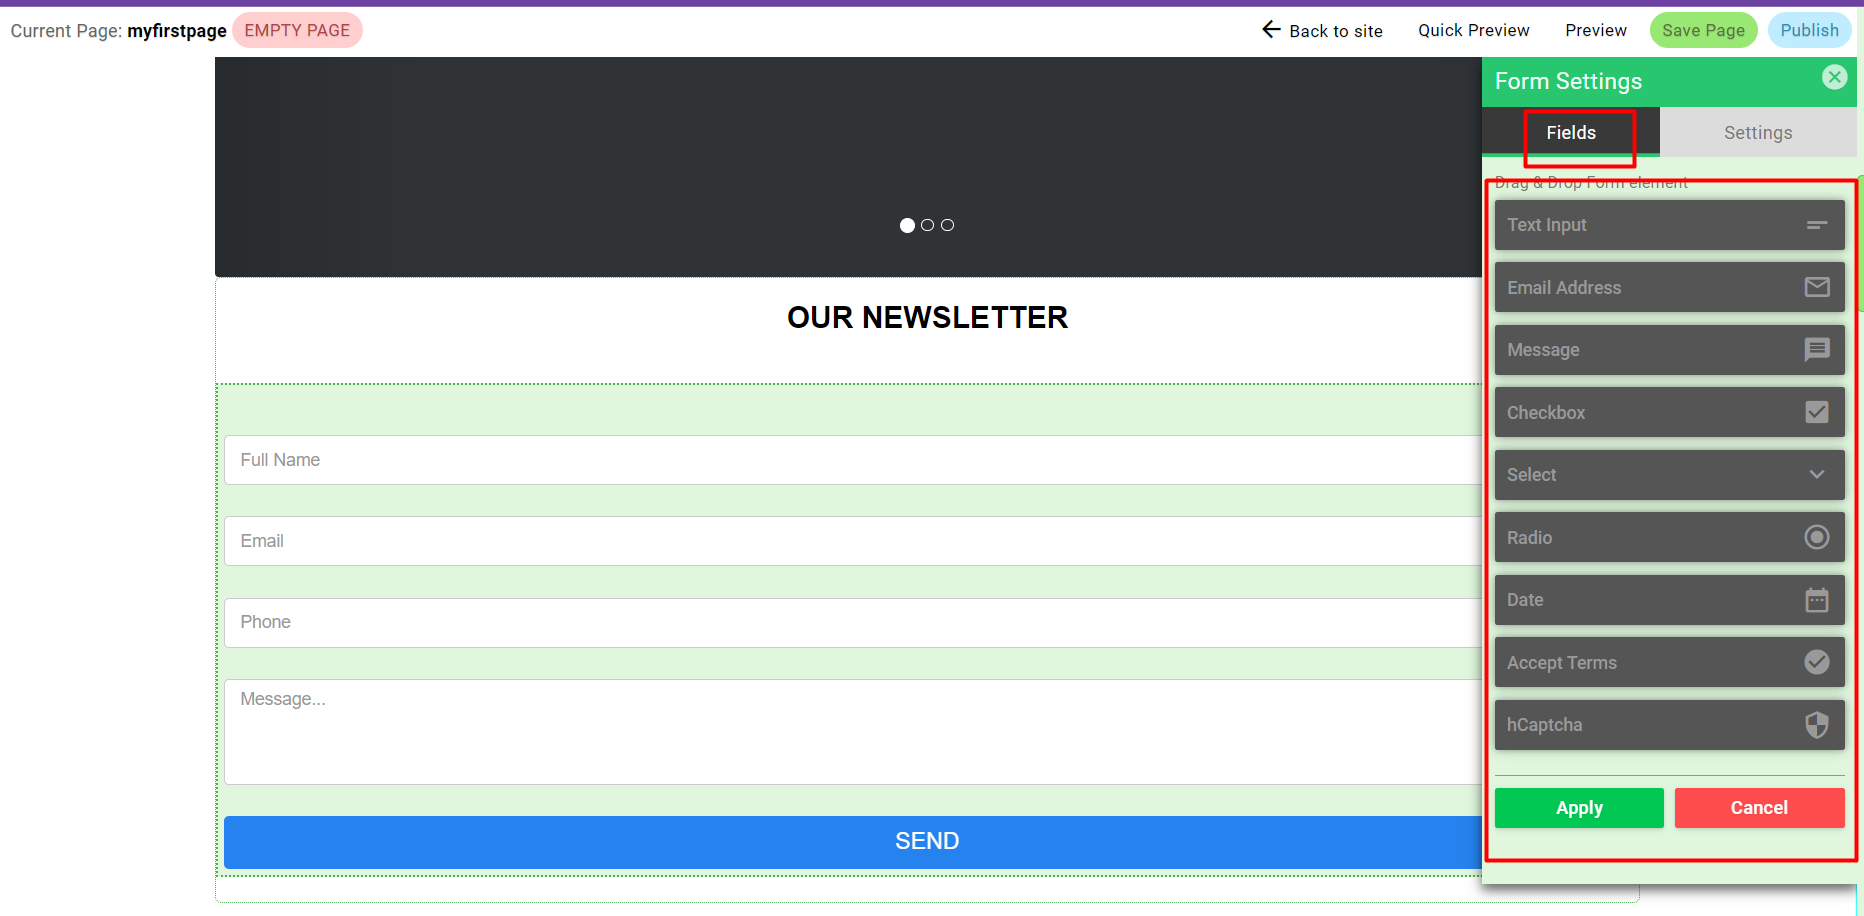
Then the settings panel will appear on the right of screen, the settings contains:
Fields: from this tab you can drag and drop new fields to your form.
Settings: from this tab you can choose a confirmation popup, add a redirect link, choose form type (custom email or a specific email marketing service) and enter list ID.
If you choose to add an email marketing service to your form (via settings tab), don’t forget to set up the integration from your RevSites Manager page.
You can check this article from integration page.
To see the options of a field in your form, just put the mouse on the fields and the options will appear:
With these options you can:
Change field order.
Edit field’s parameter (name, placeholder, required…).
Under the settings of the Form element you will get more options like the screenshot below:
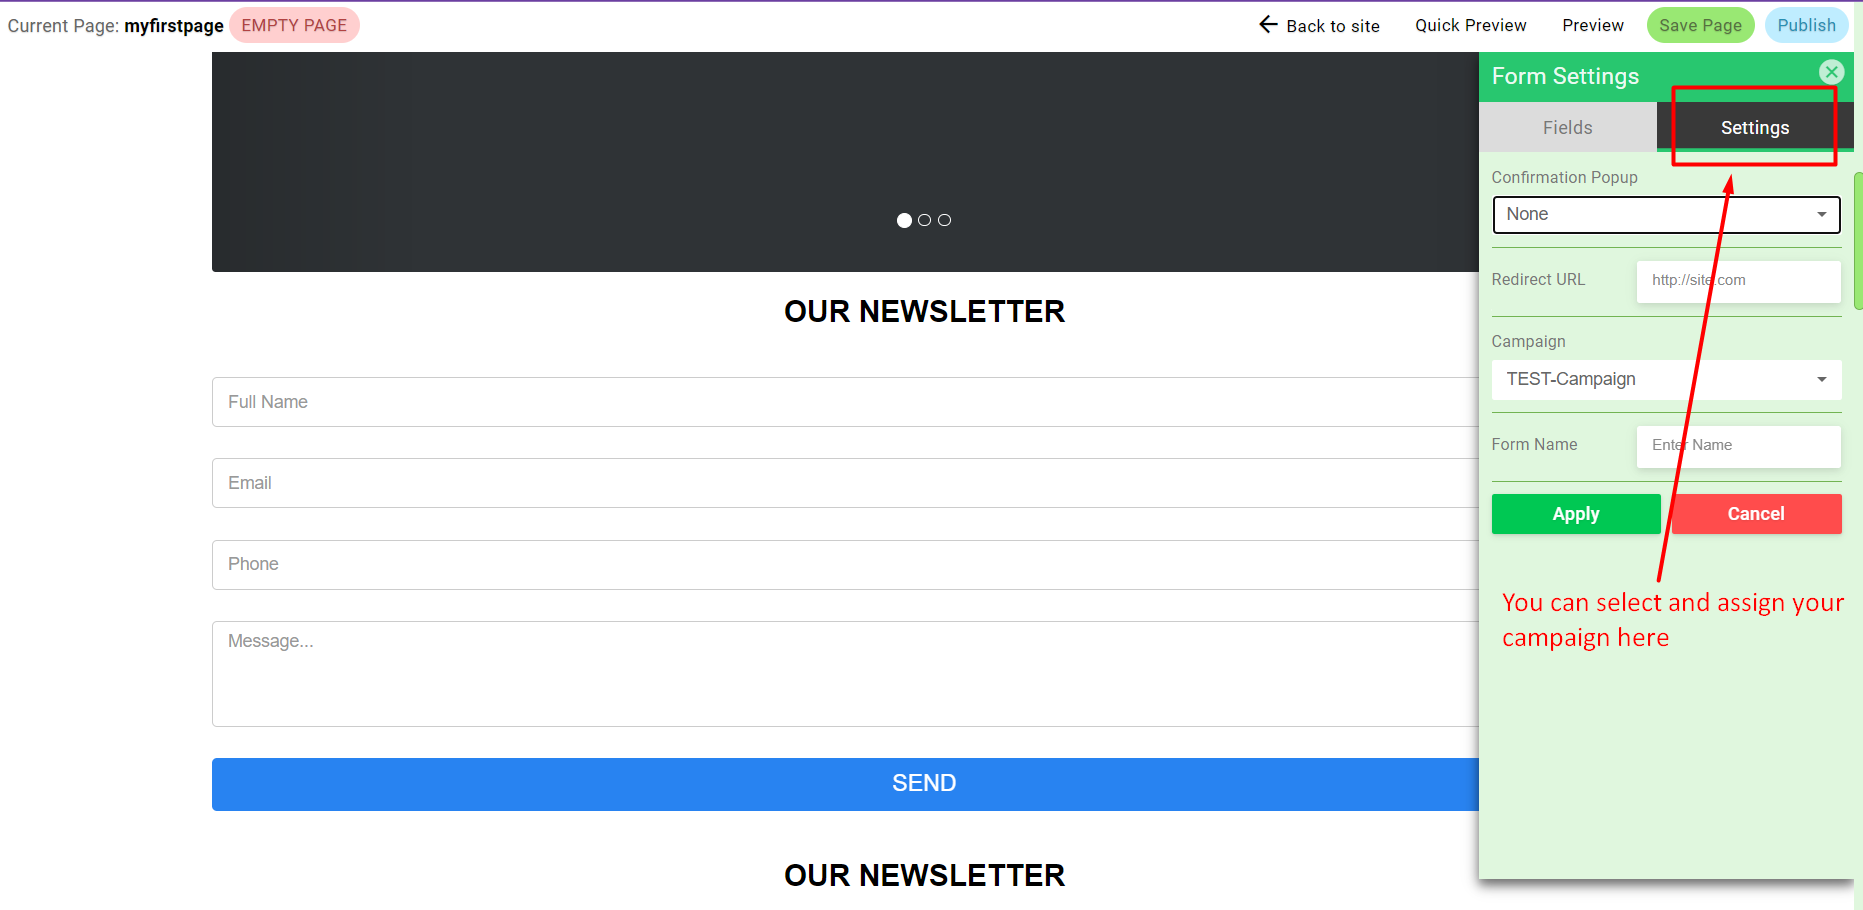
You can select and add the campaign that you need to assign on this form.
To know more about the campaign setup in RevSites Click Here
Popup Builder
Learn how to add popups to your page:
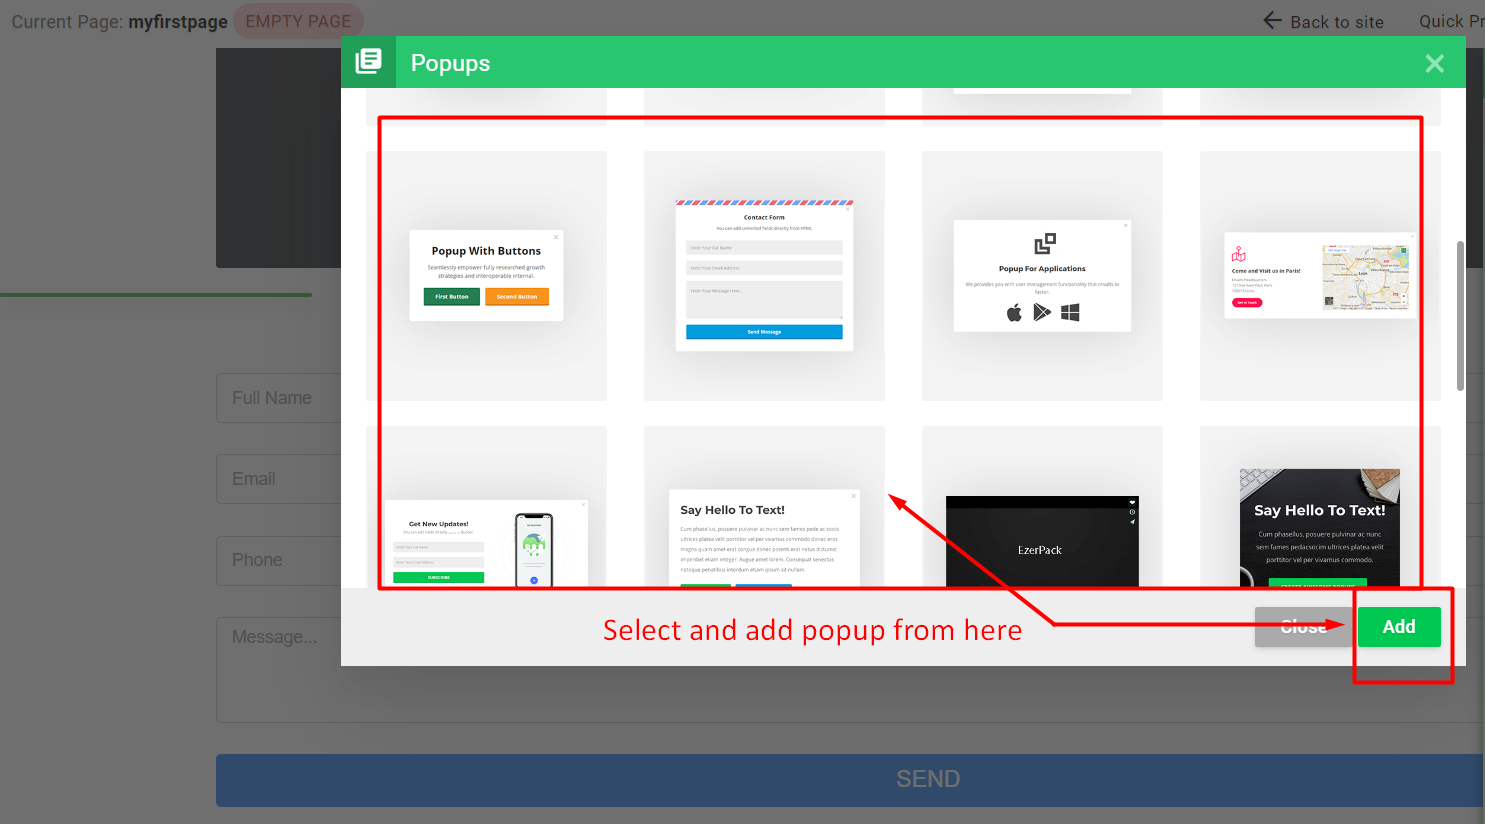
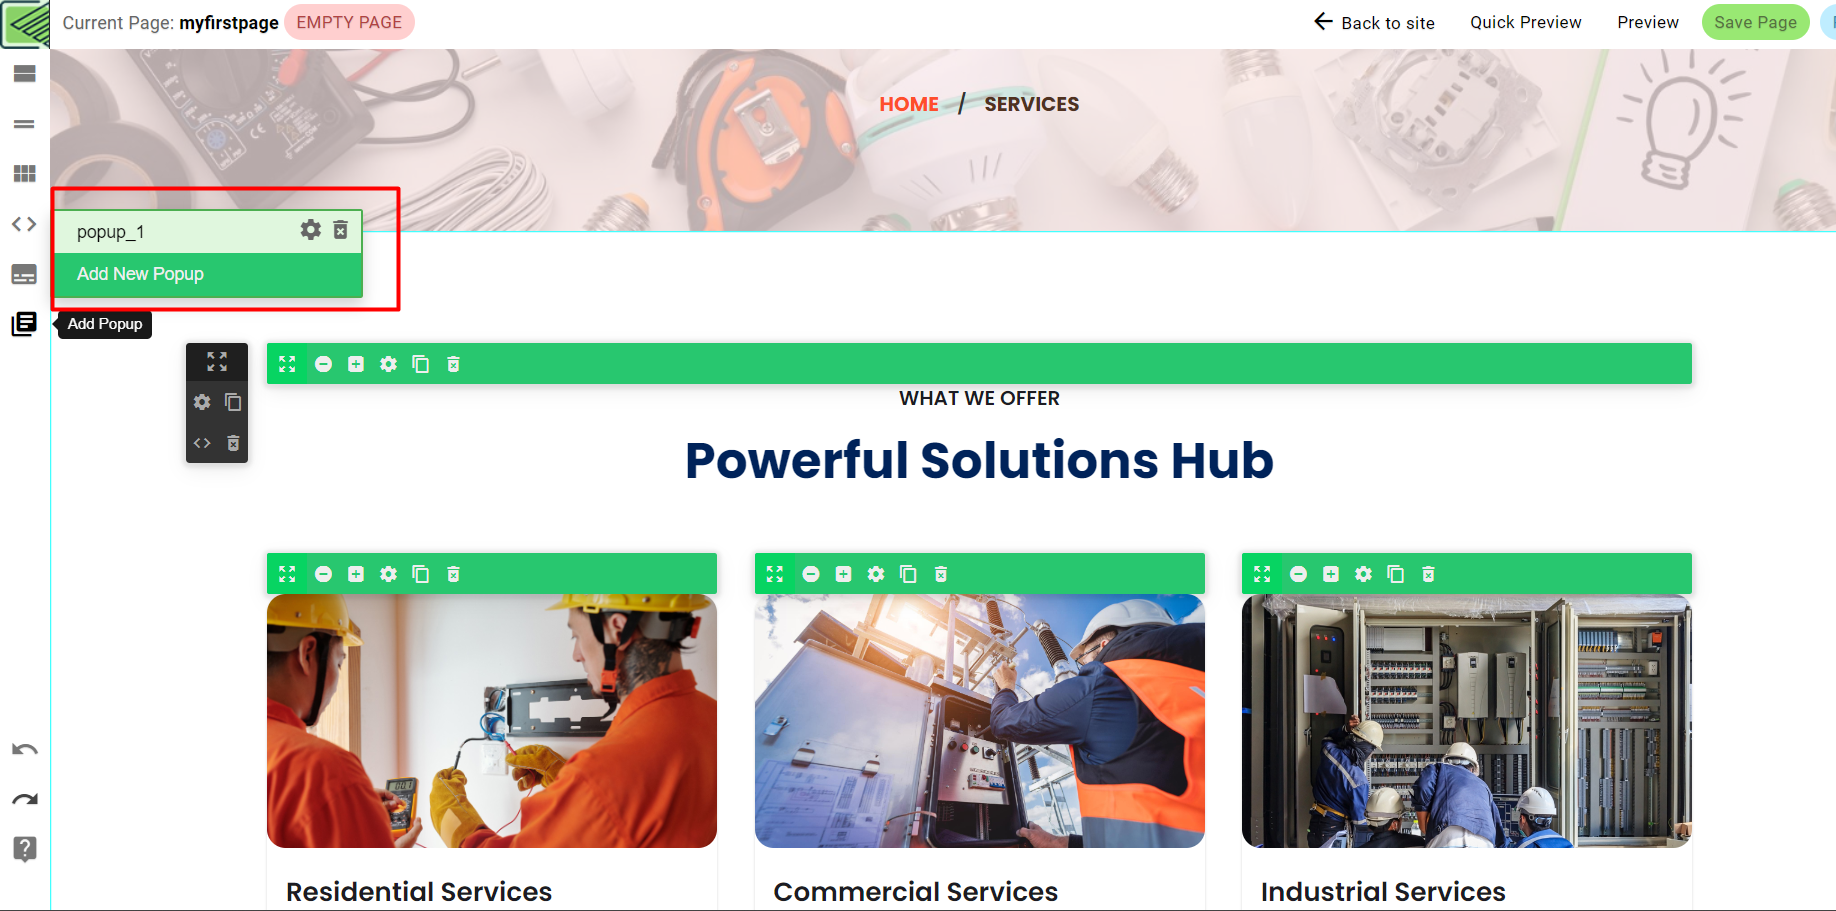
Adding popups via popup builder is very easy, to select a popup click on the Popups button in the bottom bar of the builder.
Then the popups window will appear and you can choose which popup you want to add to you page.
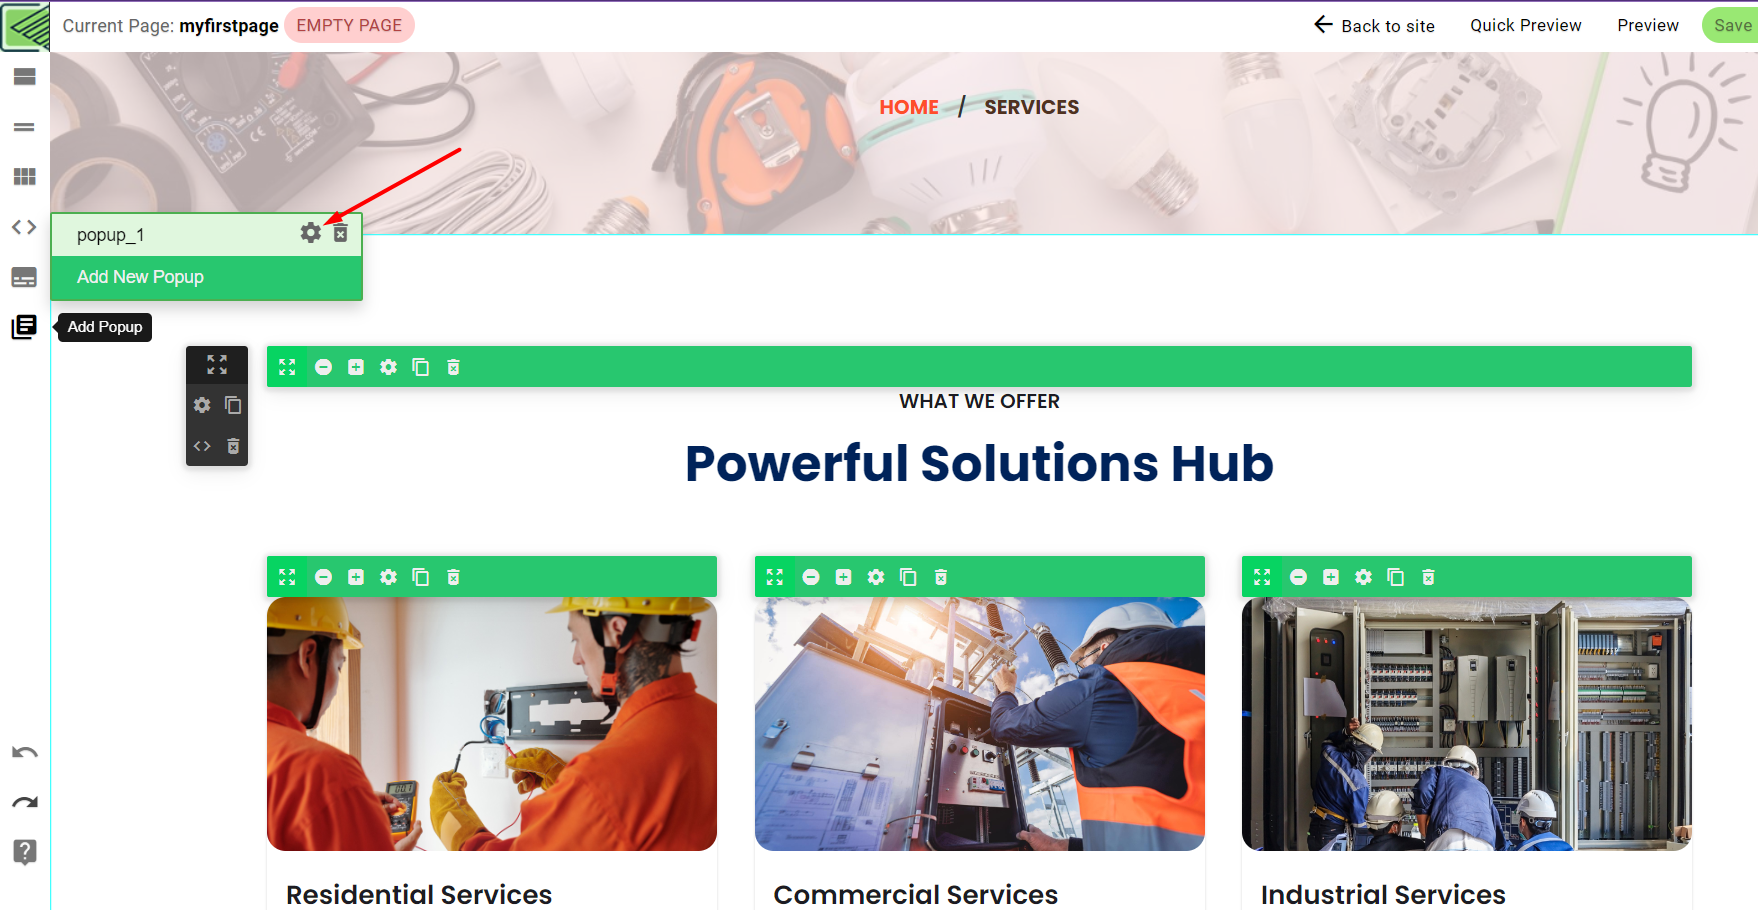
After adding a popup you can via the Popups button:
- Open the popup by clicking on it.
- Access to its settings by click in settings icon.
- Delete the popup.
- You can also add new popups to your page!
Automatic Popups
Learn how to set automatic popups:
To set a popup to appears automatically after loading the page, open popup settings then choose Advanced tab, then choose the duration from Automatic Popup.
Then,
Edit Menu
Learn how to create your custom menu:
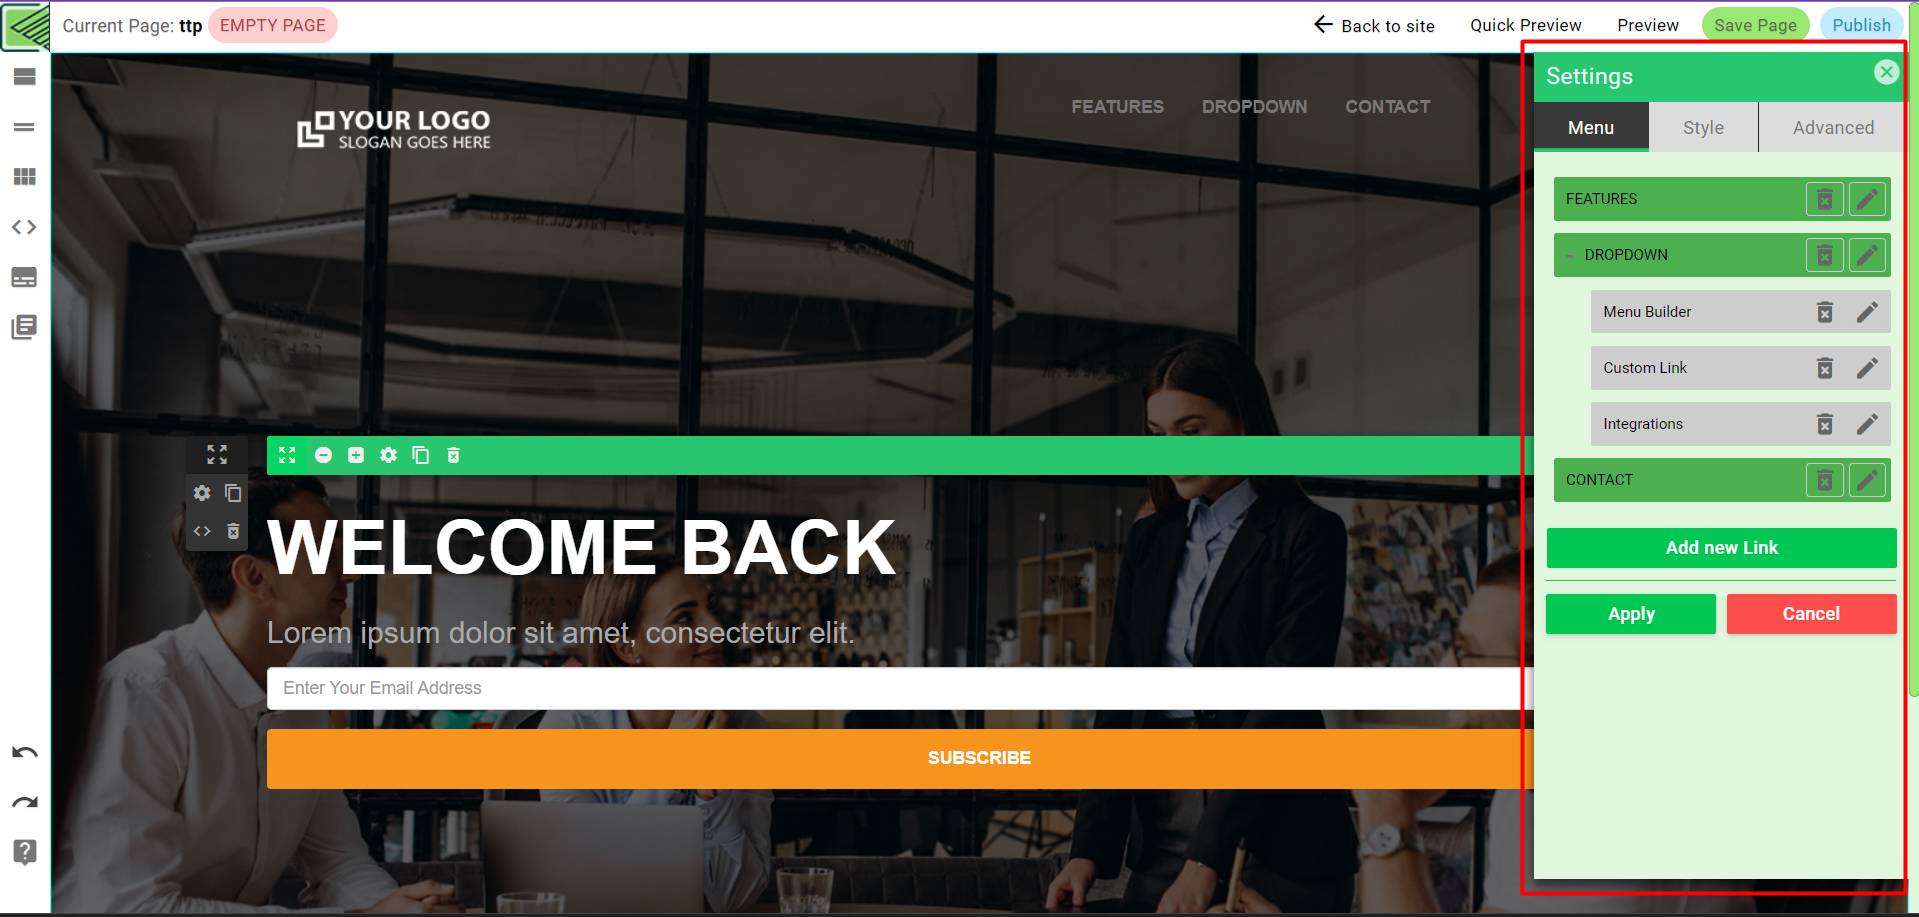
To open menu settings, click on header’s settings icon, then from the settings panel (menu tab) you can customize and modify the links in your menu.
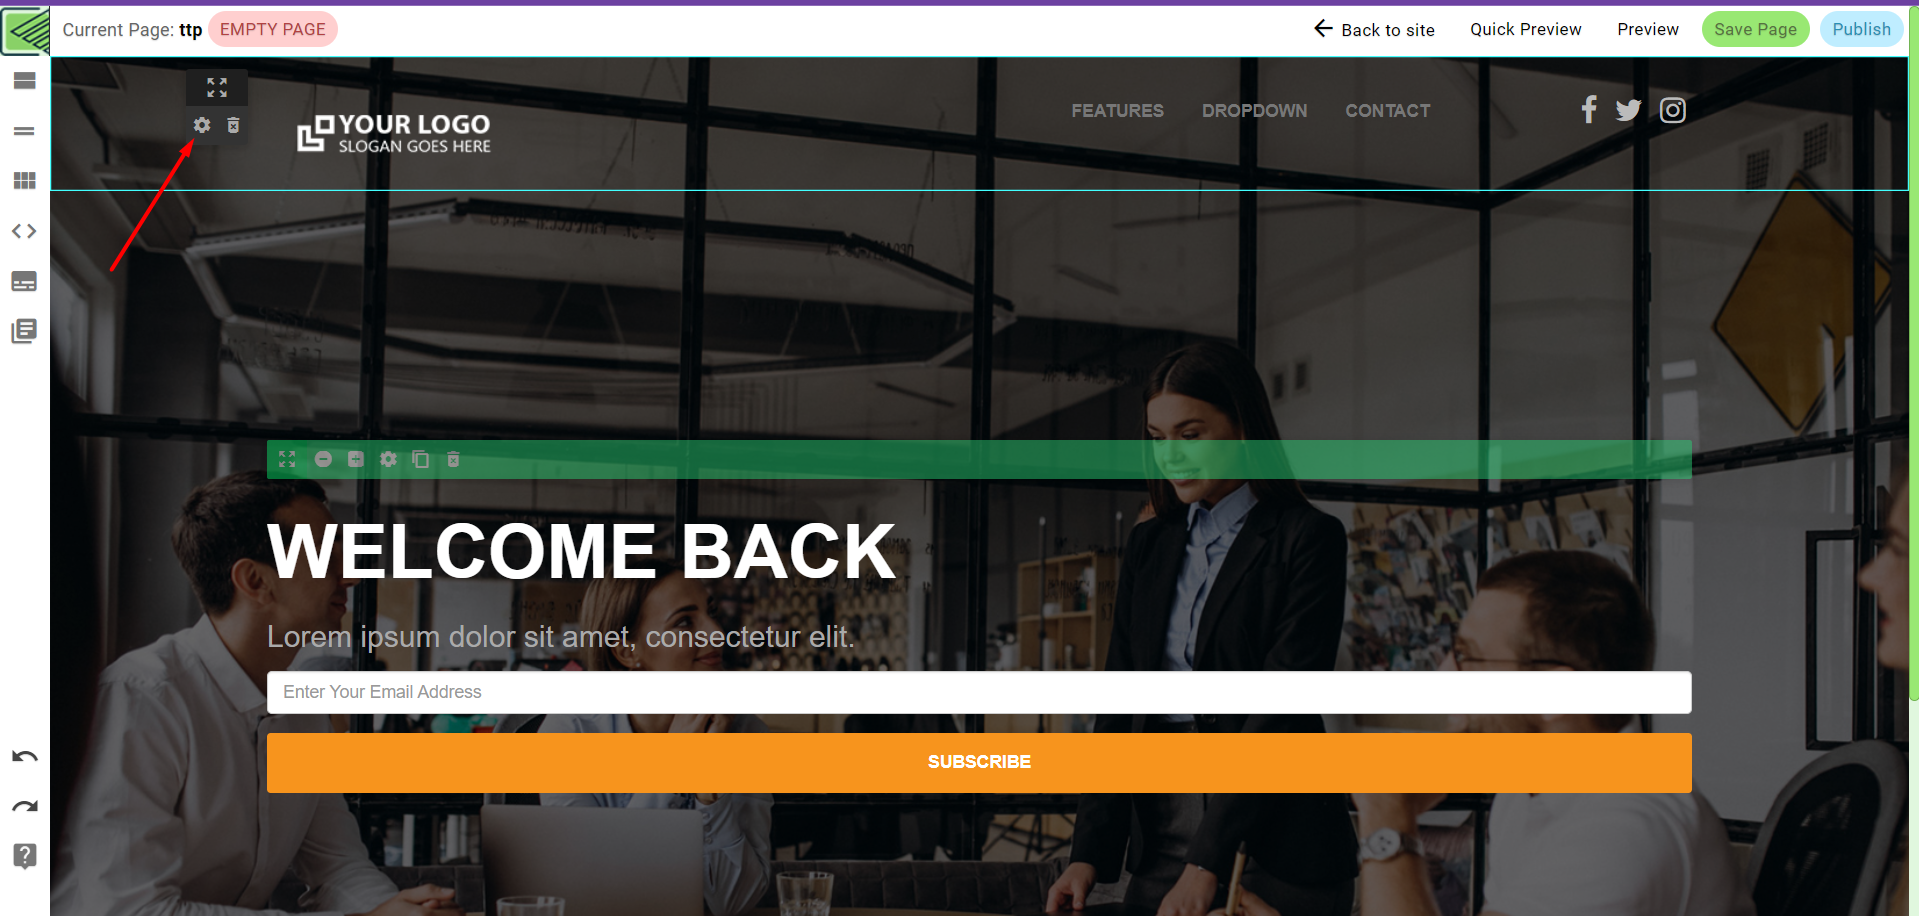
Now from the settings panel you can add, edit and reorder the links in the menu, you can also access header settings via the tabs Style and Advanced.
Add/Change a video
Learn how to add/change a video in templates:
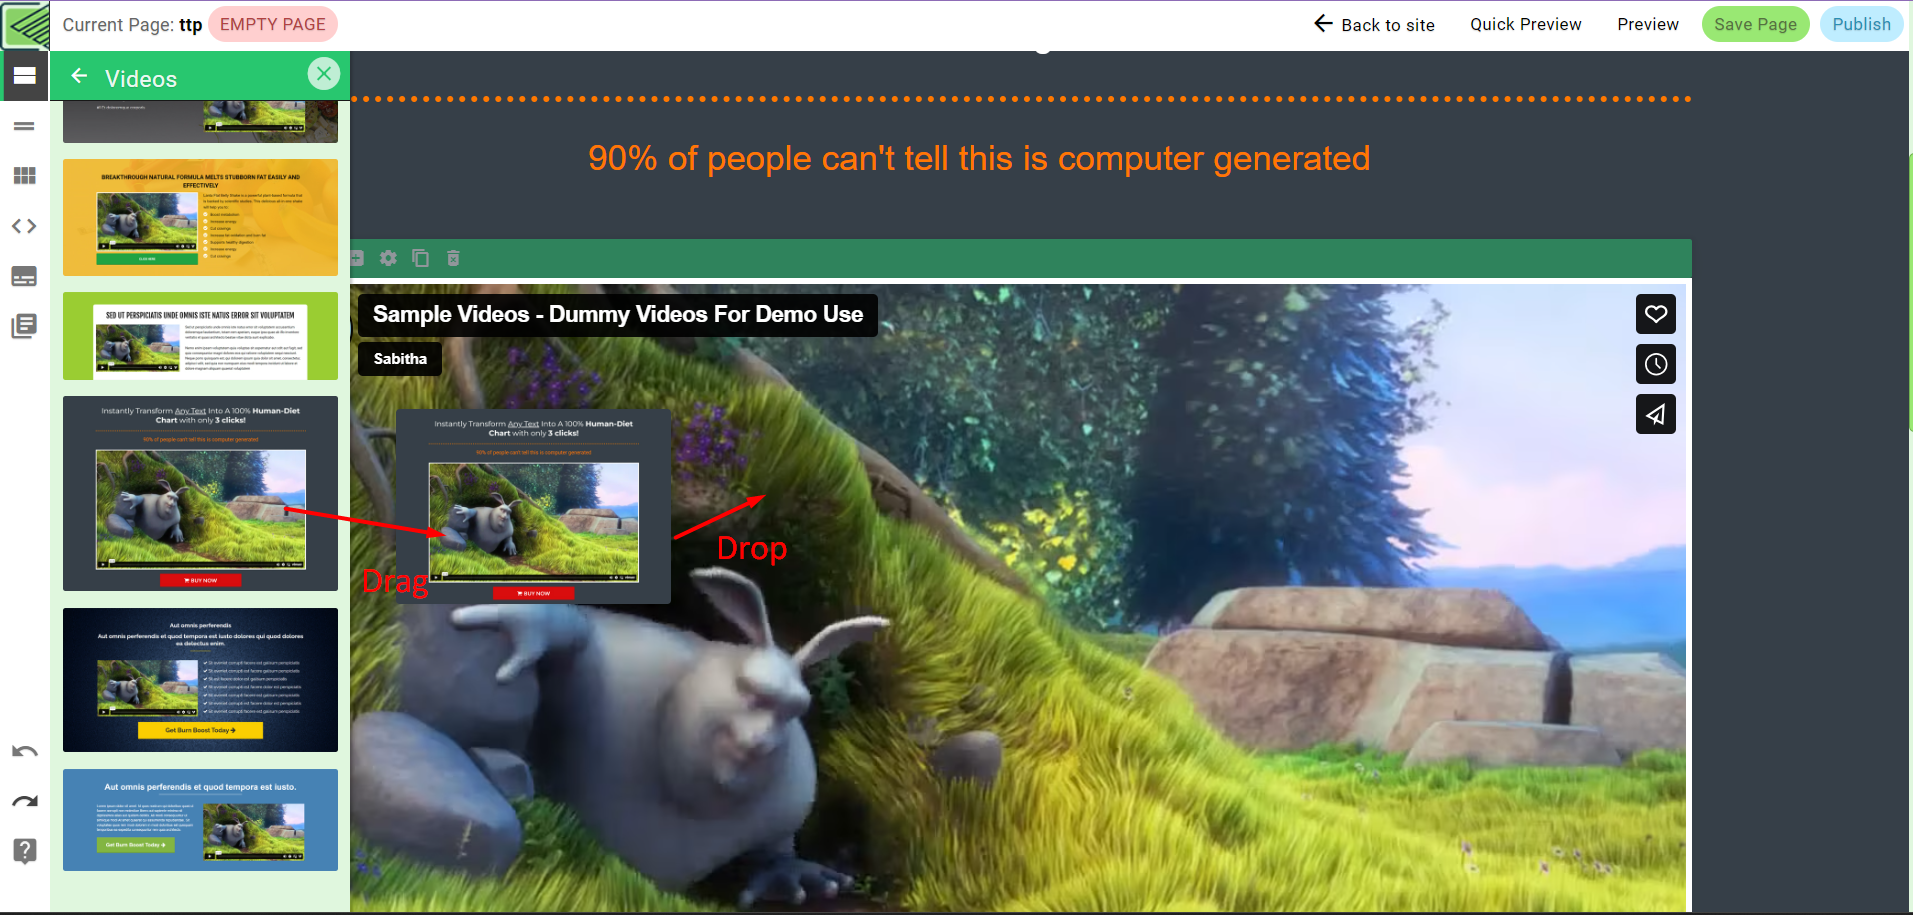
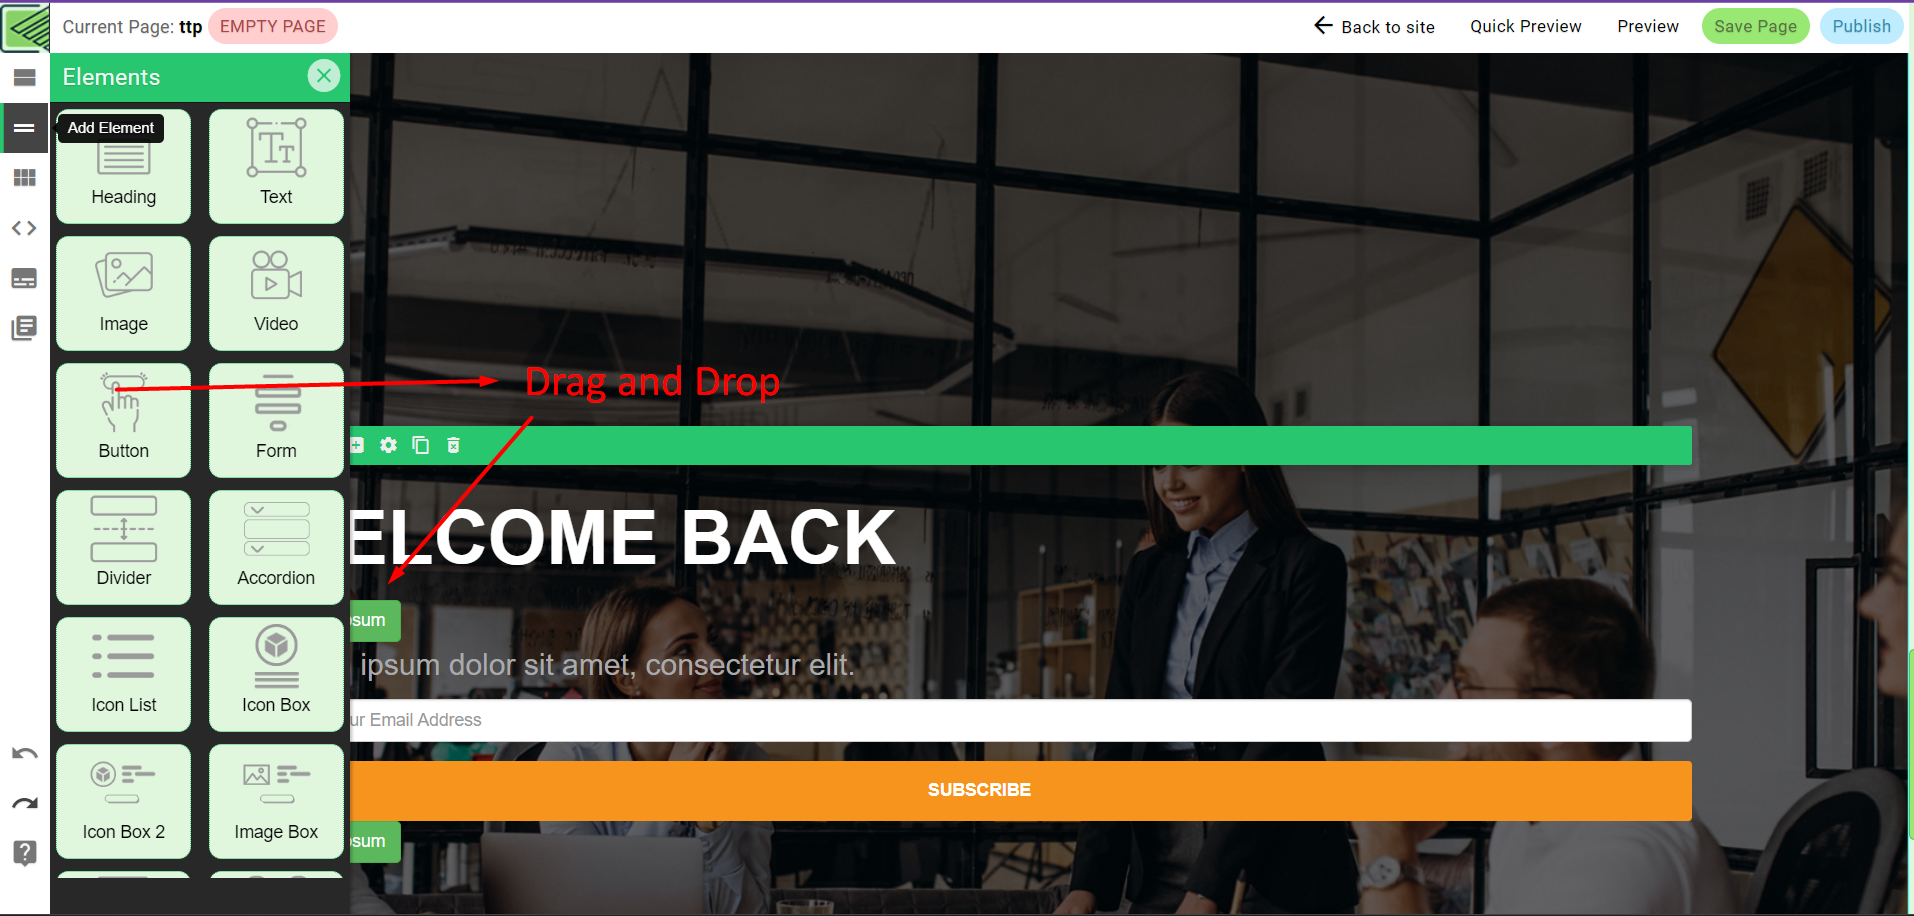
How to add a video inside the builder. Please see the below screenshot:
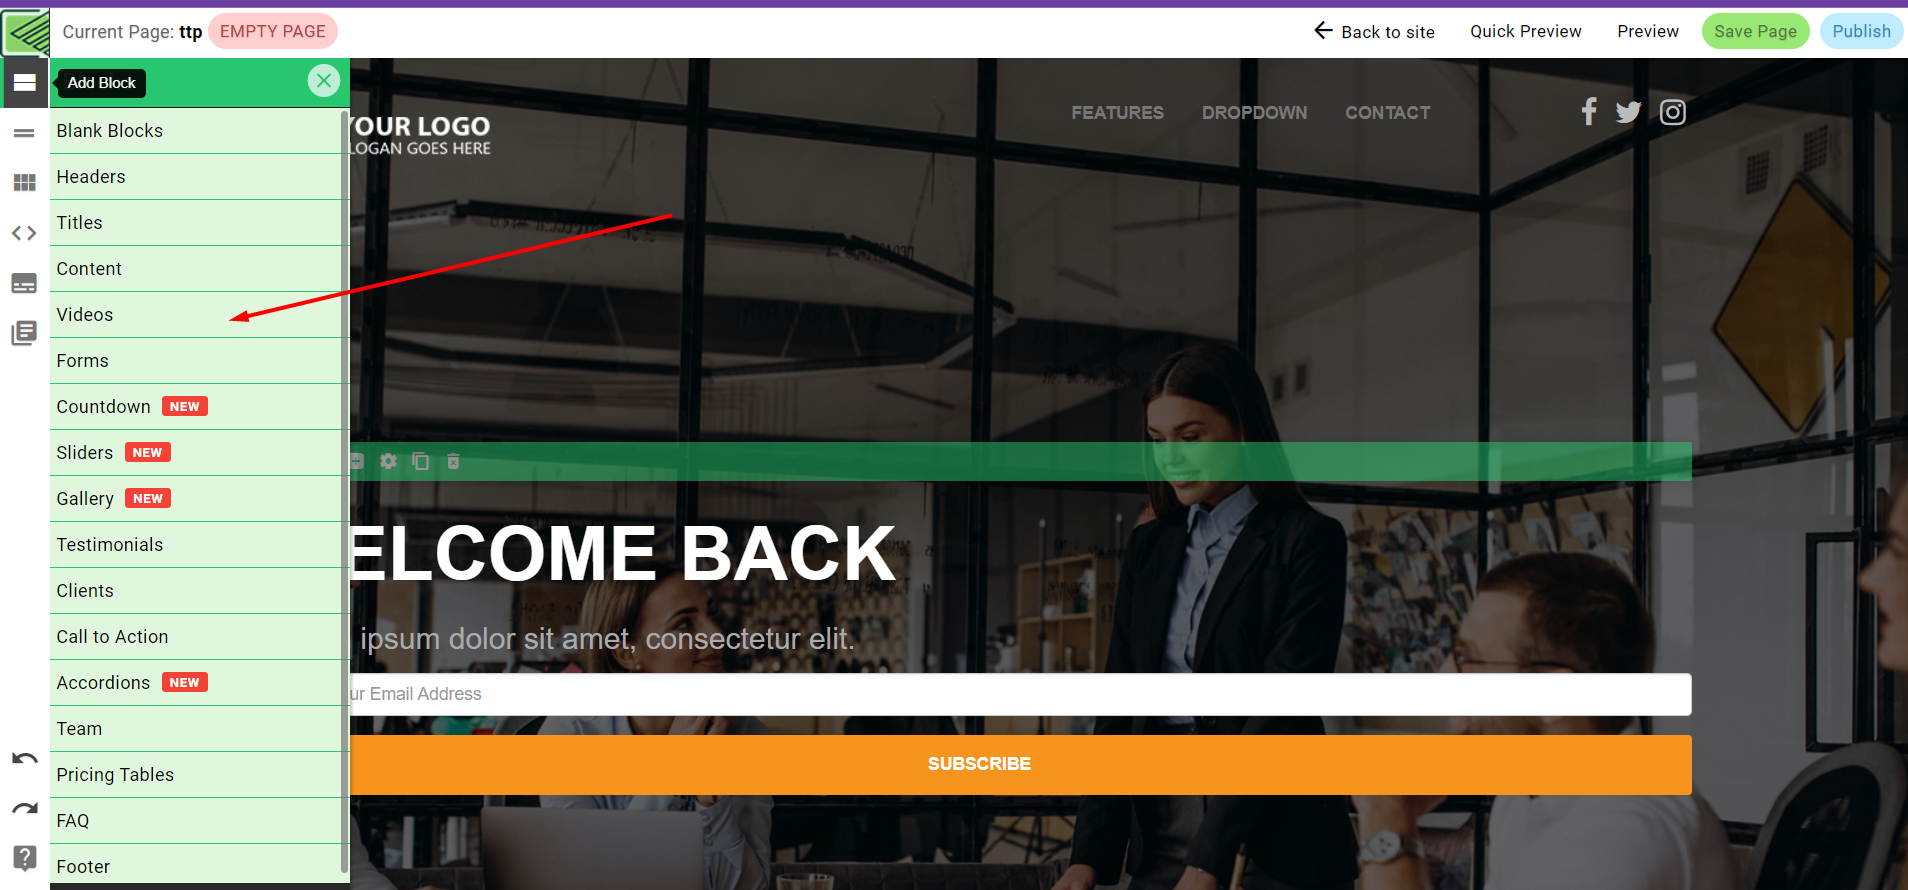
Drag and paste where you add a video in templates.
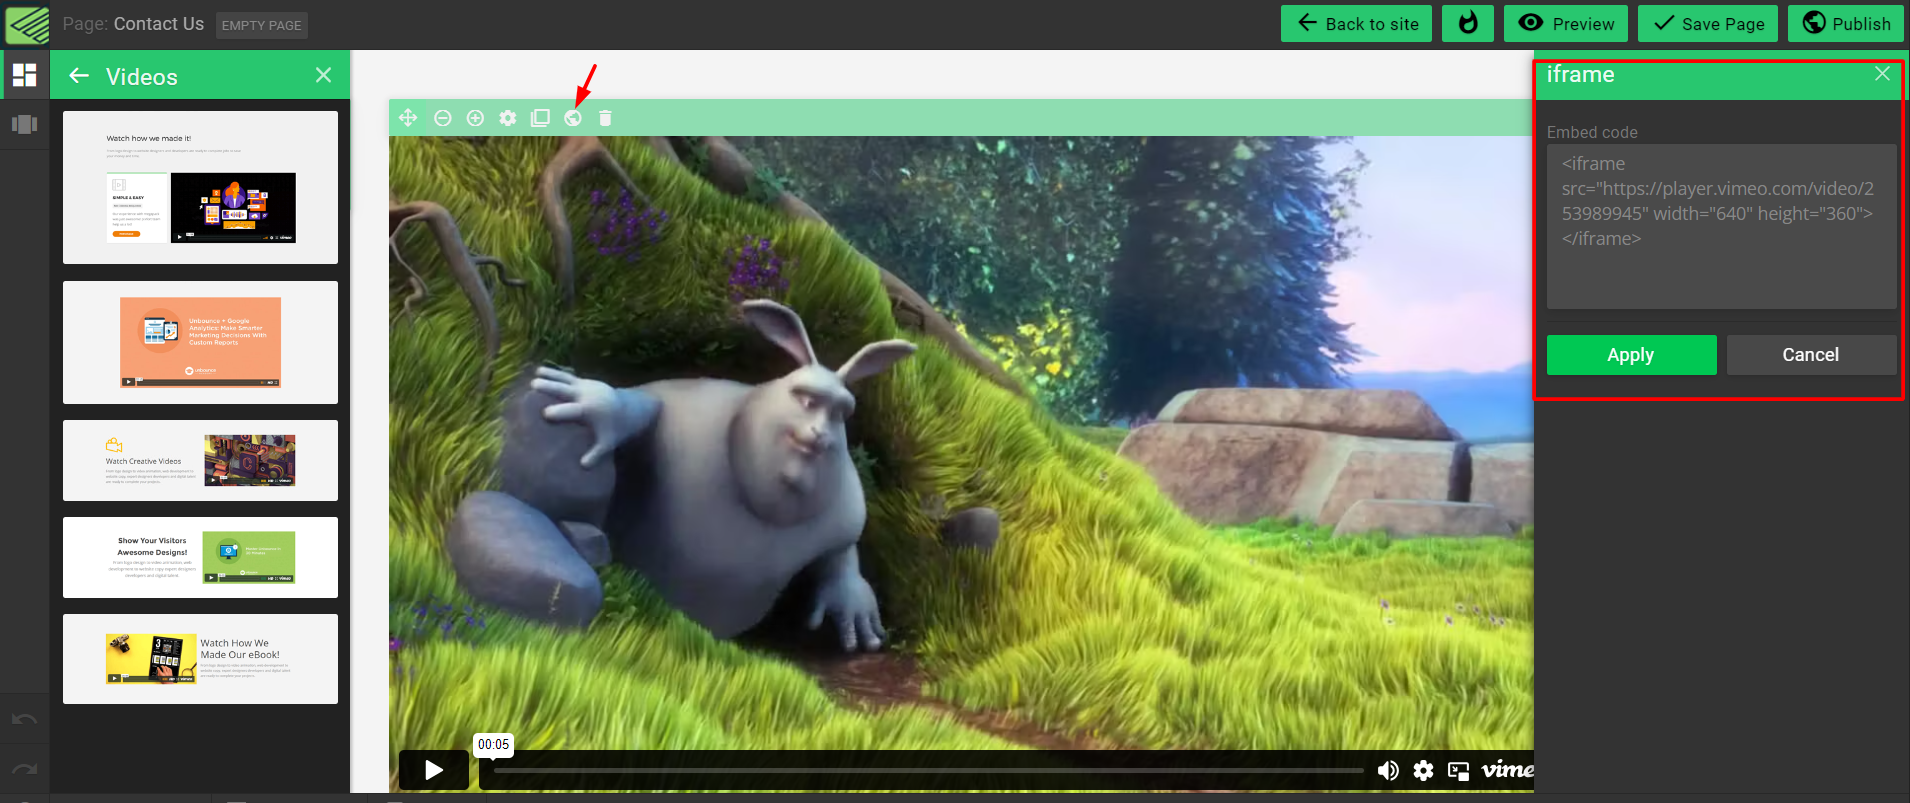
Learn how to change your video inside the builder:
To change a video just click on the globe icon in the blue bar then from the right sidebar you can change the embed code with your own one.
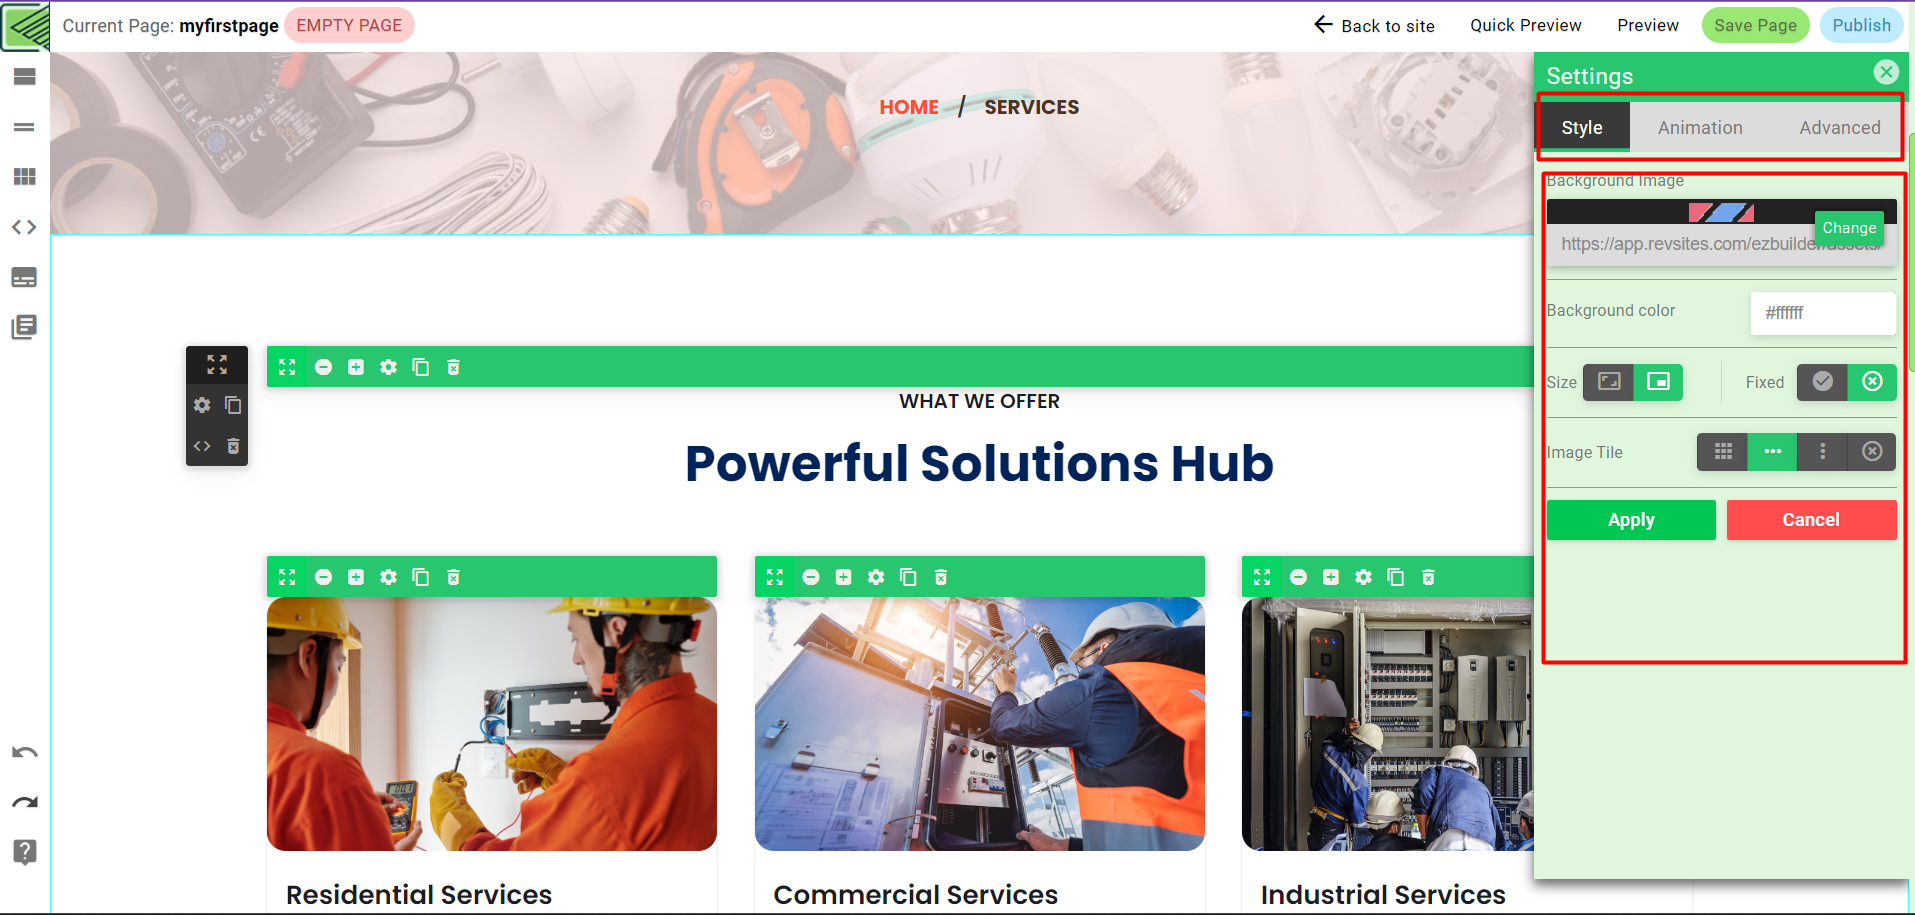
Change background image of sections
Learn how to change background image:
Pages in web builder are composed of sections, you can create any order you want with these sections, and each section has its own settings (background, padding…), you can access to it by clicking on the Settings icon in the dark box on the left of each section.
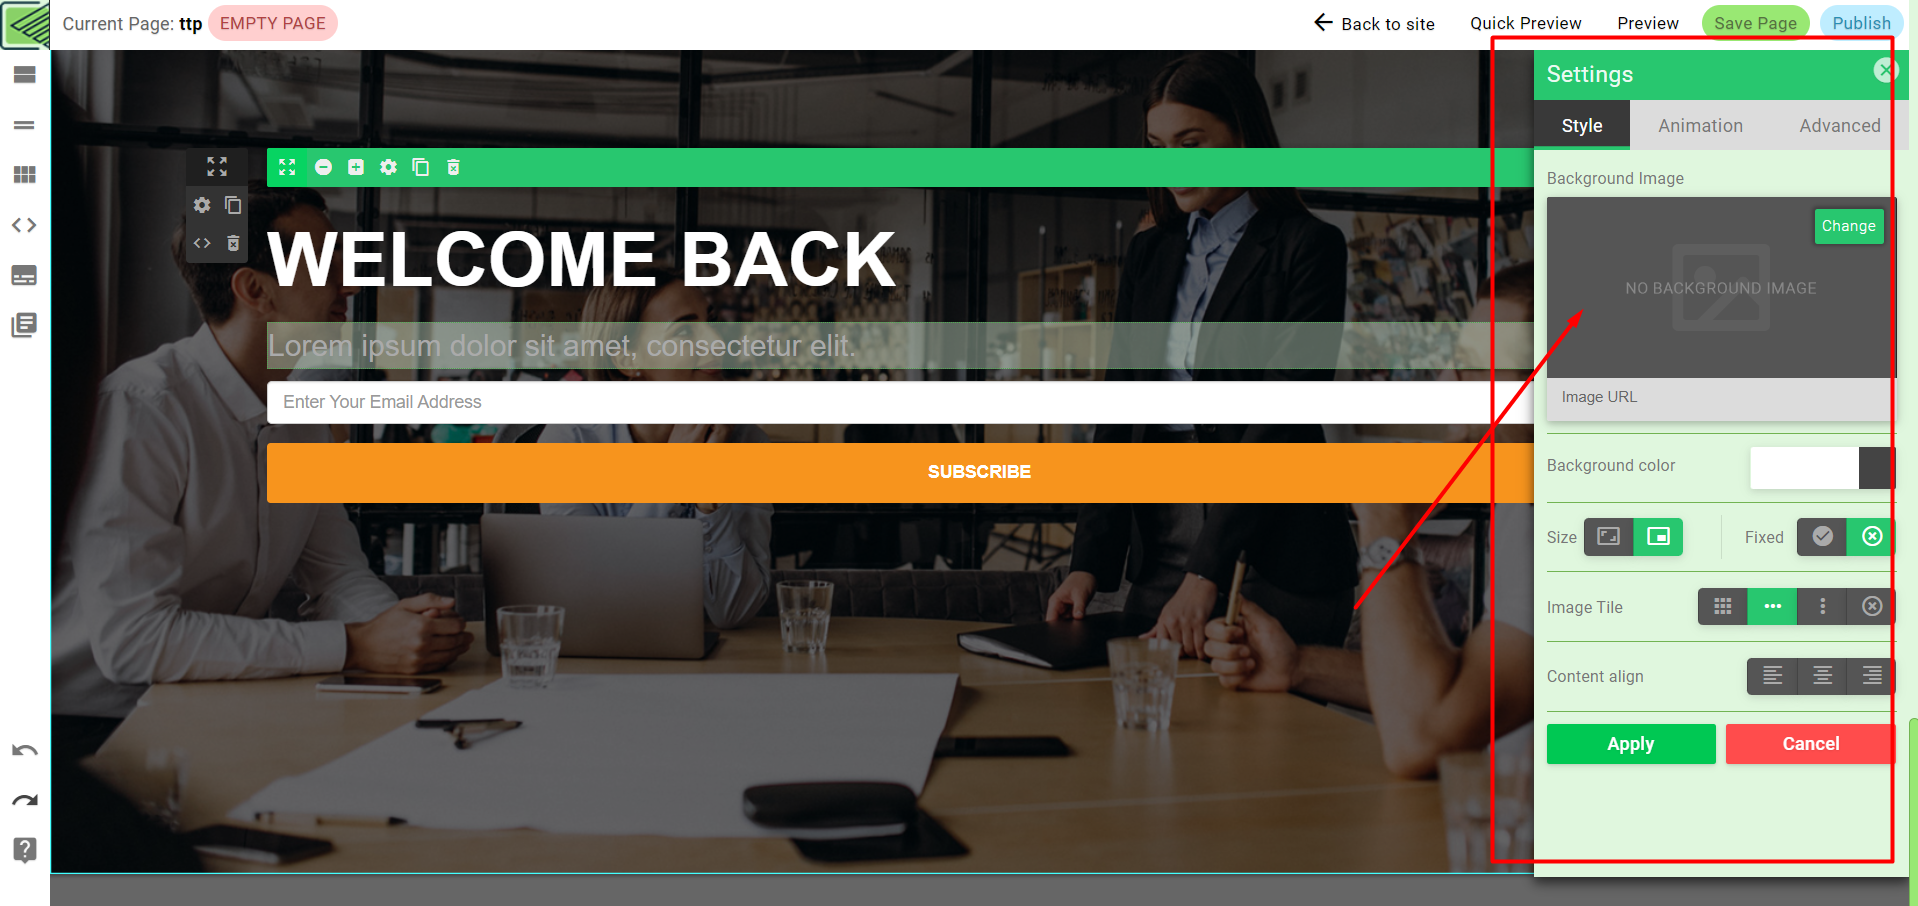
To change the background image click on “Change” button, then you can choose an image from the gallery or upload new one.
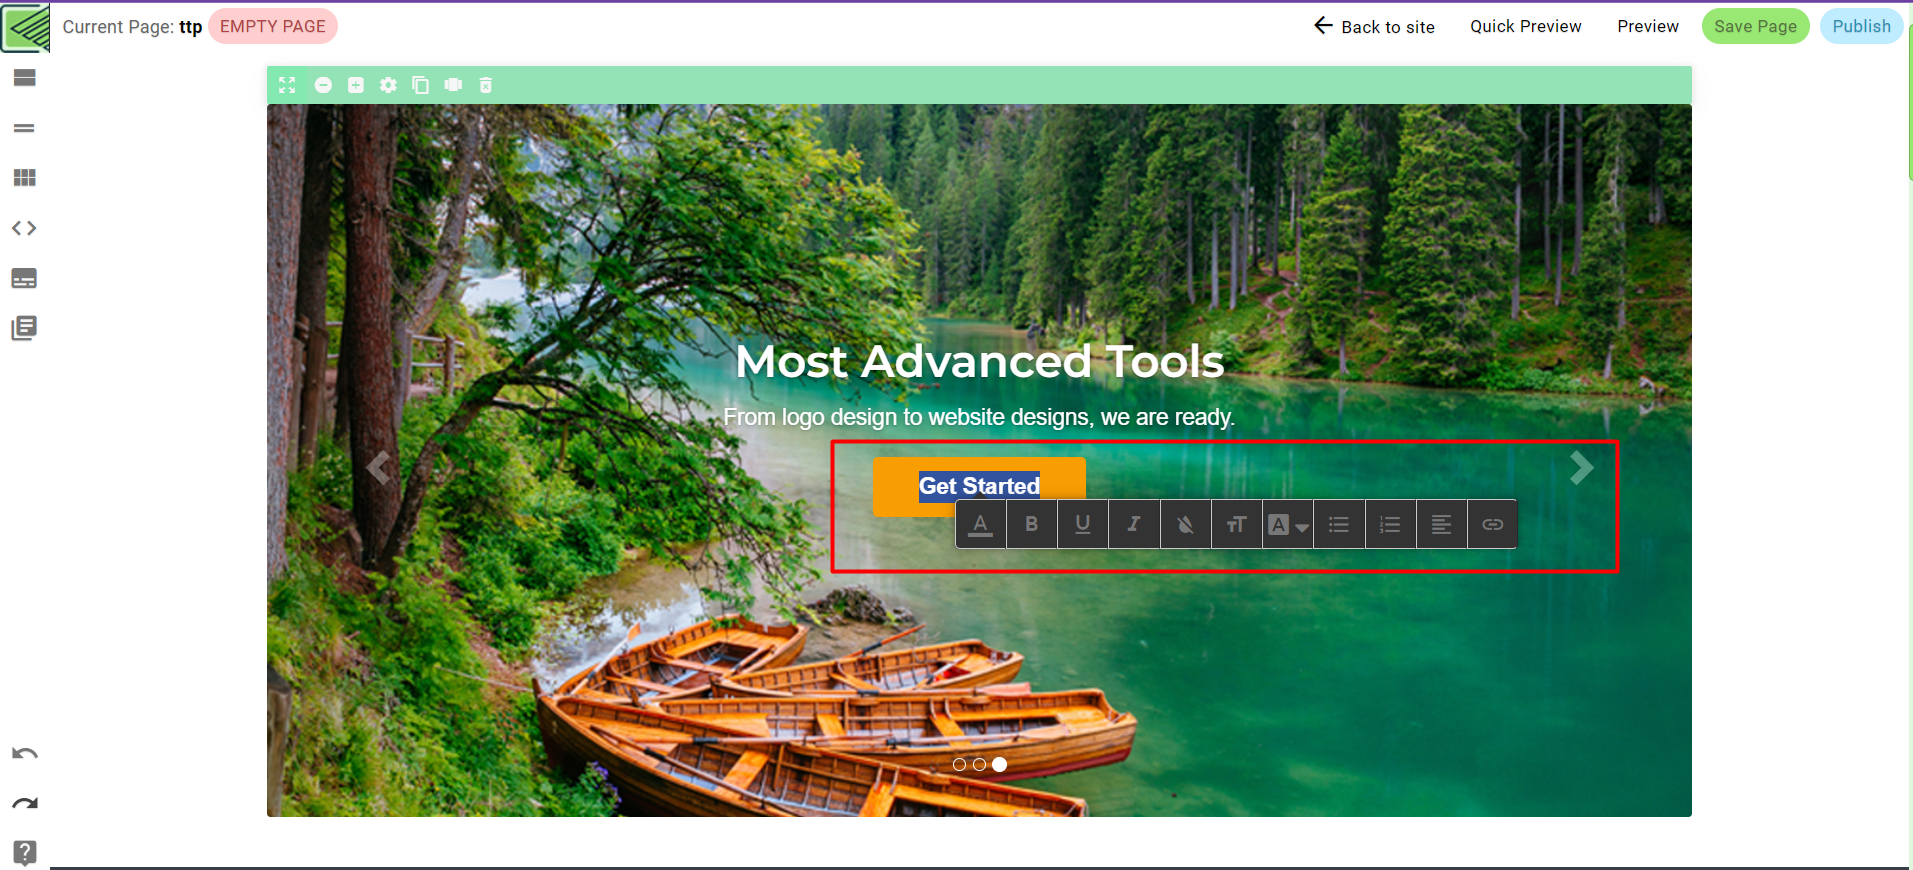
Button Customizer
Create custom buttons via button customizer tool:
To edit the text of the button
Just click on the button’s text and then you can edit it, for example:
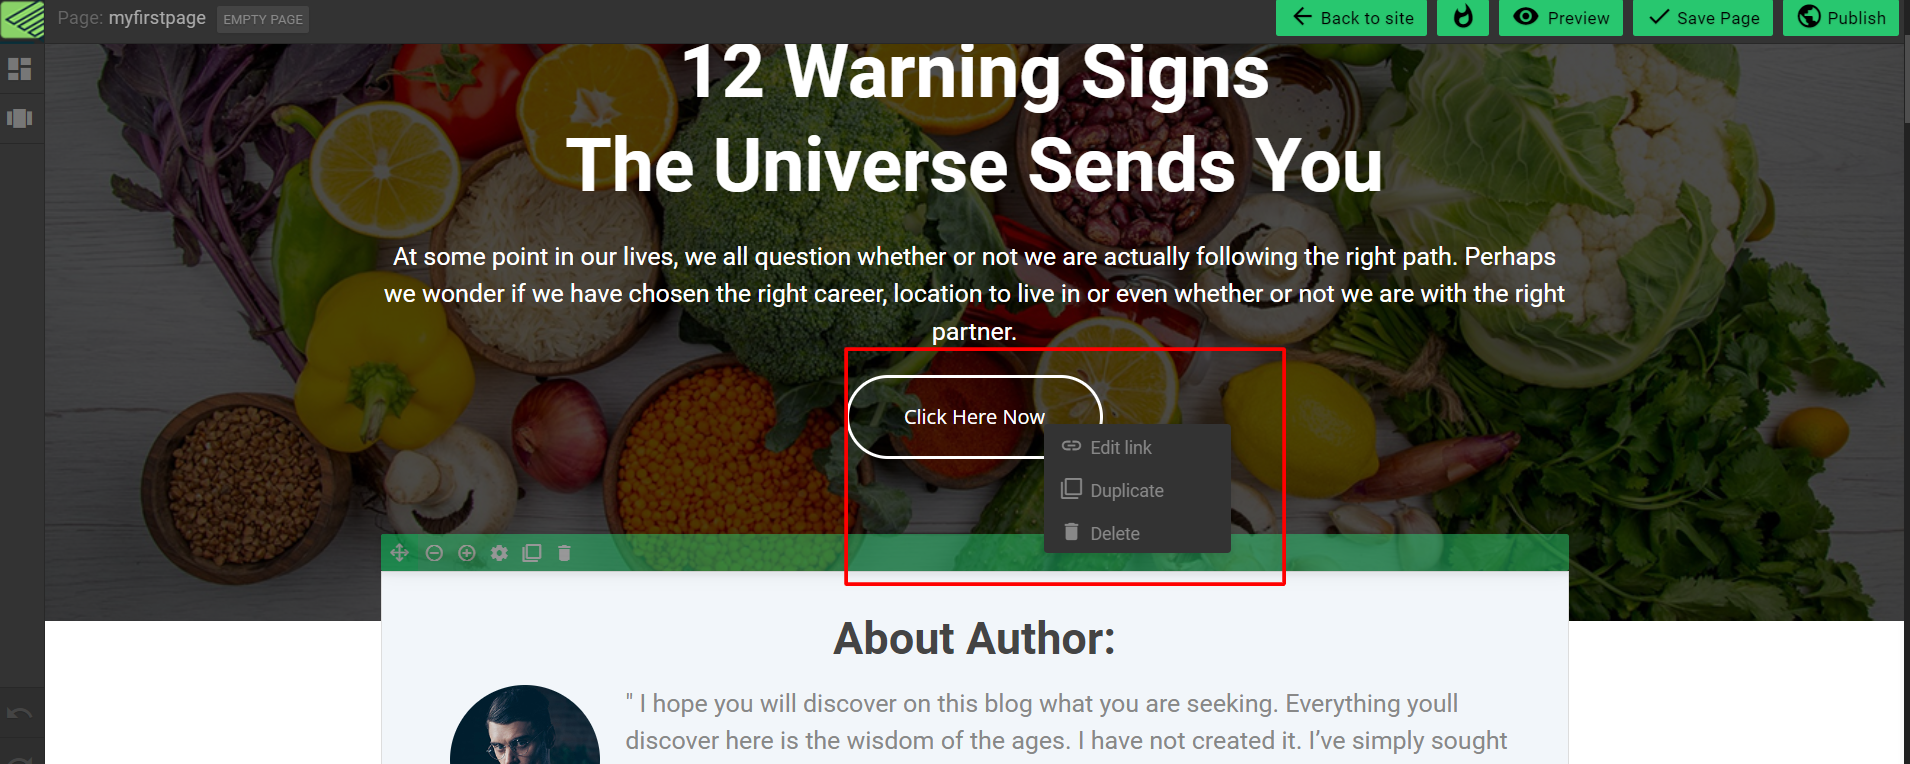
To edit the button link or style on your page:
Right-click on the button and choose the edit link.
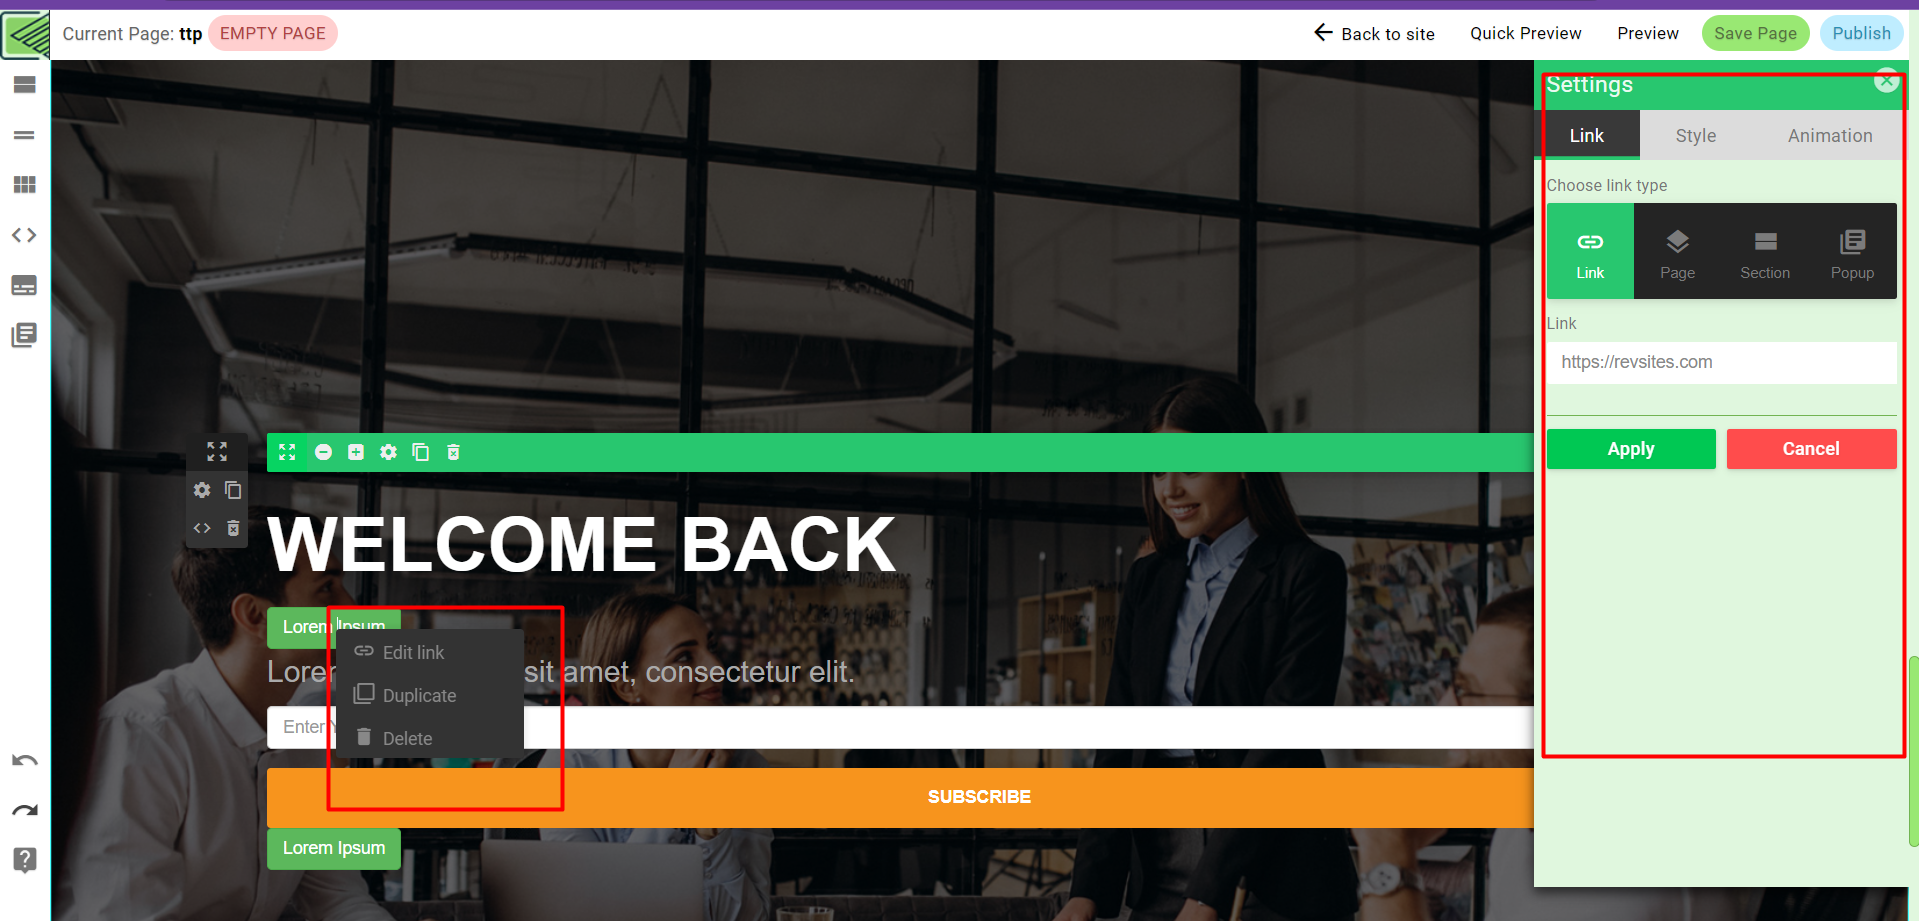
Then,
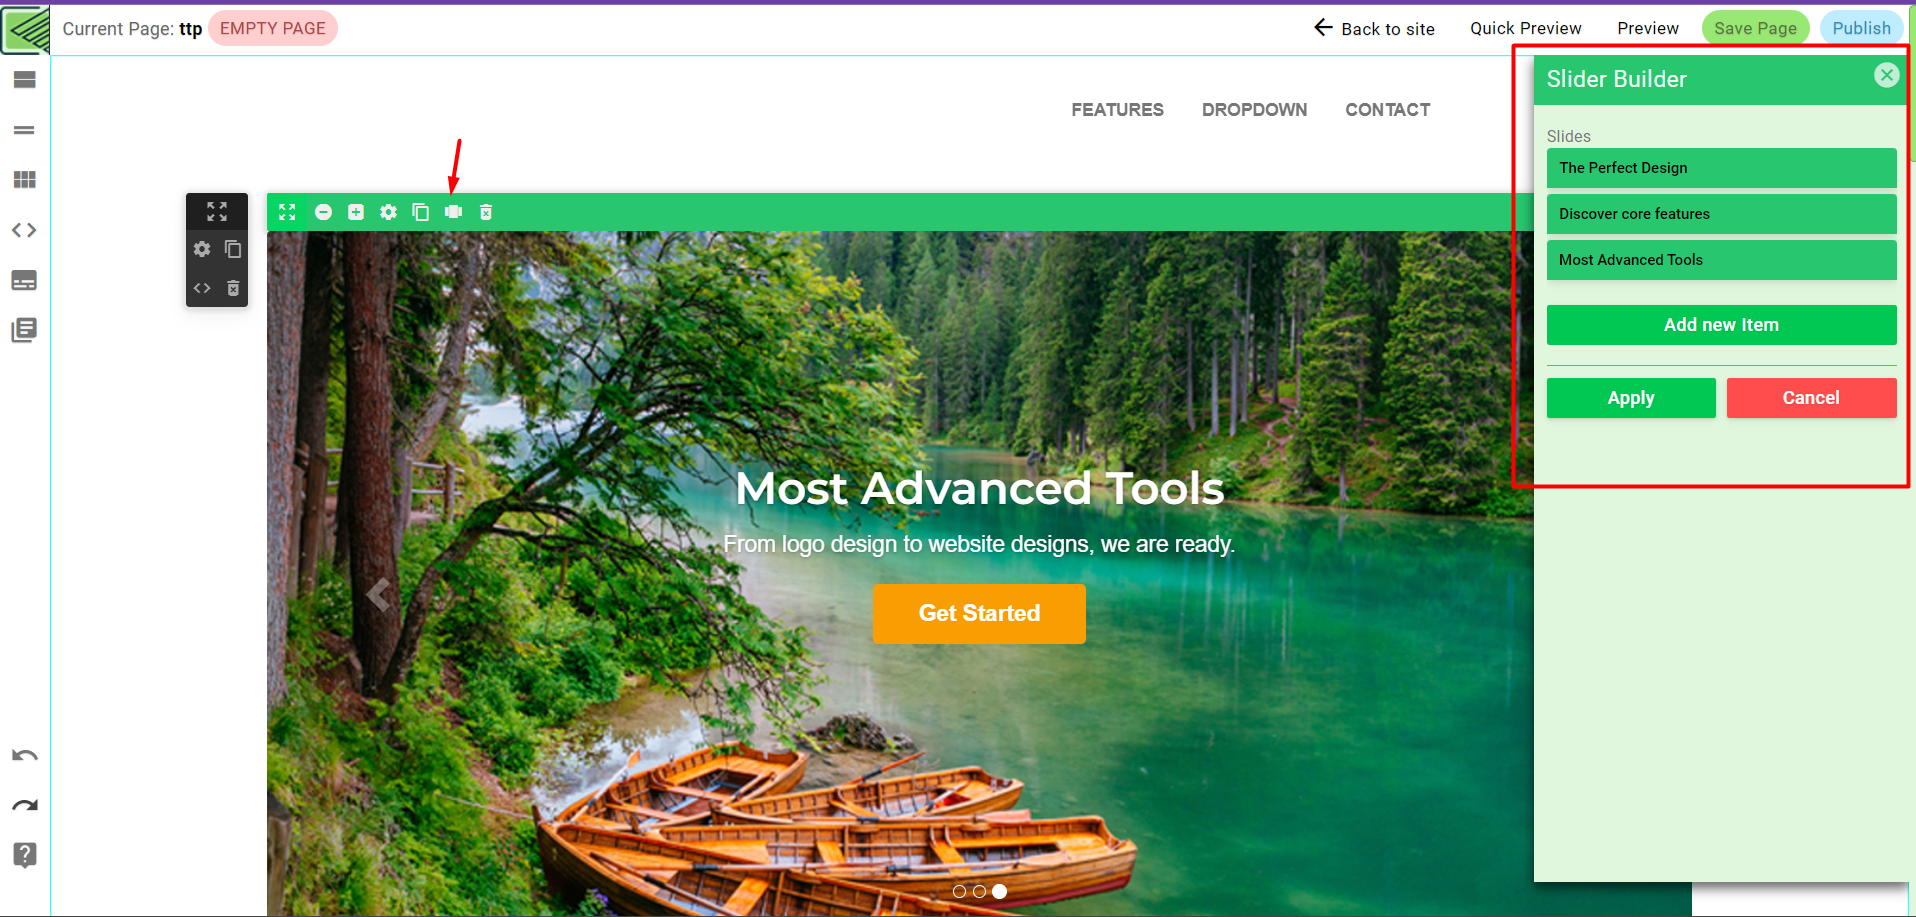
Edit Sliders
Create custom sliders using the Slider Builder:
To edit a slider, just open the Slider Settings where you can add or remove slides and edit the title and content for each slide, for example:
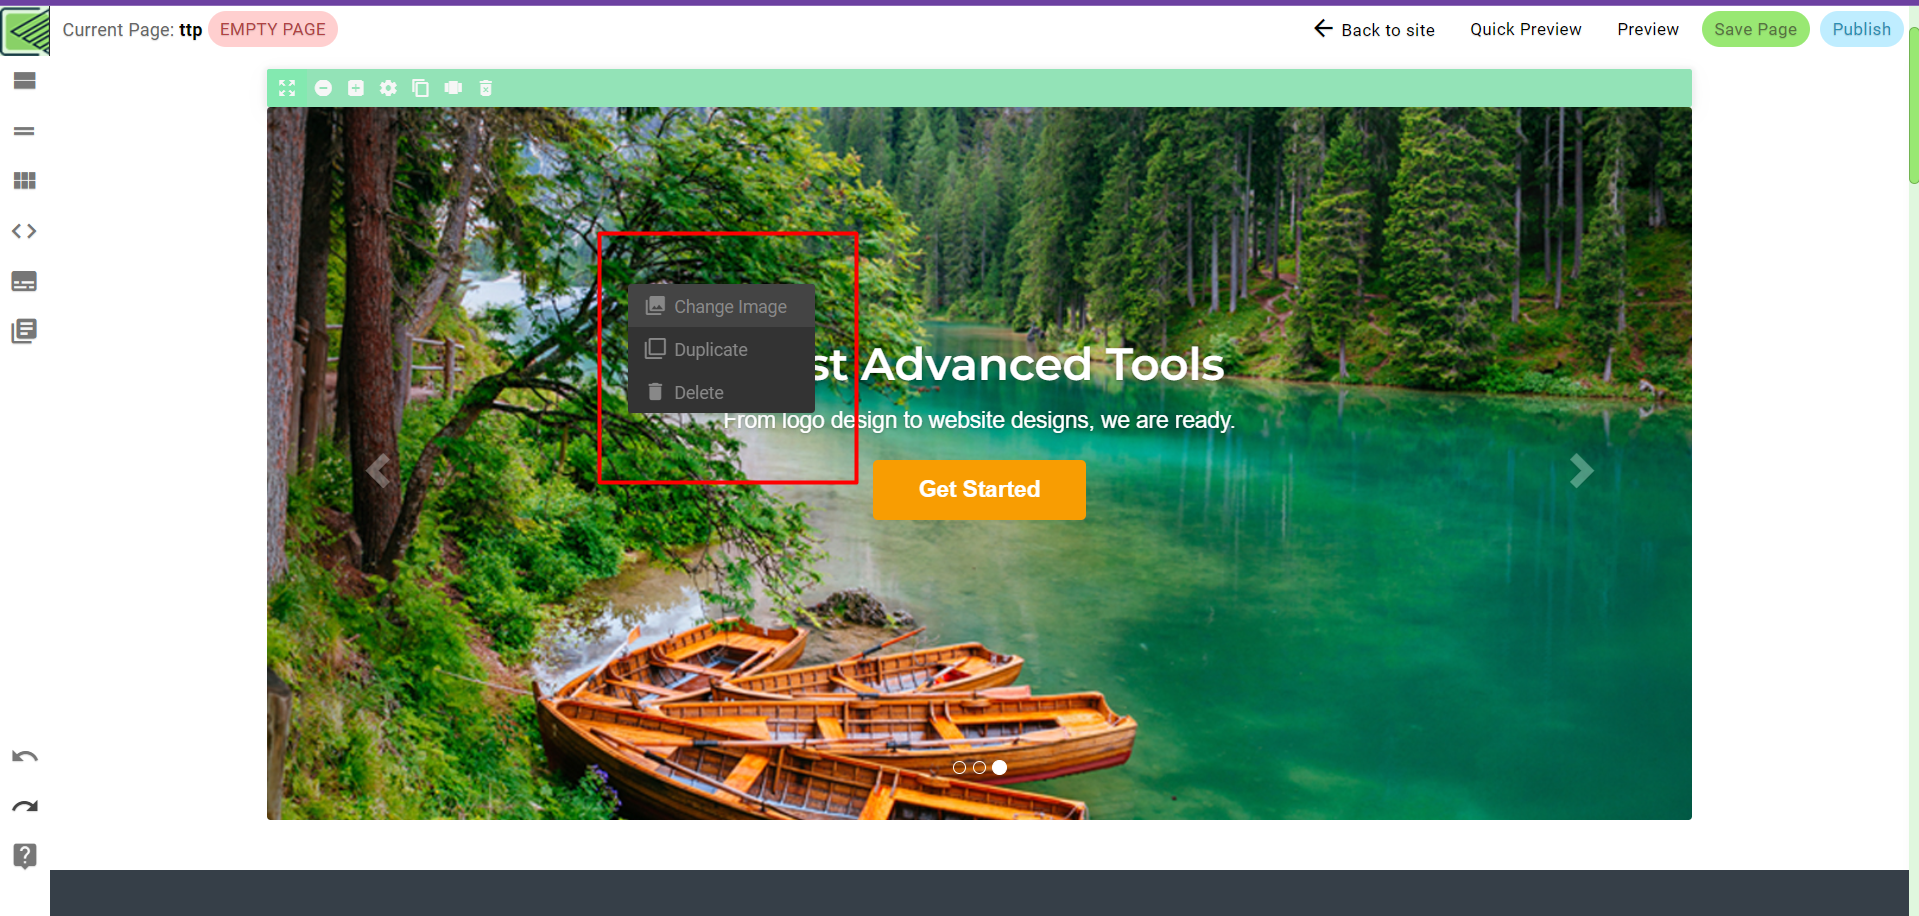
To edit the image of each slide, just Right-click on the slide image and select , for example:
Right-click on the button and choose the edit link.
Now from the Settings panel in the right sidebar, you can customize your button design as you want!
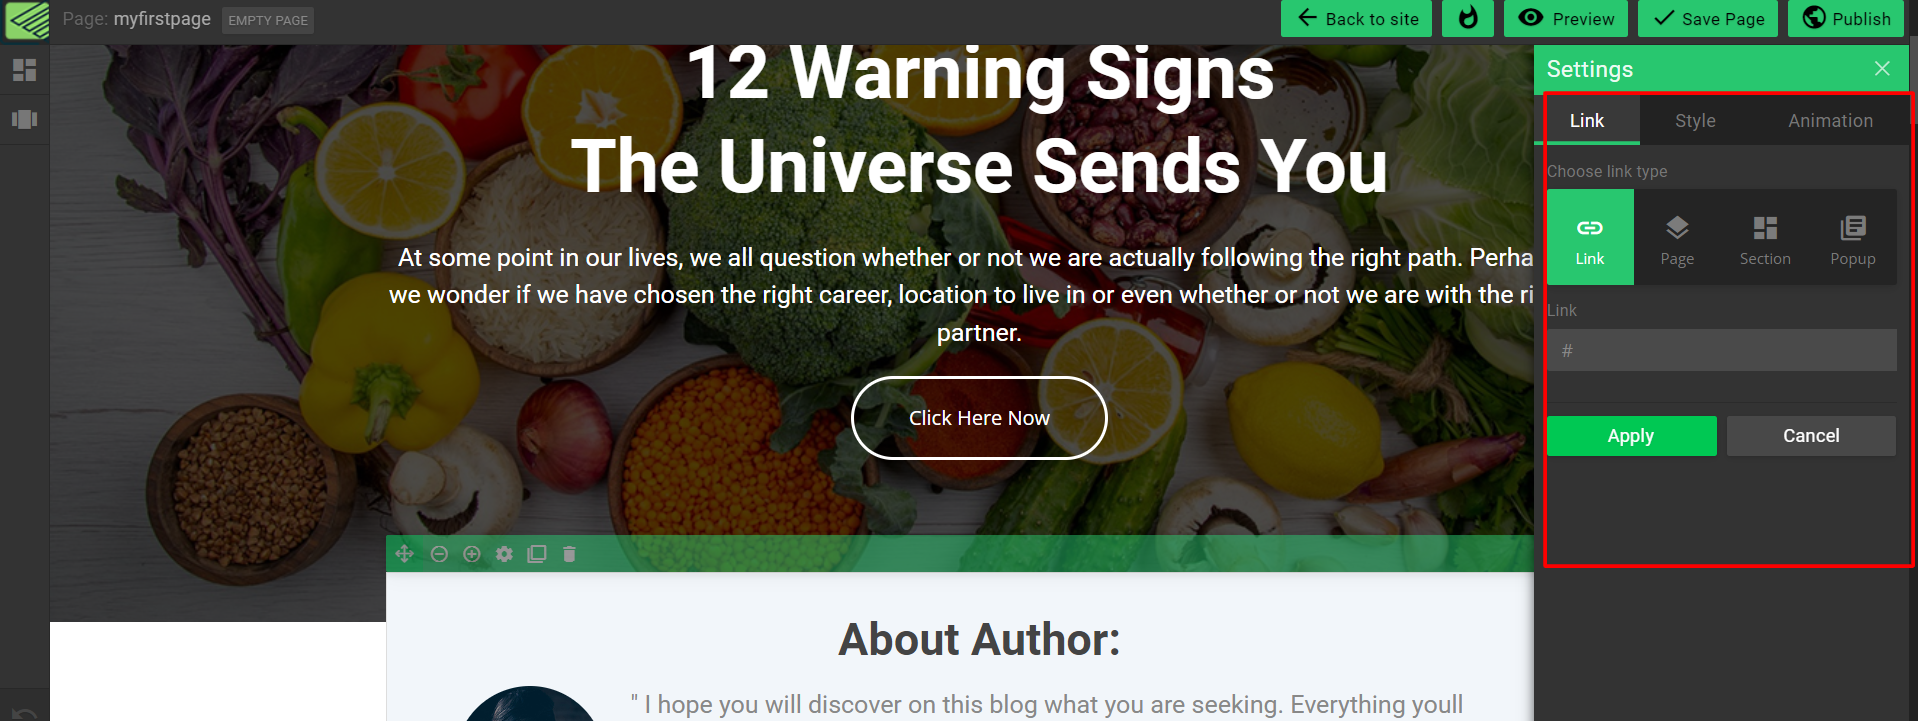
Changing links in your page
How to change links of buttons and social icons:
To add your page link to any button or social icon just right click on the link and choose “Edit link”.
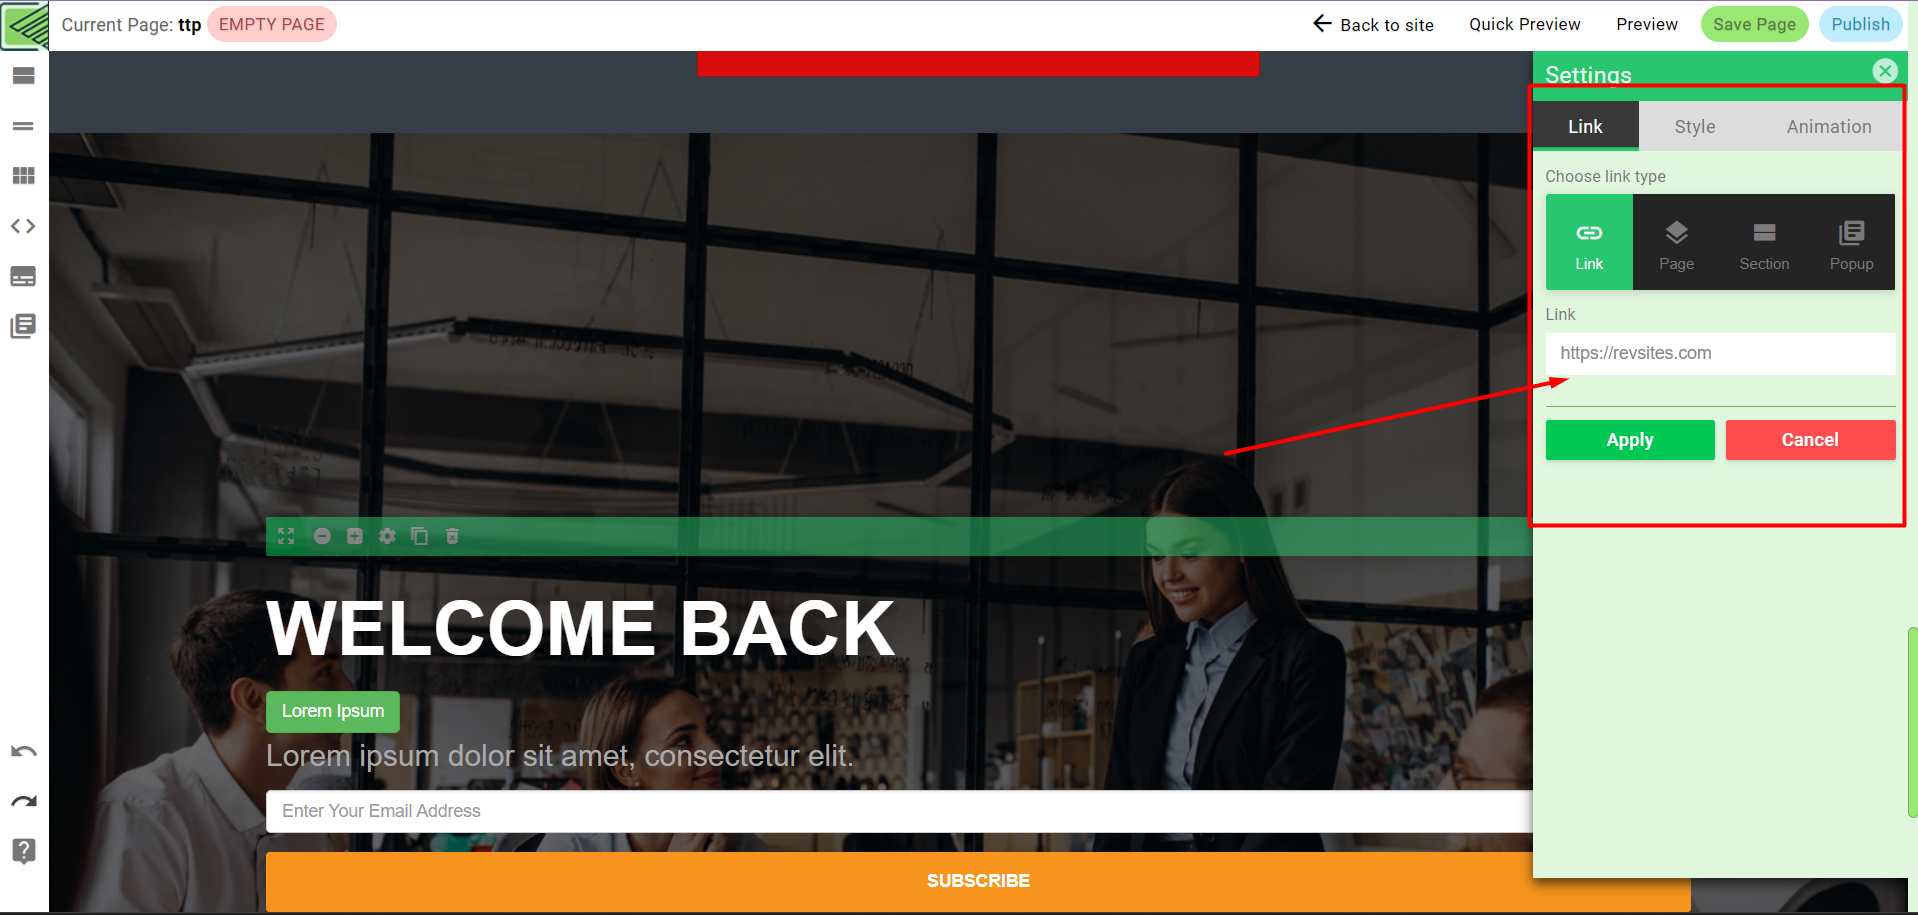
You can choose between multiple link types:
- Link: input your page URL in the “Link” field.
- Page: select a page in your project.
- Section: select a section in the current page.
- Popup: select a popup in your project.
Then click on the green button to apply the changes.
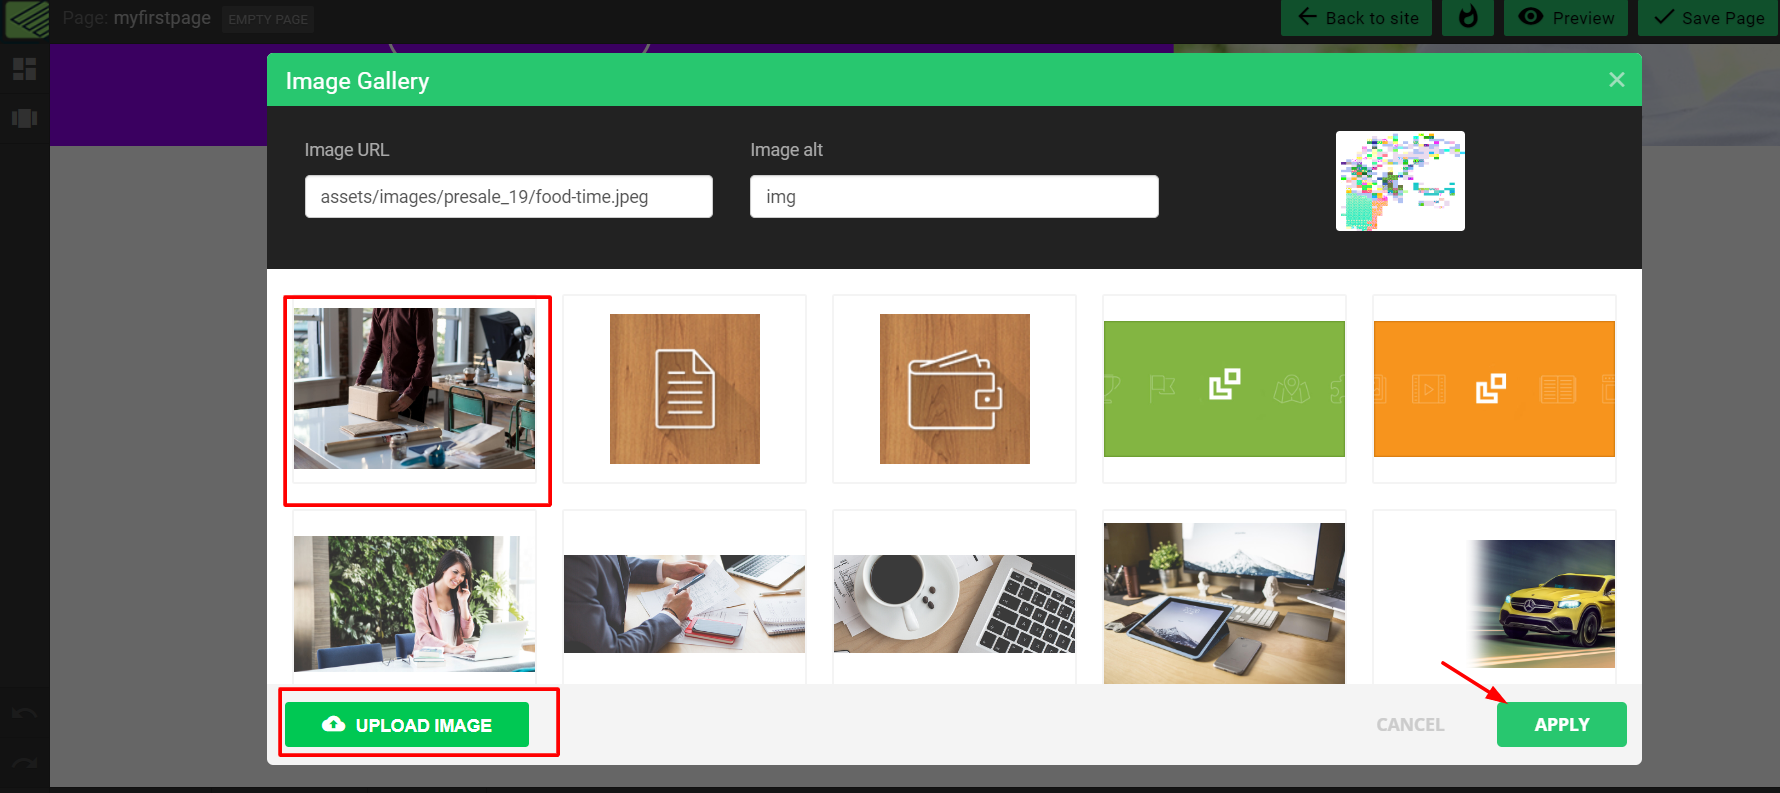
Change and upload images
Learn how to change and upload new images:
To change an image in your page you just need to Right-click on the image and choose Change Image.
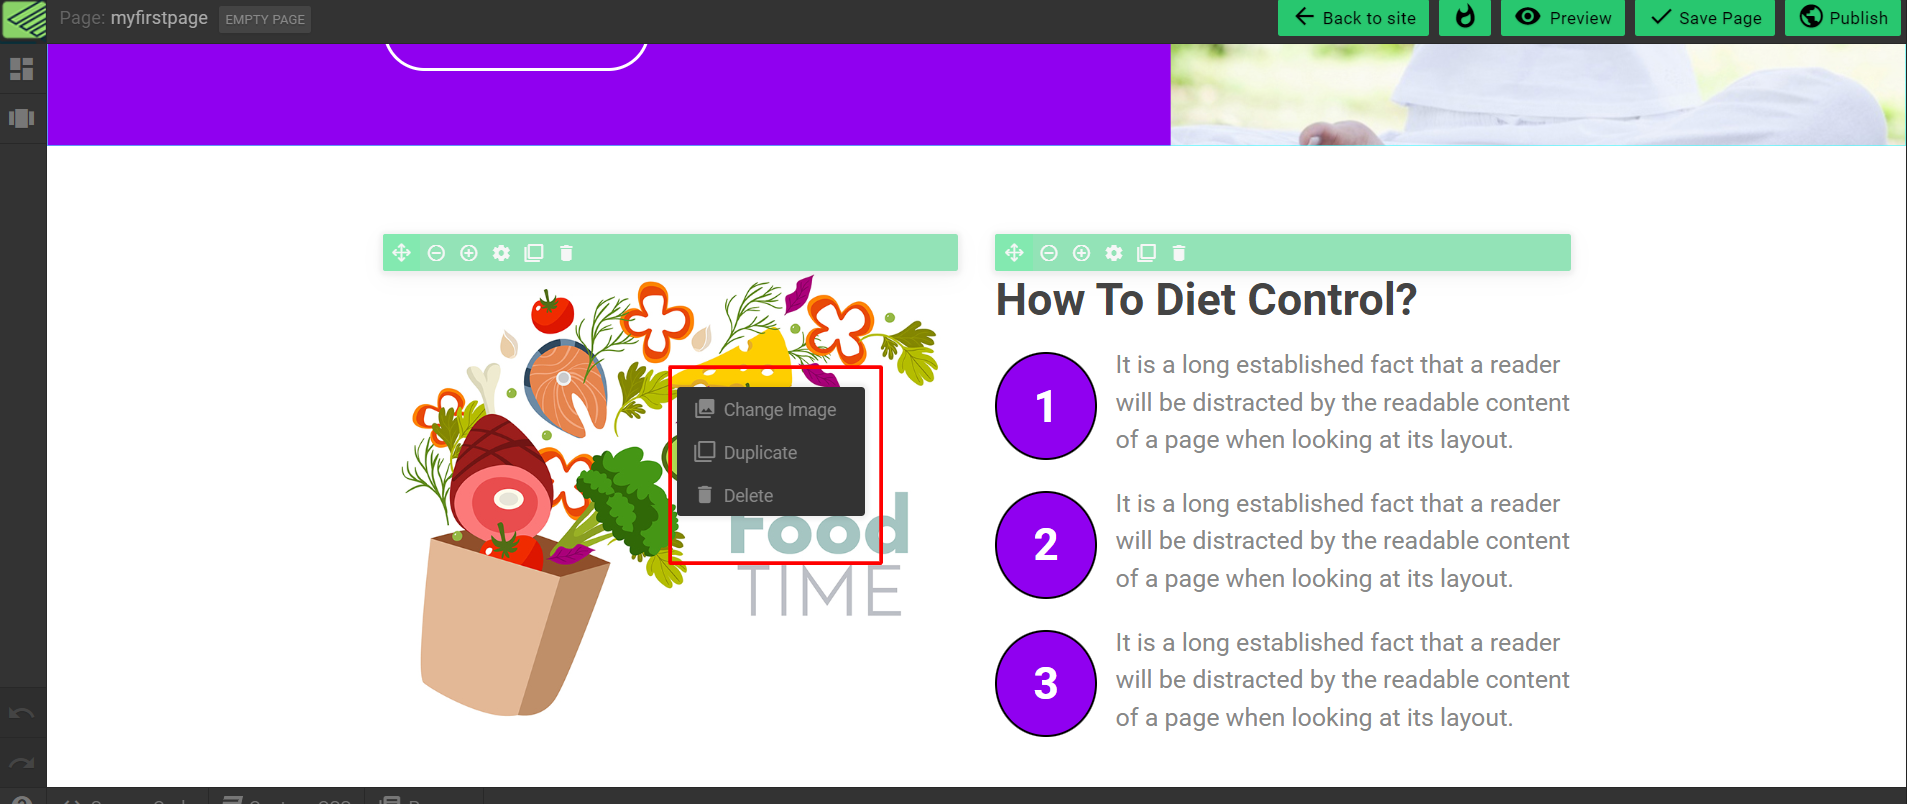
Then choose the Upload image tab to upload your own image.